Raised Gabion Garden Bed
Gabion Garden Wall
I worked on building this wall during Cody’s end stage cancer, which helped to give my mind something to focus on other than facing the inevitable loss.
It was challenging trying to figure out how to do this project. There was very little online information detailing how to build a small 2ft high gabion cage garden wall. So I will do my best to detail my findings, rational, and building processes.
My entire cost for the build came in under $175.00 with rock delivery. I am very happy with the end result which has received many compliments.
This gabion garden wall of mine is going to serve a dual purpose of being a;
1. Garden bed wall and a
2. Ground level permeable point for my roofs water run-off.
First familiarize yourself with the terminology and physiology of the Gabion cages CLICK HERE!
Next call your local gas and water companies to come and do a free service locate on your property so that you can prevent damaging any lines when digging.
Building basics
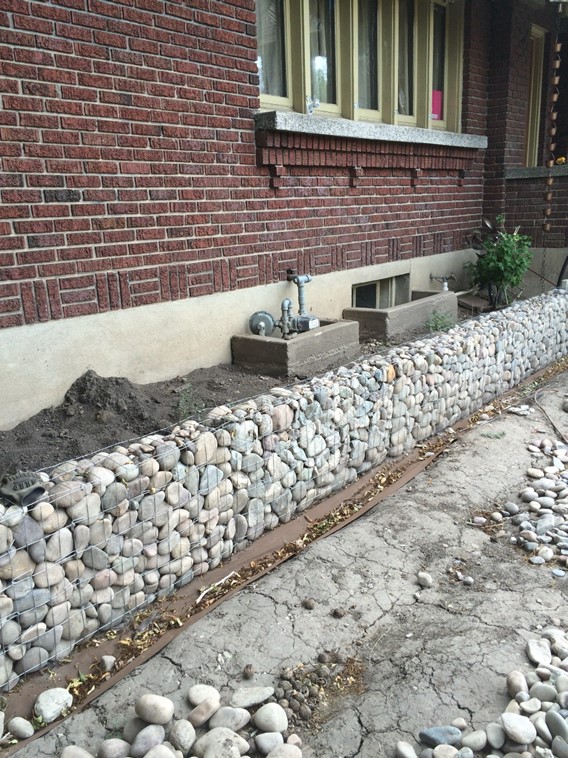
My Design Cages/Baskets
 I need to cover a length of 28 linear feet so I made my boxes to be (Y) x 2ft x 6in (Correction: 8″)
- Note: The (Y) is length of the boxes which ended up being 5ft in length with some room for customization.
One (1) basket will be 3.5ft x 2ft x 8in as my garden wall is in the shape of “L”.
For this project I built cages similar to building a gabion basket fence/cage.
Change in plans: My design changed slightly while making the baskets, for no particular reason. So my baskets actually ended up being 22in H x 5ft L x 8in W.
Tip:
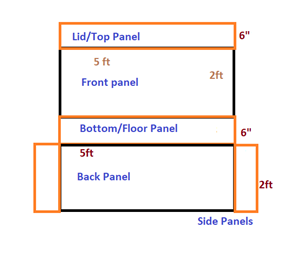
If you stick with the 6 in width for your basket then you can buy readymade 6 inch steel stiffening rods/cross wire and prevent having to make the cross wire by hand.
Supplies
- Hog Rings
- Hog Ring Pliers
 Landscape weed block
- Rebar
- Wire Cutters
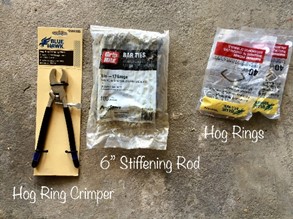
- 12/14/or 16g mesh wire fencing 2×4″ rectangle mesh openings
- Spool of 12/14/ or 16 gauge wire (will be use to make stiffening rod aka brace wire, cross wires)
- ¾ minus aggregate
- Quickcrete post hole no mix cement
- Rock fill for the baskets
- Large Shovel (Spade shovel)
- Small hand shovel (For moving the rock into the baskets)
- Permanent marker
- Measuring Tape
- 4-5ft scrap piece of 2×4
- String
- 5 gallon bucket (Optional for moving rock)
Gabion Garden Wall Foundation
For a small 2ft garden bed with no intentions of building a retaining wall or building upward I decided to utilize internal support posts and a 5-10 degree slope for my foundation. I am using these methods since this garden bed will have to endure a lot of rain run-off from our roof and the freezing and melting effect that lead to the demise of the previous garden bed wall. Our goal is to have this gabion basket be a permeable solution for a long lasting garden bed that sits within 3 inches of our drip line.
Important:
Please keep in mind that this method will most likely not work for modern built homes that have a 2ft eave overhang. Please see my post on gutter less roof.
Slope
I used the 5-10 degree slope and fine aggregate bed in addition to internal supporting posts.
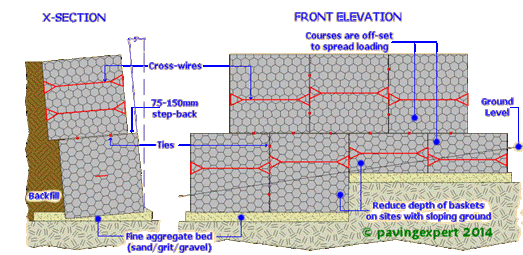
(McCormack, T., n.d. Image)
The image I have here shows two different foundational support options for a large scale retaining build.
Support Posts
I have also used internal securing posts (rebar) to attach the gabion baskets to and prevent movement or shifting of the cage. We get a lot of snow melt and refreezing which causes excesses damage and soil shifting.
Gabion support posts are typically used in building slim gabion caged fences so I have decided to use them for added security in my slim garden wall instead of using a soil anchor aka dead man style anchor.
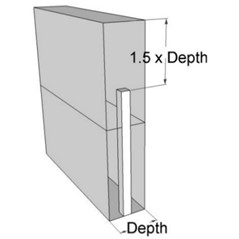
Gabion support posts (rebar) must extend to at least 1.5 x Depth from the top of the gabion basket. Gabion support posts need to be strong enough that they do not snap or bend under the load of the gabion wall. Gabion cages are tied to the support posts with brace wire/stiffening rods (Gabion wall stability guidelines, n.d.)
Surface prep
- Using two pieces of rebar at the center area of either end of your desired location then attach the string to each piece of rebar.
- I dug a 3-5in deep trench 12 inches wide
- I laid out the landscape material underneath where the baskets would be placed with 2ft attached to the back side of the baskets
- The rebar will sit evenly spaced against the plumb line, as it will later be attaching to your gabion boxes.
Post holes
Video guide to post hole digging and setting
QUICKCRETE INSTRUCTIONS:
Dig post hole diameter 3 times the width of the post (i.e., the hole for a 4″ wood post should be about 12 inches wide). The depth of the hole should be 1/3-1/2 the post height above ground (i.e., a 6-foot tall fence would require a hole depth of at least 2 feet).
- Use a your shovel or post hole digger to dig your holes
- (2) rebar post inside of each cage.
- dig 1ft down and install 3inches of aggregate at the base of the hole
Note: Post hole filling is easily accomplished by buying the non-mixing cement formula, dumping it into the hole, and then adding water to the hole with your garden hose.
I did not have to use this method for my own build because we had a pre-existing cement slab from the demolition of the old garden bed. We were able to tie our rebar pieces into the cement slab.
Building Gabion Cages
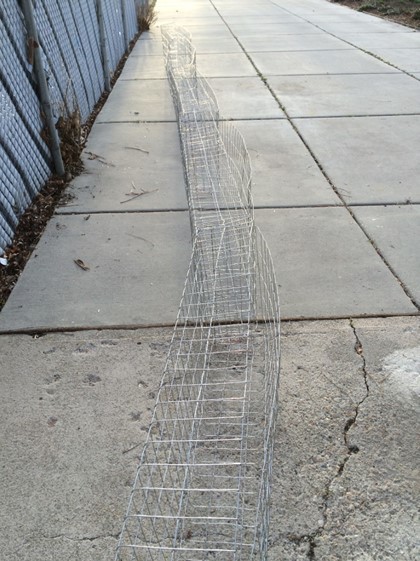
Eric and I worked on this together and it went a lot faster than either of us expected. We started by unrolling our 5 x 50ft 14g all-purpose welded wire material.
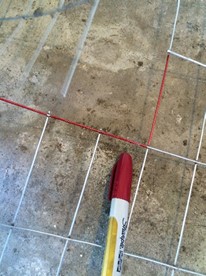
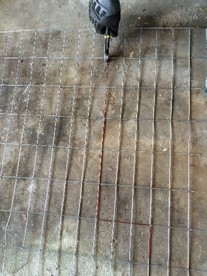
With my outline/blueprint in hand we measured out the dimensions and used a red sharpie to mark our outline and make our cuts.
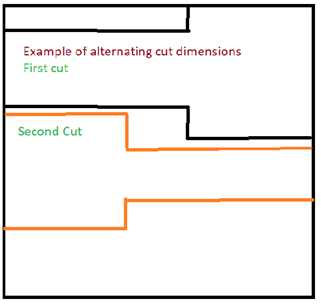
Tip: To avoid having excess waste I alternated my cut pieces from my source material.
*Note:
Eric wanted to try and avoid having any bends that weren’t on a welded seam. However that just wasn’t avoidable. So rest assured that the material will bend just fine even if it isn’t at a welded seam.
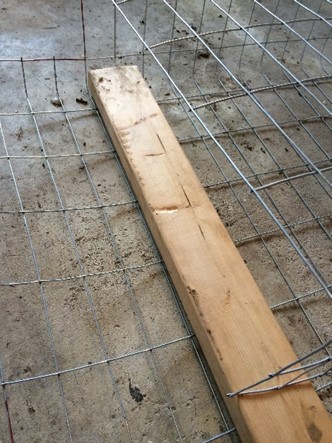
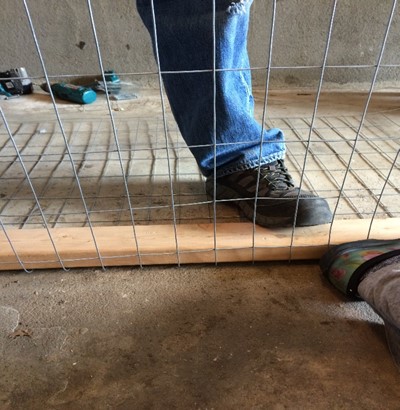 locations, by using a 2 x 4 x 5ft scrap piece of wood to bend the basket around and into shape.
-
By using opposing pressure I was able to get a much nicer looking bend in my box. I had Eric stand on the 2 x 4 while I applied pressure with my foot at the base of the bend.
- We did this for each side panel, the lid, and the floor/bottom until it all folded in on its self into the shape of a box.
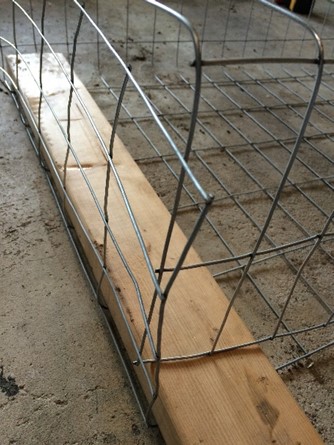
Use the crimpers to place three hog ties at each connecting side. One at the top corner, in the middle, and at the bottom corner. That means at this point there will be 6 hog ties on each basket. Do not close off your lid to the box yet.
Your basket making should be done!
Installation
#1. Prep your area
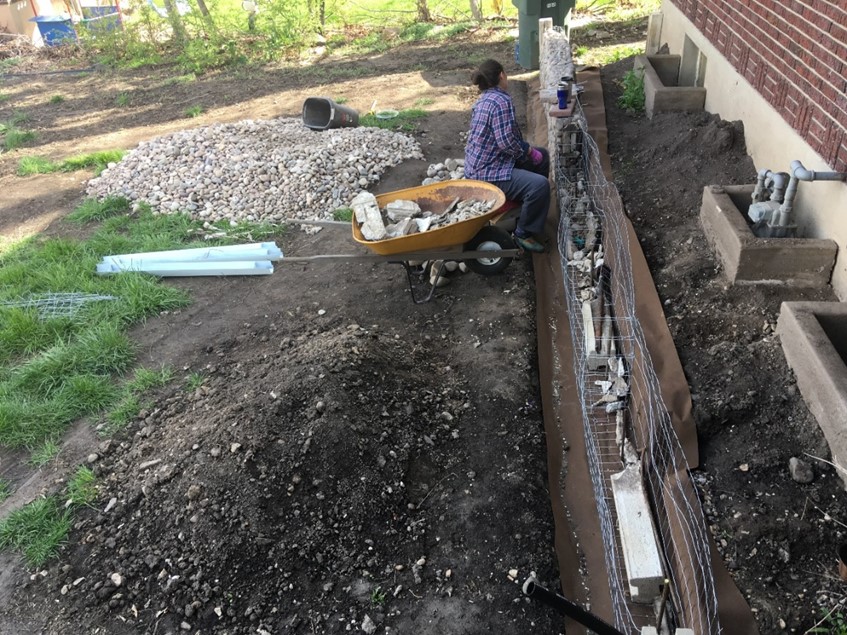
We measured and dug out a trench before using small rock to level the surface area and placed two pieces of rebar at the ends and then ran a string to find our center location to install the anchoring basket rebar pieces.
#2. Have your basket fill
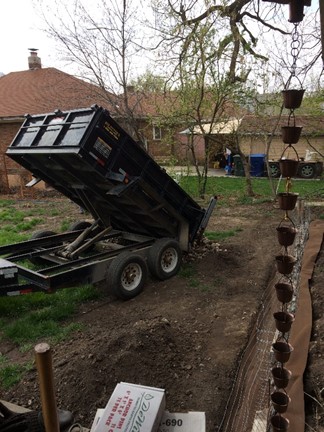
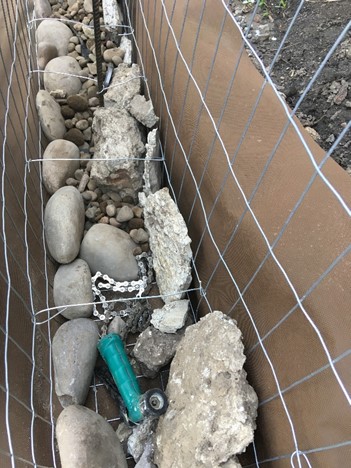
First I used all of our cement debris we had left over from the demo of the old garden bed and other metal odds and ends we had laying around. I then made the mistake of using pea gravel as fill on a few boxes and towards the end of the construction wound up strictly using the larger river
rock that we had delivered.
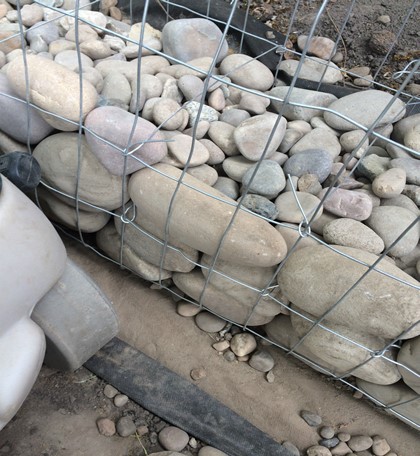
TIP: use medium to large fill rock in order to avoid your baskets easily falling apart later. DO NOT USE ¾ minus or other small pea gravel as this easily falls out between the gaps in your larger rocks.
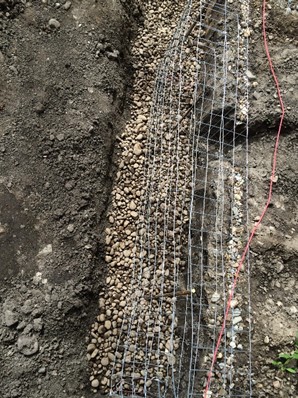
#3 Place your fill and fascia rock
I placed my largest river rocks as flat as I could on the front/fascia side of my baskets. I would then back fill behind them with smaller 3-4 inch sized rocks. I also used the large broken pieces of cement and metal flashing on the back side of the baskets to prevent rocks from falling out. When I ran out of scrap materials I resorted to using medium sized rocks.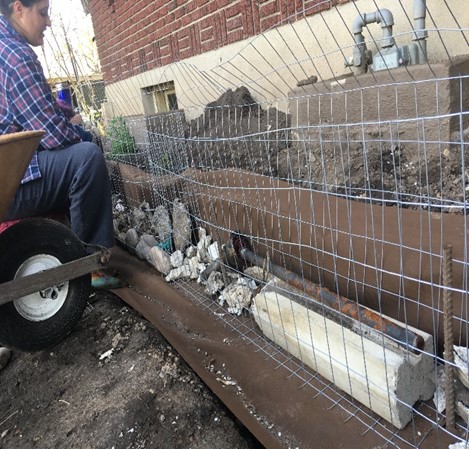
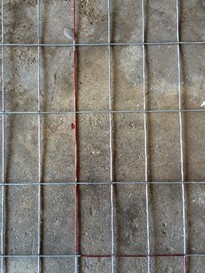
#4. Place your cross wire
I placed a cross wire every three to four boxes horizontally and applied them to each layer vertically(box layer).
The more cross wires = a uniformed strong box.
- We measured 12″ long cross wire and fastened it down to an 8″ width
- We cut 14-16″ cross wire, long enough to wrap around the rebar a few times before connecting it to either side of the basket.
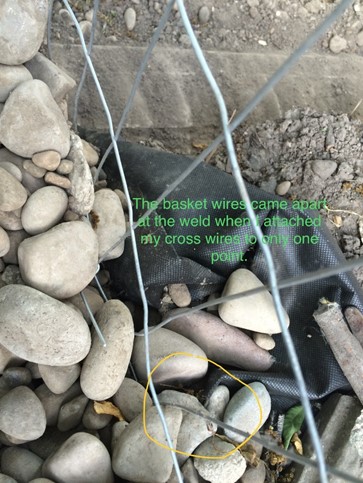
I learned the hard way that
a) The direction you attach your cross wire to the basket matters.
You want to loop each end of your wire in a fashion so that you loop around the baskets horizontal and vertical basket wire.
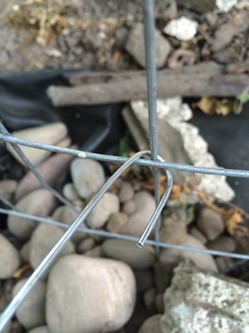
b) More cross wires were better than too few.
Close the Lid
Finally you will use your hog ties to close the basket lid and be DONE!

When all of my front facing boxes were completed I ended up taking my first built basket apart to refill it. I didn’t use enough cross wire, I used the wrong size rock, and it just looked awful, bulky, bulging, squatty, and out of place with the rest of my baskets that were better built. Lastly you can decide to either leave your gabion baskets open on top or you can cap them with cement pavers or any other material you wish.
References
Gabion wall stability guidelines. (n.d.). Retrieved March 12, 2018, from https://gabion1.com/gabion_stability.htm
McCormack, T. (n.d.). Gabions and Mattresses. Retrieved March 12, 2018, from http://www.pavingexpert.com/gabions_01.htm
Youre so cool! I dont suppose Ive read anything like this before. So nice to find any individual with some authentic ideas on this subject. realy thank you for beginning this up. this website is something that is wanted on the internet, someone with a little originality. useful job for bringing one thing new to the internet!