Feline Esophageal/Esophogastromy Feeding Tube
When Cody stopped eating for four days I chose the feeding tube vs syringe mouth feeding. I didn’t want to take the chance that I could cause aspiration pneumonia, soft tissue oral trauma, a severe food aversion, but most importantly I didn’t want to traumatize him. I also had to consider the medications I would be administering to Cody and his comfort and quality of life.
Tube feeding has been the best thing for me with Cody!! I have been able to bolus the necessary fluids, his liquid diet, and easily give him his medications all while he is sleeping through the process.
UPDATE: 4/26/18 Due to the lack of proper teaching on how to administer tube feed to Cody developed an infection at his esophageal tube site and the tube had to be pulled roughly five days after being placed. What I unknowingly did wrong was to tube feed Cody while he was laying flat. This allows the food and any acid reflux to push up the esophagus toward the surgical opening and develop and infection or lead to nausea and vomiting. He is now using a nasogastric feeding tube after his esophogeal feeding tube became infected and had to be removed.
Your Pet needs to have its head ELEVATED above their stomach so that gravity can assist in emptying the food into the stomach. I accomplish this by either laying his torso on a pillow or having a second person hold his torso on their legs while his lower body is at a declining angle.
This is an overview of what I am doing for Cody’s tube feeding from the Hills A/D urgent care canned food to the CliniCare all liquid food.
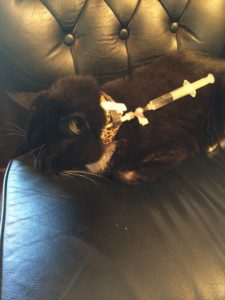
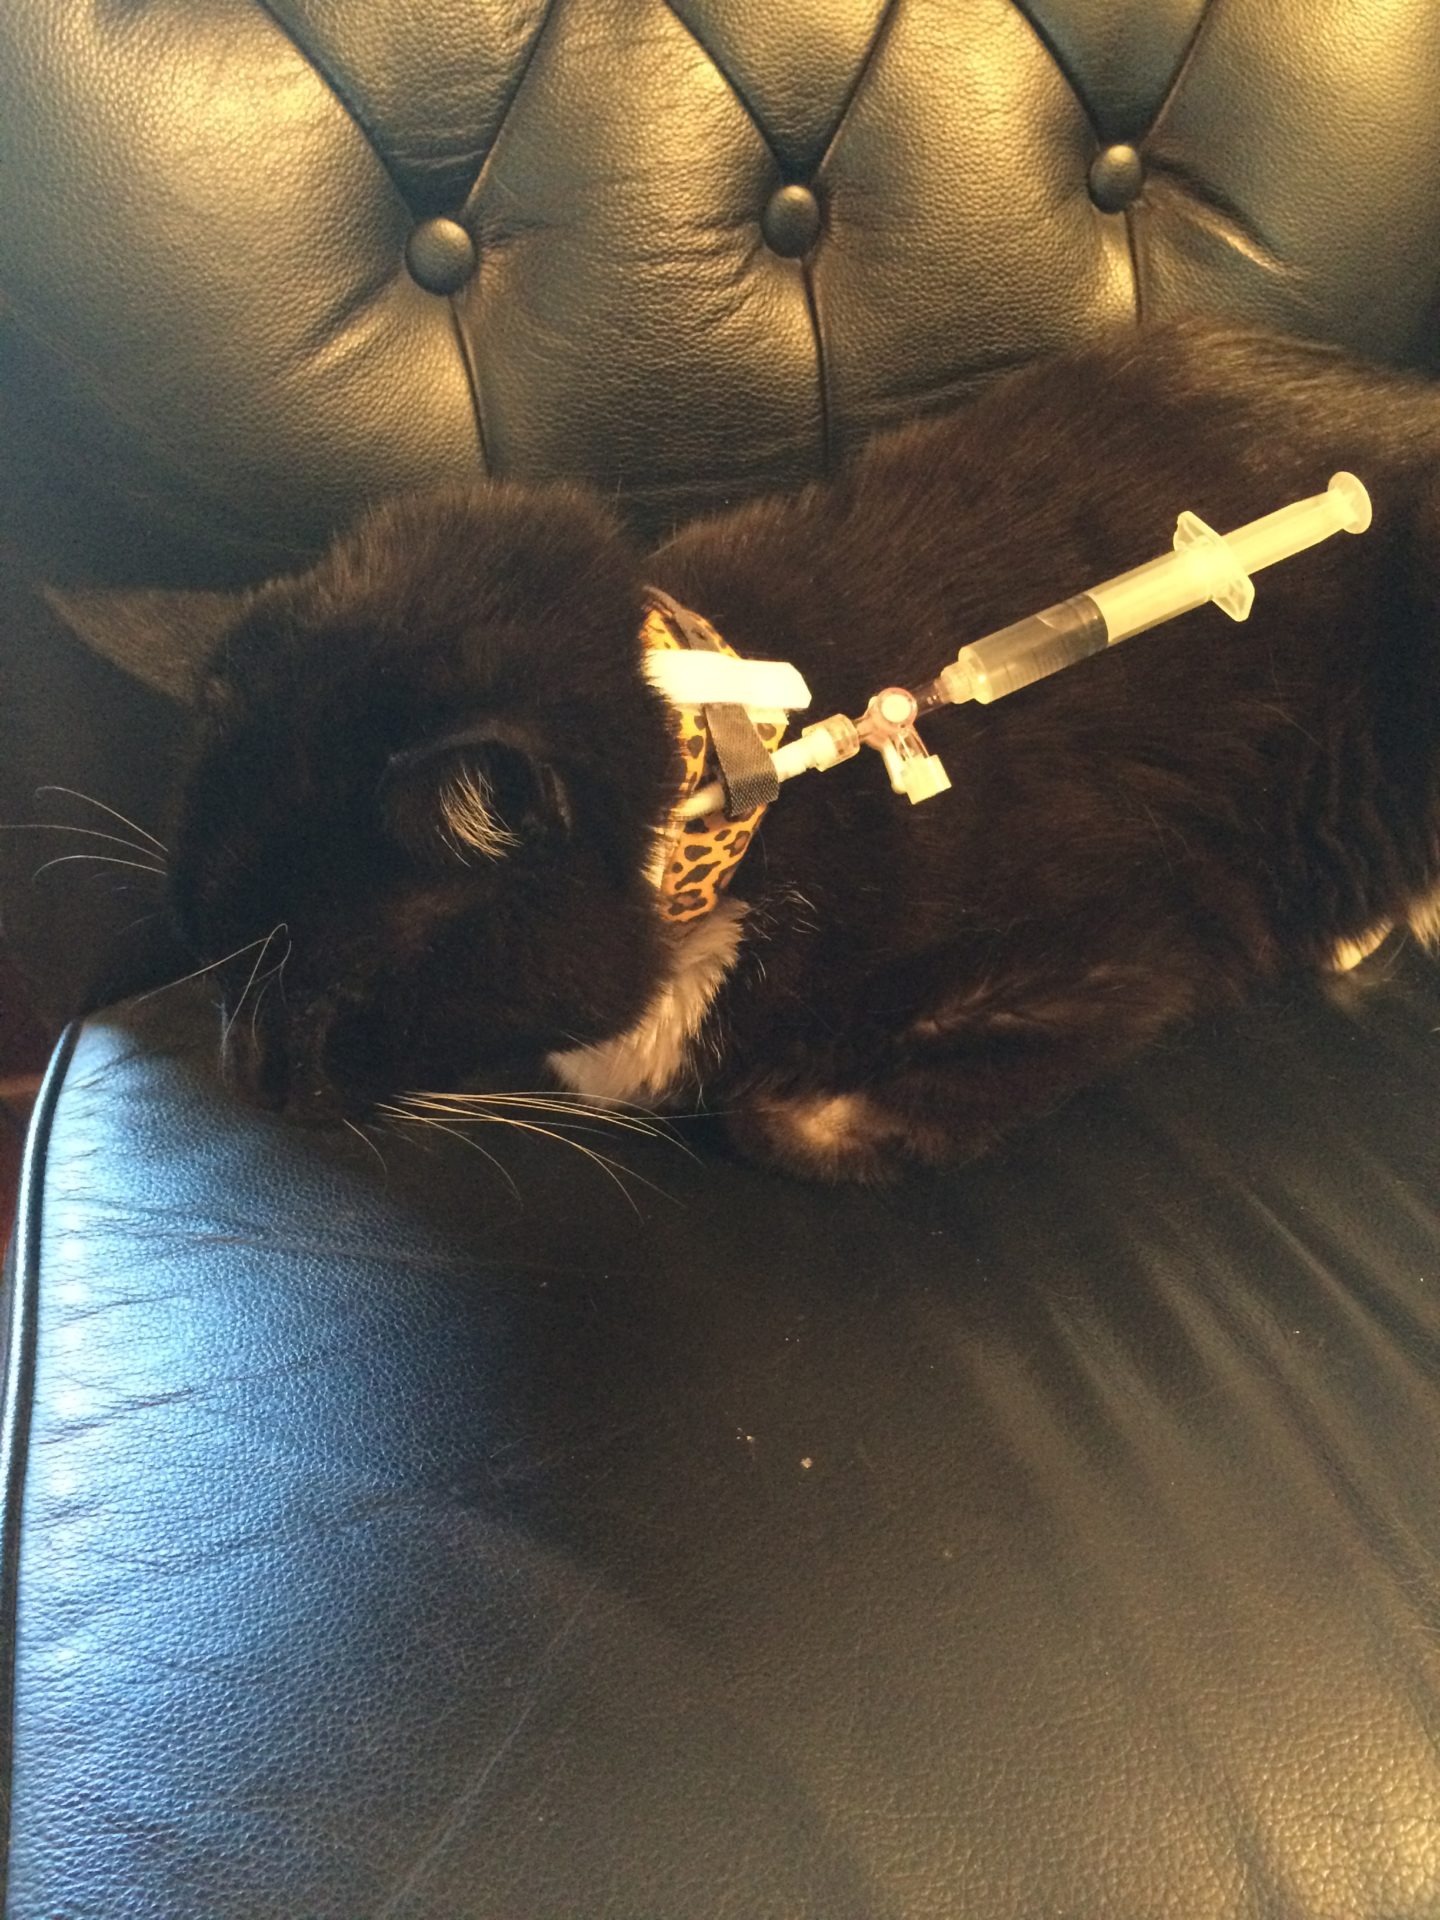
In this picture you can see Cody with his feeding tube and Kitty collar. Please visit the companies web site for great tips for living with an E-Tube by visiting here. Unfortunately the feeding tube was so short outside of his neck that there was no room for a clamp, to pinch the tubing, or to even wrap it correctly in the securing strap. I was able to take a Velcro cable tie and secure the feeding tube to the collar to the point that it will hold the small 6mL syringe in place if it is light enough weight. In the picture it is half empty.
Home Supplies
There are going to be things that your veterinarian won’t supply you with and you may want to have on hand. Some supplies are specific to using an esophageal tube such as the pill crusher.
-
Varying sized O’ring Syringes<—Click Here (3mL, 5mL, 10mL, 20mL, 35 mL, & 60mL) This is the MOST IMPORTANT purchase you can make. Your normal syringes given to you by your veterinarian are typically inefficient and will barely last a week of repetitive use.
- Signs of bad syringes:
- Increasingly difficult to push fluid or food through the syringe. Increasing resistance until the point that you can no longer push anything through it.
- Uncontrollable spotty or jerky movements when applying pressure that cause the contents of the syringe to squirt out everywhere.
- Signs of bad syringes:
-
There are two different styles of syringes from slip tip to luer lock. I personally preffer the luer lock because cody becomes very fidgety and likes to randomly shake his head or get up and walk away. I have used the luer lock tip syringes on both the NG and Esophogastric tubes both with different styles ports and the luer lock worked on both!
- I like to keep at least 10-12 inches of excess tubing between me and Cody because he is more comfortable and less stressed when we feed him from a short distance. We did try holding him with a towel but that just caused him unnecessary stress.
-
Tube Caps (These are very important if you want to preload your syringes for the next meal or any vet trips you need to take that could interfear with your feeding times.)
-
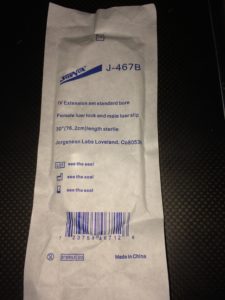
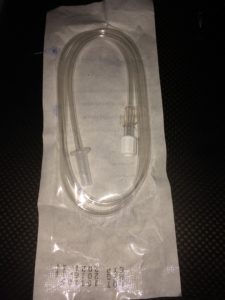
Feeding tube extension Tubing
- First you prime (Fill your tubing with food so there isn’t any air in the line) your tubing with your very thinned food before attaching it to your cat.
- Flush your cats feeding tube at the connecting port before attaching your primed extension tubing
- When you are finished feeding you only flush enough water through the extension tubing to clear the food;
- Detach the extension tubing and then flush the feeding tube at the main connector/port. This will prevent fluid overloading your pet with too much excess water.
-
A box of gloves
-
Digital Thermometer + lubricant
-
A baby scale or home scale that weighs in KG
-
Pill Crusher can be found in any pharmacy section of your local grocery store (Crushed pills can only be given in a Esophogeal feeding tube or other large lumen feeding tube. They should not be given under any circumstances through a nasogastric

Pill Crusher feeding tube).
- My primary vet tried to tell me it was fine to give crushed medications through the NG tube but all of the science based evidence publications indicated otherwise.
- My primary vet tried to tell me it was fine to give crushed medications through the NG tube but all of the science based evidence publications indicated otherwise.
-
Miniature 1/4 Cup Liquid Measuring Cup

Tube Feeding Foods
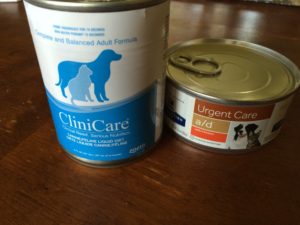
CliniCare Liquid Food
137mL with 1Kcal/1mL
I use 1.2 cans a day to meet Cody’s calorie Requirements.
Pros: You can feed less volume (mL) throughout the day and still reach your calorie count goals.
Cons: Can cause diarrhea, it is expensive at around $6.00 a can. I paid $5.81/can no tax and free shipping on my order.
I am so thankful that my primary veterinarian switched me to the liquid food because it is more reliable for measuring fluid intake and preventing pulmonary edema (Respiratory Failure). I simply pop the can open like a soda, pour it, warm it, and feed!
Buying the CliniCare food local cost me $9.75+tax so I bought my recent order of two weeks worth of food online for the same price i paid locally for an eight day supply.
Hills A/D Urgent care canned wet food
180 cal/162.65mL (5.5oz) Cody needs 2 cans per day to meet his calorie requirements
Pros: I haven’t used it enough to find any good notes on this food.
Cons: You have to feed more volume of this food to meet the daily calorie requirements. More labor intensive to prepare the food.
I was first given the canned food and was ill directed on how to actually prepare and administer it safely. I was instructed to simply heat it up until it became a watery consistency, THIS IS BAD ADVICE! A lot of science based literature suggests adding water and using a blender to liquefy your canned foods and then to pass it through a strainer.
I found a 25mL of H20 to 1 can of A/D Hills canned food Instead of water I used Clinicare but negatively this still added more volume.
CAUTION:
The supplemental wet canned food or liquid food poses a great risk of secondary health issues such as Respiratory failure and surgical site infection. This is especially dangerous if improperly or ubmeasured amounts of water and food are mixed and administered. For canned food you will need to track the water content of the canned food plus tracking/measuring any water you mix to liquefy the canned food. You don’t want to administer straight food because the consistency is too thick and will clog the feeding tube. If you try and feed just the canned food without adding water this means you will have to detach the feeding tube and flush more frequently and could cause a fluid overload to your pets system or an infection from frequent handling of the feeding tube.
Administering too much fluid can cause either pulmonary edema (respiratory failure) or it could cause aspiration pneumonia. WATCH YOUR CAT FOR Symptoms of having difficulty breathing, wet wheezing sounds when breathing, grunting, groaning, coughing, choking, labored breathing (full body movement with each breath). Normal respiration are between 20-30 respirations per minute, If your cat is struggling to breath or in excess then I would immediately take them to the local vet or ER.
How to decrease the volume of food while still meeting daily calorie requirements?
I wanted to be able to use my supply of Hills A/D canned food but without having to add volume with CliniCare or water and I didn’t want to lose calories when using water. I found NICHE QUICK-START.

180 calories/1oz
Instructions indicate to give 1tsp x 2 times a day for cats and dogs 10-30lbs
- 1tsp=5mL
- 1oz=29.75mL
a tube of 60 mL/ 5 mL
180 Cal/ 29.75 mL= 6.11 Calories/ 1 mL
5 mL x 6 Cal= 30 Calories/ 1 tsp
2tsp x 2 times a day = 60 calories a day
You can purchase it HERE!!
What You Need To Know
-
If your pet is coughing or gagging while feeding, DO NOT PROCEED WITH FEEDING. Your cat may have too much stomach content and may begin to vomit or the tube may be displaced, and your pet needs to be brought to a veterinarian to check the placement of the E-tube.(“Esophagostomy Tube Information and Care,” 2015).
- Aspirate and esophogastric tube before feeding, with an empty syringe pull back on the plunger (if you feel resistance do not proceed) to check if your cats previous fluids or food have passed through the digestive system.
- if you try feeding again too soon this can cause your pet to vomit, or aspirate (fluid backs into the lungs). If there is still food content wait another 2-4 hours before feeding.
-
With the canned wet food you are going to want to make sure that your veterinarian gives you the information regarding;
- How much food to mix with water? (Food to water ratio for canned food)
- How frequently should you be feeding your pet?
- How much should you be feeding? (Dose)
- How much should you be flushing pre and post feeding?
- How much should you be increasing the feedings and when?
- When should you begin to wean your pet from the tube feeding?
-
On Average cats should be taking in 200-300mL of water or food a day and that includes the water content within the canned food and the pre and post feeding flushes.
- Cats stomachs can typically hold 45-95mL, NEVER FEED OVER 100mL to your cat in one feeding!!!
- All feedings must be slowly increased over a two to three day period and increased by 5-10mL for a 24-48 hour trial period. Below is an example of how I increased our feeding volume specific to Cody.
- Day 1 15.5mL (Clinicare) x 4 hours + 150mL H2O
- Day 2 31mL (Clinicare) x 4 hours + 200mL H20
- Day 3 46.5mL (Clinicare) x 4 hours + 100 mL H20
- Day 2 62mL (Clinicare) x 4 hours NO additional H20
- Day 5 62mL x 4 hours
- Day 6 62mL x 4 hours
- Day 7 70mL x 4 hours
- Day 8 82mL x 3 hours
- Day 9 82mL x 3hours
The Veterinarian Health Center of the University of Missouri Gives the following outline to follow for tube feeding.
Please feel free to copy and paste this into a word document to print and take with you to your veterinarian.
Your pet’s diet: ______________________________
Amount of food needed for daily caloric needs: _____________________can(s)
To mix your pet’s food appropriately, add _________________ can(s) into a blender and add _______mL of tap water and blend. Please store this in the fridge.
Administer _____mL approximately every __ hours on Day 1.
Administer _____mL approximately every __ hours on Day 2.
Administer _____mL approximately every __ hours on Day 3.
Administer _____mL approximately every __ hours on Day 4 and thereafter.
-
As your pet begins to eat more food by mouth, you can decrease the amount you feed through the tube either by cutting out a feeding or feeding less at each meal (“Esophagostomy Tube Information and Care,” 2015).
-
A general rule of thumb is that if the cat is eating solid food then the feeding tube will remain for an additional 1-2 weeks before removing the tube.
Monitoring and Tube Care
- Nausea: If your cat starts to smack their lips, lick their lips, is restless, strongly resists, noticeably swallowing more than usual then you are pushing too fast and they are becoming nauseated and you need TO STOP FEEDING and give your pet a break of 2 to 3 hours. The feline digestive system moves slowly and can take up to 8 hours or more to completely digest a meal.
- Push the food slowly while giving amounts of 15mL or larger should be administered over 20 minutes or more.
-
ENTRANCE SITE CARE:
The site where the tube enters the skin of the neck should be examined daily for discharge, swelling, redness or foul odor. A small amount of swelling and discharge may be normal; this can be gently cleaned by blotting (not rubbing) with a clean, warm, moist towel, gauze or paper towel. If the discharge is yellow or green and malodorous, or there is increased swelling, redness or pain, see your veterinarian.- Note: A malodorous smell was the first sign that Cody had an infection long before any discharge was present. You want to catch the infection early before it has a chance to decay the top layer of skin, such as with a superficial abscess.
-
TUBE CLOGGING:
In the event that the E-tube clogs, use cola to unclog the tube. Infuse about 5 mL of cola into the tube and let it sit for 10 minutes, then flush the tube with water according to the feeding instructions above. If you are unsuccessful at unclogging the tube in three successive attempts, consult a veterinarian.
- The method of adding a cola or carbonated drink to the clogged tube didn’t make sense to me when I first came across all of the recommendations to try this. I imagined that a tube would be clogged and therefore nothing would be able to go into the tube. Cody’s NG tube clogged and I was able to confirm my suspicions and verify that this doesn’t in fact work because you can’t infuse anything into a clogged tube.
Food Safety
- If you do use the microwave, warm the food in a bowl and mix well before pulling it into a syringe. You can test the temperature on your wrist like checking the temperature of a baby bottle. The food should be room temperature to lukewarm, not hot or cold (“Esophagostomy Tube Information and Care,” 2015).
- I am using the microwave to warm the food and a food grade thermometer to test the temperature. The food shouldn’t be warmer than __105.1 degrees F. Feeding HOT food can cause severe burns to the mucosal lining of your pet’s esophagus and stomach. Feeding food that is too cold and straight from the refrigerator can cause your pet pain and possibly shock. With my microwave I can successfully warm the food within 7-8 seconds depending on the amount.
- Food should be liquefied and prepared fresh DAILY. Refrigerate the food for no longer than 24hrs as bacteria can grow and lead to infection in immune compromised pets.
- Be sure to wash and store your syringes after each use.
- Do not use water that has been left open to room air for greater than 24 hours as the bacteria is harmful to immune compromised pets.
Nasogastric vs Esophagogastric Tube Feeding
No matter which system you are using it is important to keep your pets head above their stomach so that gravity can assist in processing and emptying the esophagus and prevent gastric regurgitation.
The nasogastric (NG) tube feeding is intended for short term application of one or possibly two to three weeks. The nasogastric tube has an extremely small lumen which in my experience is going to drastically increase the level of difficulty in administering the food. You can only administer a complete liquid diet through the NG tube. I now have to push 62mL of liquid food over close to 60 minutes vs a 20-30 minutes feed time with the esophagogastric (EG) tube. You can not administer any crushed pills through the NG tube as the potential for blockage is too high.
- I had to downsize to using a 12mL syringe in order to safely and efficiently administer the liquid diet through the smaller lumen feeding tube.
The esophagogastric tube can is placed for a longer term home use, can have larger amounts of food and water administered, and you can administered crushed medications through the tube without fear of it clogging. With the EG tube I was able to use a larger sized syringe for the feeding sessions.
Canned Food Preparation
Depending on the thickness of the food you are administering you may need to liquefy it further by either directly adding pre measured water to your canned food and mixing it by hand or running it through a food processor or blender and adding the appropriate amount of water as instructed by your veterinarian and bring it to a consistency of a slurry.
If you pre mix the can of food and water in the blender then you can store it in a Tupperware in the refrigerator or you can pre draw them up in your syringe and store them in a zip lock bag. DO NOT store pre drawn food syringes for longer than
-
You will have three to four syringes, one to two large syringe for the food and one two 6mL syringes for your water.
SAFETY POINT: With Cats it is best practice to flush with 3-6mL Pre and Post feeding. The best advice is to flush the line until it runs easily and smoothly. When there is food in the line you will feel some resistance and once that food is cleared through the tube the water will push much quicker. As you increase the food amount then the amount of water you are using to flush may need to be DECREASED to avoid fluid overloading your pet and causing pulmonary edema.
FEED SLOWLY!!!!!!
For large amounts of food of 15-20mL slowly push this over 10-20 minutes and give plenty of breaks. This is very important to allow for complete gastric emptying. If your cat vomitsSo If I notice any possibility of nausea then I stop and give a break of anywhere from 40min to 2 hours before resuming feeding. “It is important to feed the liquid diet slowly (i.e., each meal over 20 minutes) since the food is not going directly into the stomach but instead into the esophagus” (“Esophagostomy Tube Information and Care,” 2015). As food is pushed into the esophagus it slowly moves down to a valve like opening (sphincter) and empties into the stomach. If you feed to fast or too much then there isn’t enough time for the food to get through the valve and into the stomach and this will cause your cat to become nauseated as the content backs up to their throat.
Stopock and Tube Clamp
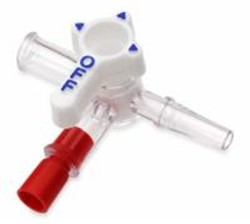
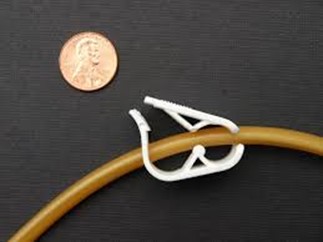
The tube clamp and stop cock are two great devices that make for easy tube feeding. Some veterinarians use them and some apparently don’t. Cody’s feeding tube didn’t have either which made for a cumbersome and awkward feeding time with the added difficulty of liquid medication. I ended up getting a stopcock from my local primary veterinarian which made a world of difference during his heavy meal and medication times. The stopcock is something I am comfortable and familiar with using so it makes the task of flushing, feeding, flushing, medication, flush much easier when I can close the valve and take my time handling my syringes.
I only use my stopcock during heavier meal and medication times and the rest of the time I keep it clean and packaged away. With the use of the clamp or stop cock you don’t have to use your hand to occlude the port opening and risk the potential of introducing a bacterial infection or air into the esophagus. More importantly you aren’t risking bacterial contamination of the tube which can grow down into the surgical incision site.
Update: 5/3/18: After a lot of the secondary medications were discontinued I stopped using my Stop cock however this was only with the addition of having an extension feeding tube set.
Administration
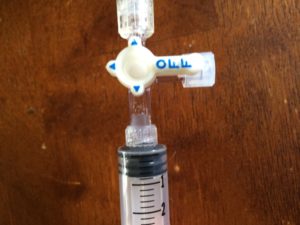
#1. Avoid Letting Air Enter the Tube: Make sure to that a) your stopcock/valve is in the “Off” Position that is facing the tube feeding port so that no air can enter your tube or b) Make sure your tube clamp is shut/closed or c) you pinch your tube closed d) or you have to use your finger from your non dominant hand to occlude/cover the port opening. You want to clamp before removing the cap from the end of your feeding tube. Clamp/pinch the feeding tube.
#2. Remove the Cap: With your non dominant hand securely hold onto the tube feeding port while you remove the cap. If you’re your feeding tube does not have a stopcock or tube clamp, mine did not, then pinch the line to stop air from entering.
#3. Pre Flush: Attach your water syringe by screwing it on (unclamp/un pinch the tube) and with room temperature water administer 3-5mL of water. Clamp/pinch the feeding tube closed. Remove the water syringe.
#4. Administer Food: Attach the food syringe (un pinch/clamp your tube) and administer your feeding intermittently and slowly giving 2-3mL at a time. Clamp/pinch the feeding tube closed. Remove the syringe and;
#5.Post Flush: Re attach your water syringe (unclamp/ un pinch the tube). Hopefully you have a cup of water near you or have a second water syringe, and administer another 3-5mL flush. Clamp/pinch the feeding tube closed and remove the syringe.
#6. Reapply the cap and FINISHED!
References
Esophagostomy Tube Information and Care. (2015, June 30). Retrieved April 20, 2018, from http://vhc.missouri.edu/small-animal-hospital/small-animal-internal-medicine/diseases-and-treatments/esophagostomy-tube-information-and-care/