Transforming a 4ft chain link Fence into a Privacy Fence
This project has changed and is currently in Progress. Go here for more ideas on converting chain link fence.
First Notify Your Neighbor
If your neighbor happens to be a renter then you could consider asking them for the property manager or owners contact information. A way around this is to see if your county has an online “tax assessor” web site where you can conduct a property search. Type in the address as instructed by the web site and look for “owner information” and “mailing address”. In many states it is not required to notify your neighbor that you will be installing or maintaining the fence. However the state of California requires a 30 day written notice be provided to your neighbor (“Fence Building Law,” n.d.). In any situation it is best practice to attempt to communicate with your neighbors and involve them in the planning processes of deciding what fence materials to use since they are likely to be responsible for paying for half of the cost.
After five years our fence is still unfinished due to the neighbors being uncooperative and harassing us.
Transforming a 4ft Chain Link Fence into a Privacy Fence
Disclaimer: I would like to state that it isn’t cost effective to repurpose a 4 ft chain link fence into a privacy fence. It is best practice and most cost effective to remove your 4ft chain link line posts and build your new fence. A 4ft chain link fence will have line posts set every 10 ft and for a privacy fence you need to set your posts every 6-8ft.
This means that in order to repurpose your existing chain link line posts then new 2 3/8″ posts will need to be installed over the top of your current posts and installed every 5 ft on center. This over building of your fence will double the cost of your building materials. For this reason I abandoned my original plan of reusing the existing line posts.
Fence post sizes
If you have a chain link fence then you will find that your posts differ in size from your line post (posts between your end posts) to your terminal posts (end posts). My line posts are 1 7/8″ OD vs my terminal posts that are 2 3/8 OD. With new construction it is recommended to use 2 3/8″ OD terminal posts ever 8′ for added strength and security of your 6ft wood, steel, or chain link with privacy slat fencing.
Why metal fencing?
First I wanted a low maintenance durable privacy fencing that would hold up to dogs, sprinklers, and damaging wind storms. Vinyl fencing runs $12+ per ft and installing slatted chain link was an option but it also didn’t give me the amount of privacy that I want additionally for the supplies to install the chain link fence with 2″ privacy slats it would cost me over $5,000.
I began by comparing the cost of wood fencing planks to the 24″ and 36″ wide metal panels. For a 54ft section of fence that is 6ft high;
- 5″ cedar planks $2.98 each
- 24″ wide metal panels 29 gauge $1.79 per ft- ***not allowed in fence building***
- 36″ metal panels 29 gauge $3.04 per ft (2018)
- 2022 pricing $4.74+ per ft.
I sourced my metal fence panel materials from wheelwright lumbar.
In the end the cedar planks were only $10 cheaper than the 24″ metal panels and these were only $20 less than the 36″ wide metal panels. The 36″ 29 gauge 7/8″ wide rib can come in a variety of colors and the 24″ comes in only galvanized silver which is not allowed by many HOA’s and urban city codes because it causes sun light to refract onto neighboring houses and properties. The cedar would require staining and is more labor intensive to maintain. So in the end we chose to go with the corrugated 36″ wide metal so that we wouldn’t have to maintenance it.
TIP: Don’t waste your time going to the big box stores looking for less than 8ft sections of 24″ wide 30 gauge corrugated galvanized panels. Start with your local building and lumbar yards and specify that you are pricing 29 7/8” wide rib metal panels and specifically ask them what the widths are of those panels.
Inspirational pictures
 I love the simplicity and privacy this fence provides
kHere is the wide rib corrugated metal in a horizontal installation
 Here is a great re purposing of old fence posts.
The plan
Using Existing Posts
I acknowledge that it is most cost effective to remove the existing posts and place new stronger and taller posts at 8ft intervals. By reusing the old posts I will incur extra cost for lumbar supports needed to extend my current 4′ posts as well as having to add additional post supports at 5′ intervals to gap the current 10′ fence posts.
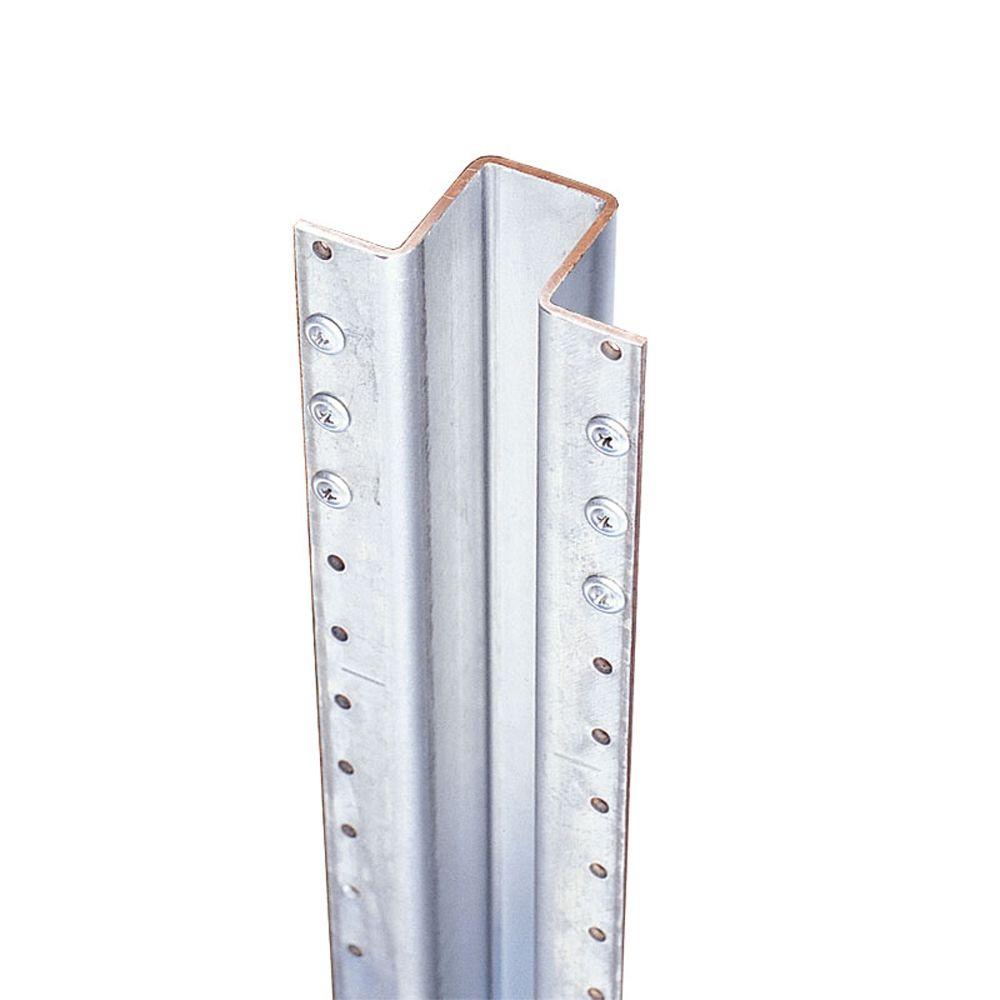
I will need to remove the old chain link top rail and post caps in order to add the vertical 2x4x6 support beams. In some places we will have to completely remove the fence posts and move it 12″ and we are considering using the U channel
Metal Fence posts to Wood Rails
#1. (The Option I chose) Use Ozco steel fence post to wood fence slat adapters.
these were discontinued in 2019 after ozco was bought out by Hillman.
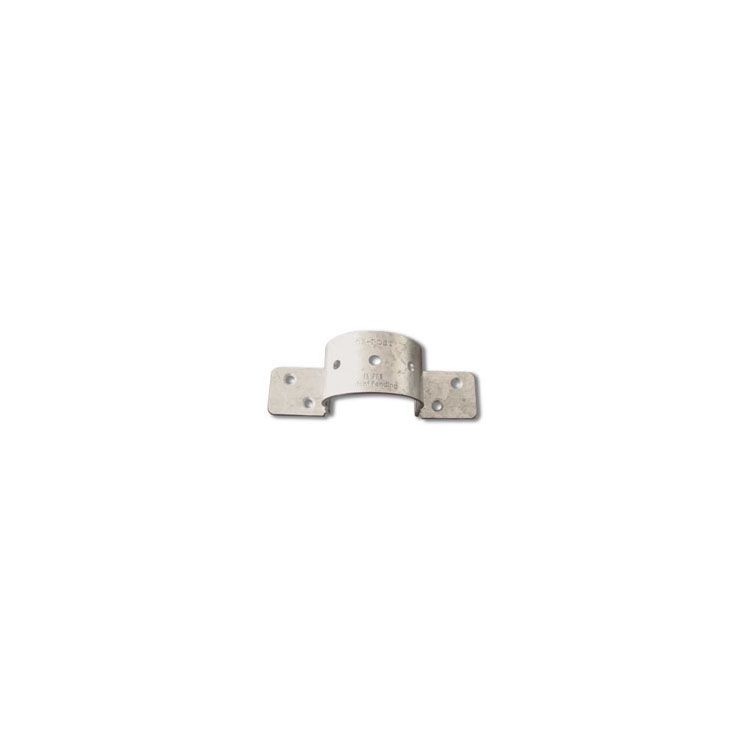
I used the brackets to attach wood rails to 2 3/8 galvanized fence posts.
4ft Chain Link Fence
If you have a small 4ft chain link fence and aren’t going to be using privacy fencing then here are some options. These options are intended for open decorative non privacy fencing options.
You shouldn’t use privacy fencing on a converted chain link fence because the privacy fencing acts as a sail or a wind block and can be damaged or ripped out of the ground during high wind storms. 4ft chain link fencing isn’t dug down and cemented the required 2ft that is necessary in securing privacy fencing. Lastly 4ft chain link posts are set too far apart, 10ft vs 8ft for privacy fencing.
#2. Use above ground pressure treated 2x4x6 yellow pine to reinforce the chain link fence posts and give added height from 4ft to 6ft. You can see the simpson strong ties holding the 2×4 on either side of the fence post and securing them to the post while extending the height of the fence.
 Fence posts and rail brackets
Tip: When using the above method it is not advisable to use on fence posts 1 5/8″ without some modifications. One reviewer suggests “1” clear rubber tubing and split it into 1″ shims to go between post and post tie.”
#3. Another option is to buy Post Extensions for 2ft of additional height.

#4. Buy larger 2.38 in. x 2.38 in. x 6 ft terminal posts and slip them over your shorter and slimmer 4ft line post. Secure the Larger post with a screw and for added peace of mind spray foam insulation spray between the two pipes to stop them from rattling. Don’t forget to add your top cap.
TIP: When you make it to your terminal/corner post it will already be 2.38 in. x 2.38 in. x 4 ft so you will need to back fill the inside of the post with gravel (3/4 minus) so that you can drop in a narrower terminal post before you add on a cut piece of the 2.38 over top.
We are still working towards getting all of our neighbors cooperation before breaking ground on the needed repairs. I will update pictures and steps in further detail…
New Fence Post Installation
Consider the available materials for your posts. While using a weaker gauge metal post can leave you susceptible to early breaking points this can easily be avoided by buying 16 gauge or sch 40 metal posts. Wood will inevitably rot through and require replacing.
Tip: For privacy fencing the post strength and buried depth are of the utmost importance to avoid acting like a sail and breaking during a wind storm.
There are areas where new fence posts will be installed to repair and add on 110′ section of privacy fence. For this area I am considering installing postmaster u channel posts, which will only be plausible if we end up ordering 15 or more to reduce the cost from $28 to $21.00. Otherwise we will be using the 2 3/8″ OD posts with post to wood brackets.
Fence Post Depth
It is recommended that for your 6′ high fence posts be buried at least 2′ or 1/3 above ground post is in the ground and cemented in place. Your holes should be wider at the bottom to prevent post displacement caused by water and ice build up. Or dig the hole 3” deeper and fill with drainage rock, tamp, place post, fill another 3”, tamp, and fill with cement.
Rail
You can either use 2 or 3 cross rails to mount your fencing. There should be 72″ of fence railing above ground. Your bottom rail should be 3.75″ from the ground and 3.75″ from the top of the post with a spacing of 54″. If you want to use three cross rails then simply place a third rail 27″ from the top and bottom.
Cross rail material, cedar or above ground pressure Treated 2×4 or 2×3 for the cross rails tied in with galvanized oz post fence brackets.
TIP: It is important to know that you have to buy hot dipped galvanized wood screws and rail ties whenever working with corrosive pressure treated lumbar. I happen to source cedar rails so this wasn’t necessary.