Rav4 Prime XSE Mods
So I purchased a premium package Rav4 Prime XSE and here are my mods to make the vehicle a tad bit better!
There are YouTube videos and tutorials on how to install most of these items. The PIAA horn does not have any installation videos or tutorials but it’s extremely easy to follow the installation video for any horn.
I was extremely lucky that I purchased my vehicle on July 3rd 2023. Toyota runs an annual accessories and parts sale the first two weeks of July starting with 15% off the lowest marked price and increasing to 20% off by the end of the sale period.
July 11-13th Amazon prime day sale occurred which allowed me to purchase additional accessories such as the viofo dash cam. I started with the easiest mods and worked my way up in difficulty.
- Xpel Ceramic window tint ✅ ❤️❤️❤️ can’t reccomend this enough.
- Xpel PPF✅ professional installer- The cats love to climb all over the vehicles.
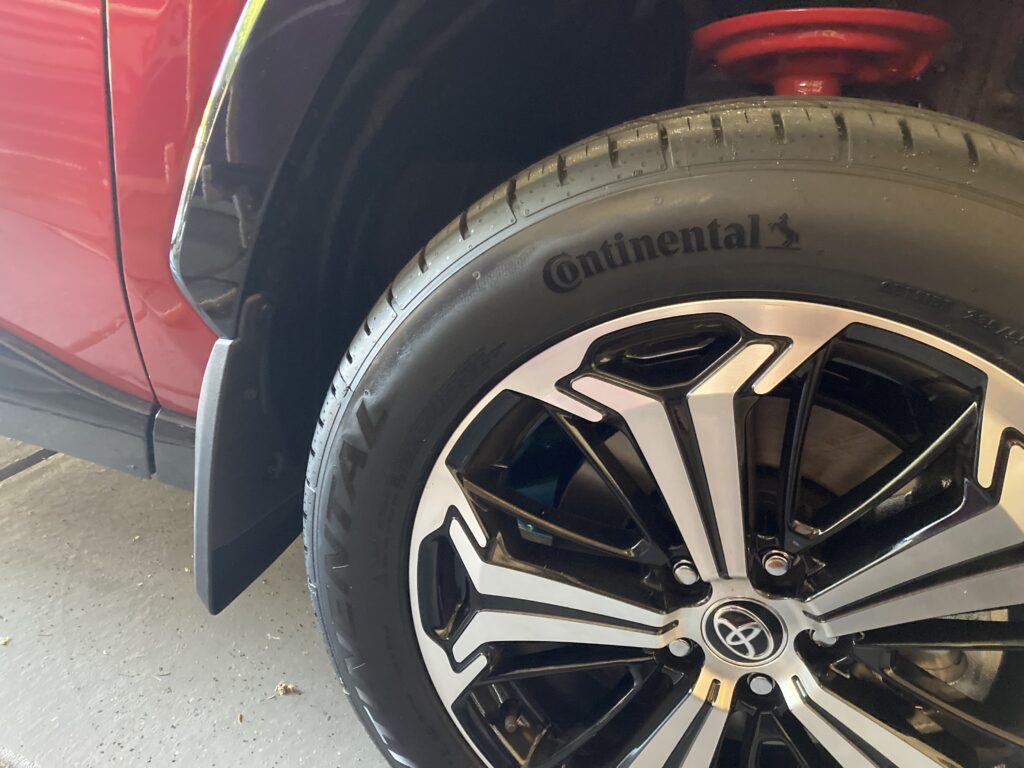
- Fender Flares ✅
- Headlight Gasket Protectors ✅
- Mud Guards✅
- Horn Replacment ✅
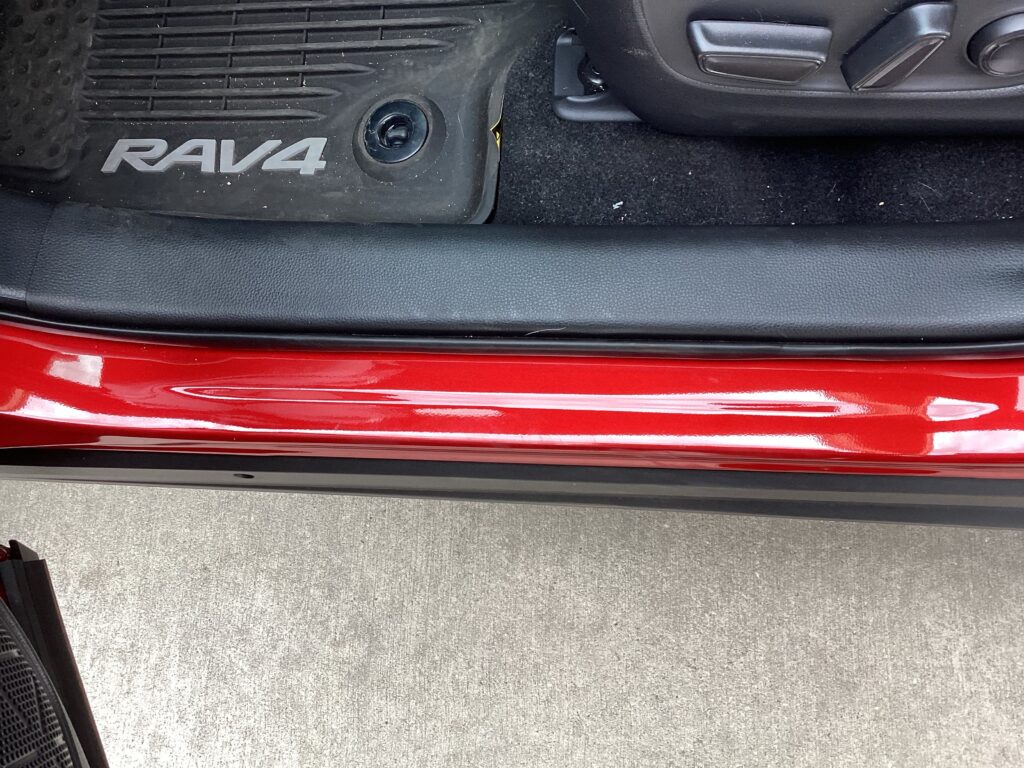
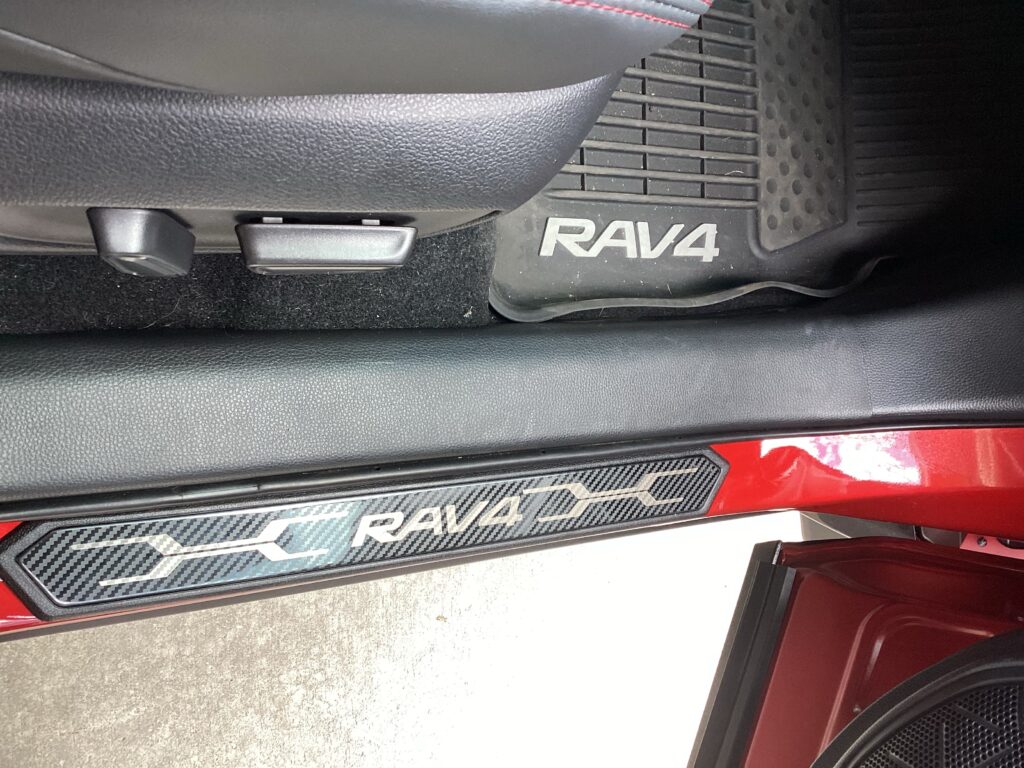
- Sill scuff plate guard✅
- Tow hitch receiver. ✅
- Dash Cam ✅
- Folding Side Mirror Kit ✅
- Grill screen protector ✅
- Pillows
- File/map organizer
- Mesh interior attic
- Winter tires, rims and TPS ✅
- Side mirror anti glare film ✅
- Constant on 12v fuse 10amp ✅
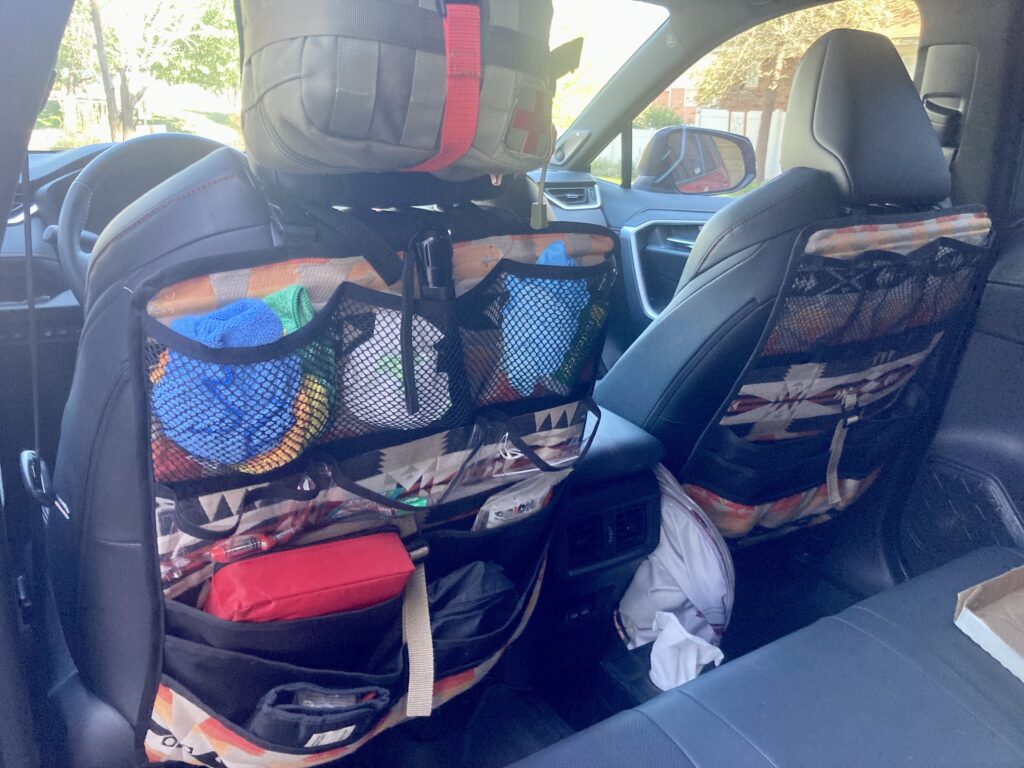
- Add back of seat cargo organizers ✅
- Led second Row footwells
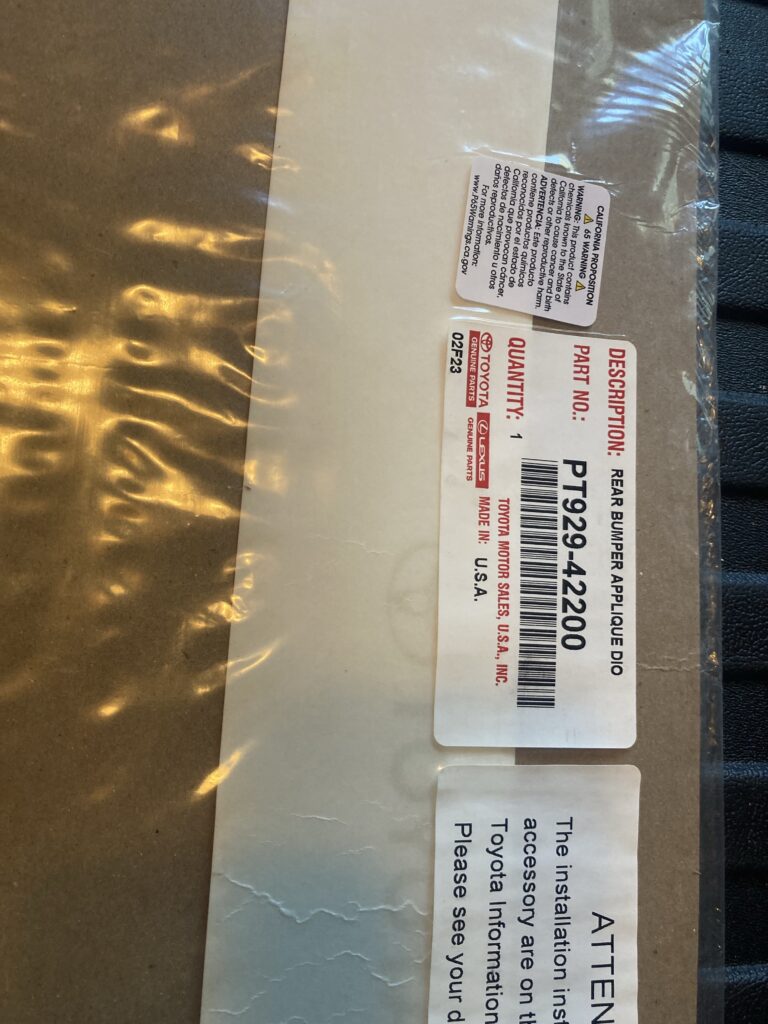
- Rear Bumper appliqué ✅
- 08285-10010 2.5” added height sliding arm rest (optional)
- LED overhead rear cargo ✅
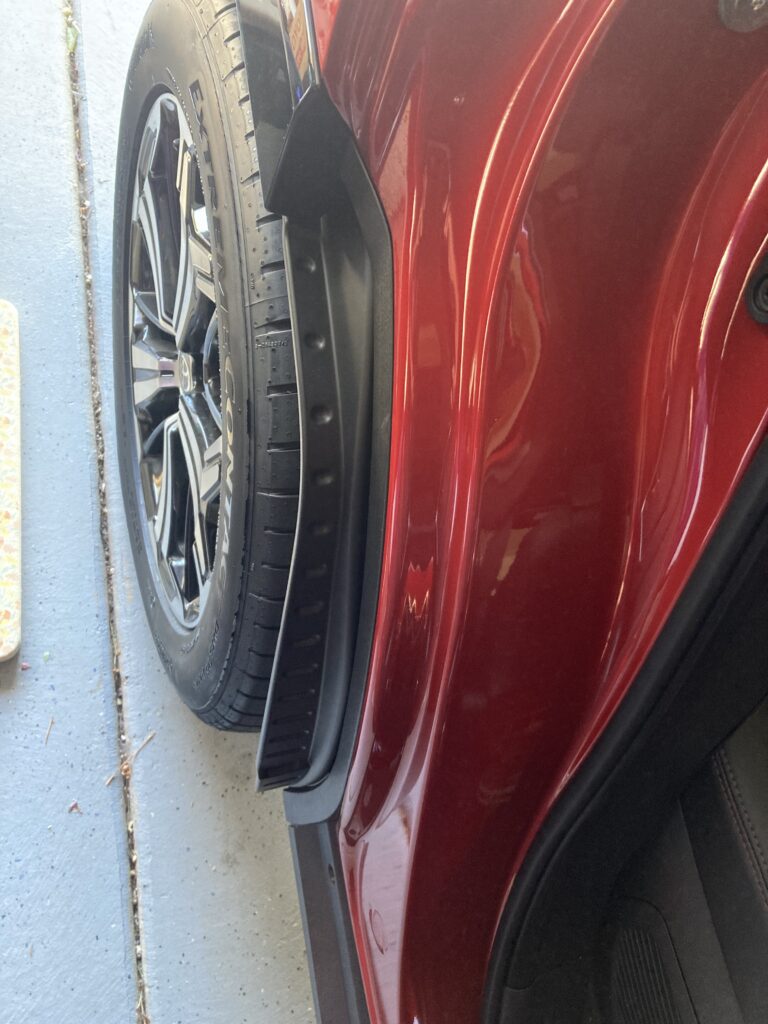
Fender Flares
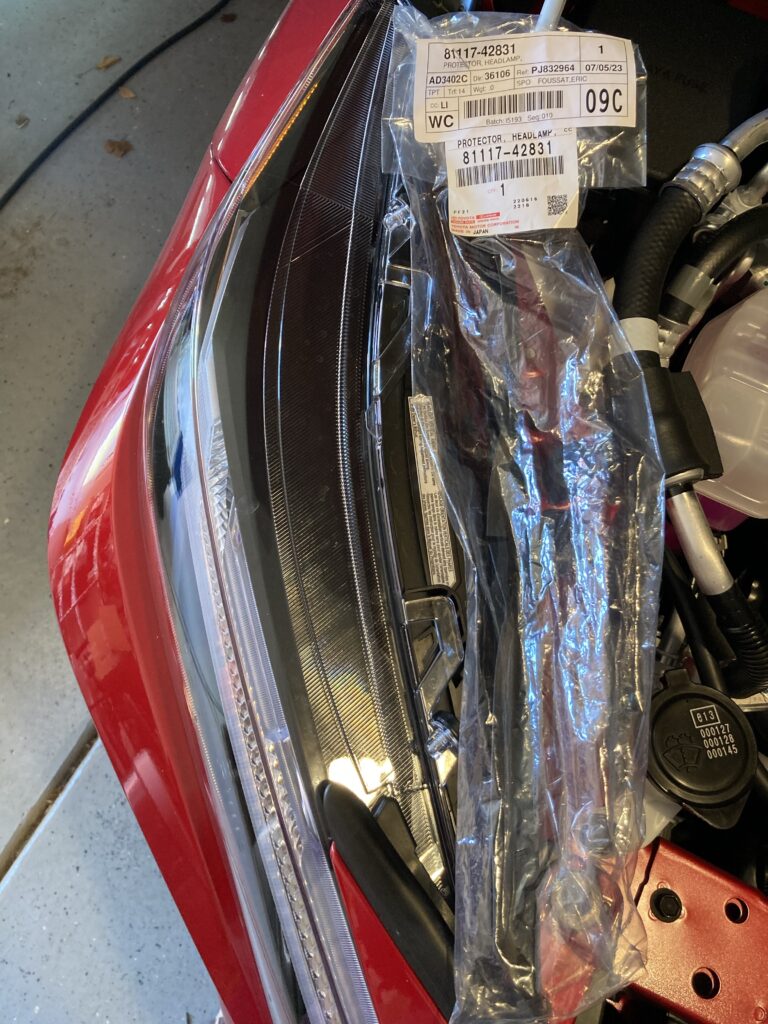
I chose to install the headlight hood gasket seals.
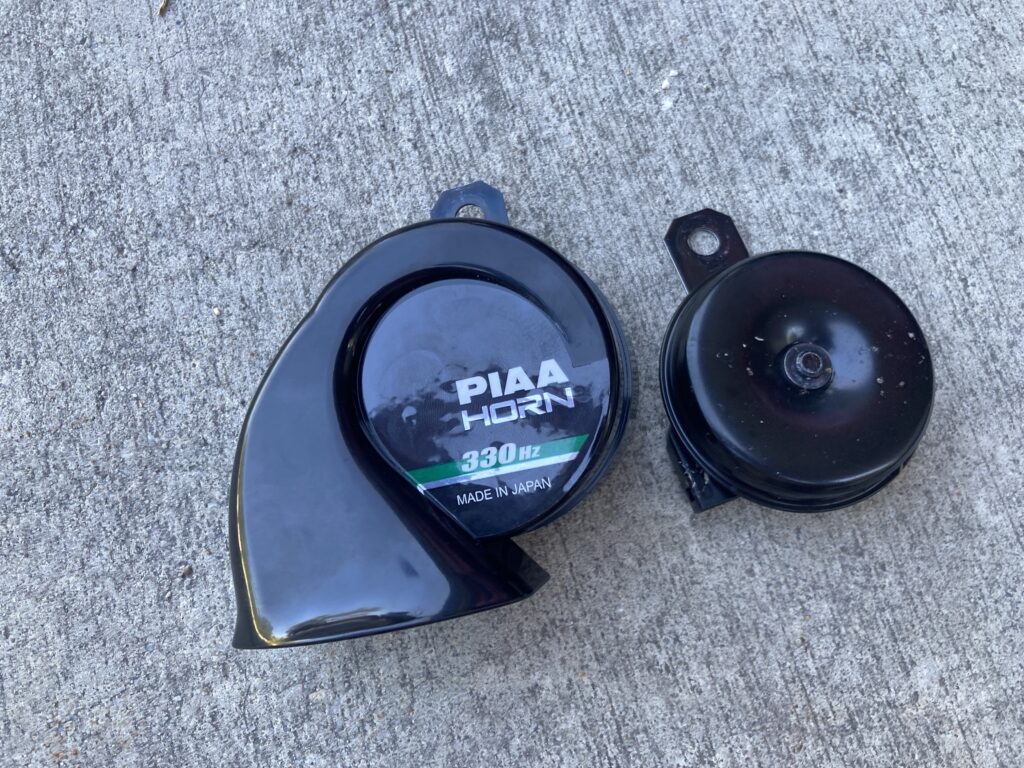
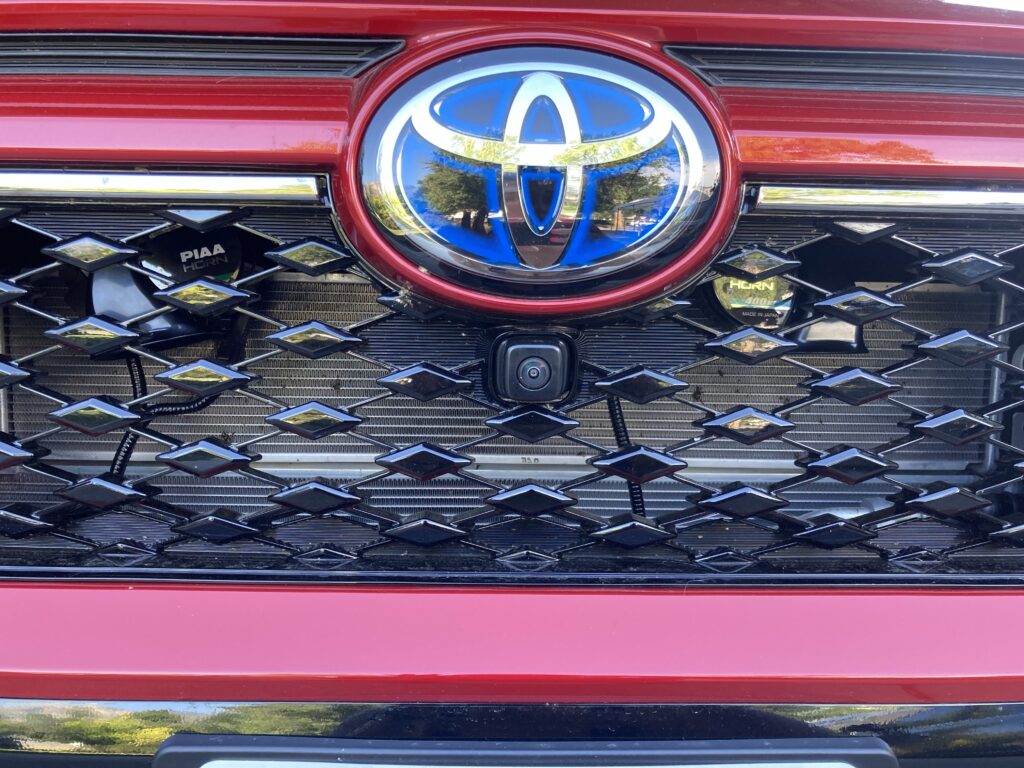
I chose to install the PIAA horn after listening to peoples posted videos of the sound of the horn. The hella horn is a popular choice among RAV4 prime owners but it was reported to use inferior hardware prone to early rusting.
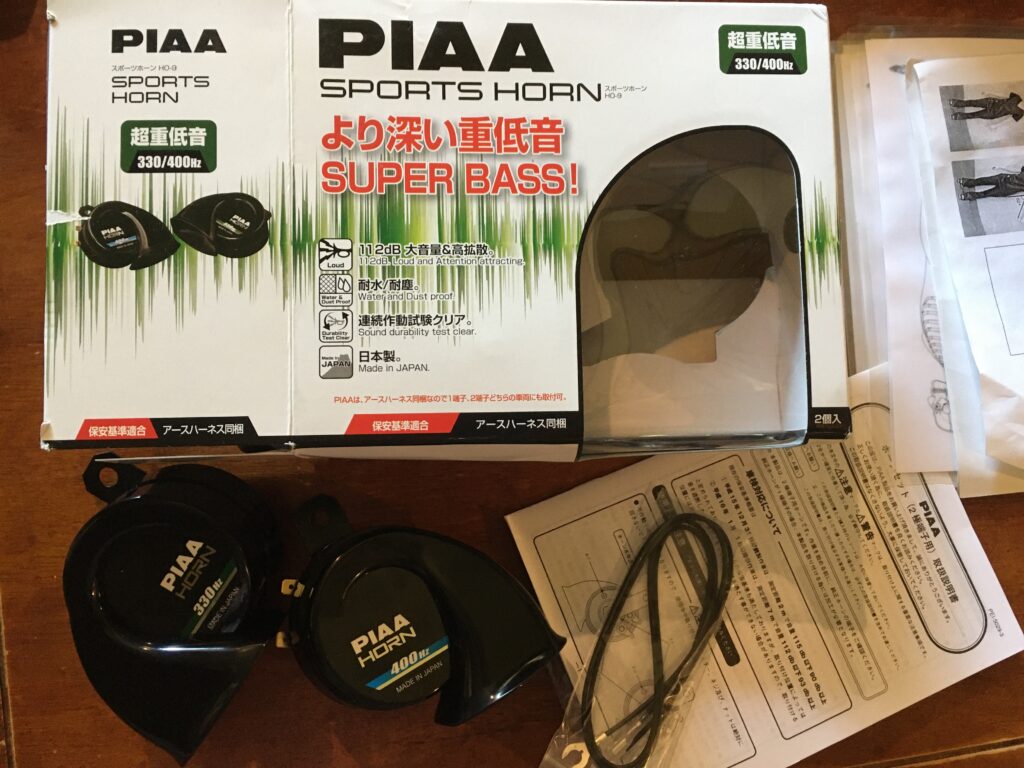
For the PIAA horn installation it is easier to purchase an electrical plug and play adapter kit such as uxcell 2Pcs Plastic Car Horn Speaker Adapter Wiring Harness Pigtail Socket for Toyota. Anyone can install this kit. Tools needed are a trim removal tool set, #10 socket and #12 wrench.
There are two brass prongs protruding from the horn. Install the ground wire to either of the prongs and then install the adapter cable to the other prong. Next install it exactly the same on the other horn. I installed the ground to the top prong and the adapter to the bottom prong. I then chose to install the ground wire to the bolts attaching the hood latch. You want to make sure that the area is paint free. I looked inside the threaded bolt hole and saw that the paint had been stripped away by the installation of the bolt, making this a viable ground.
Sill Kick Plate
Rear Bumper Aplique
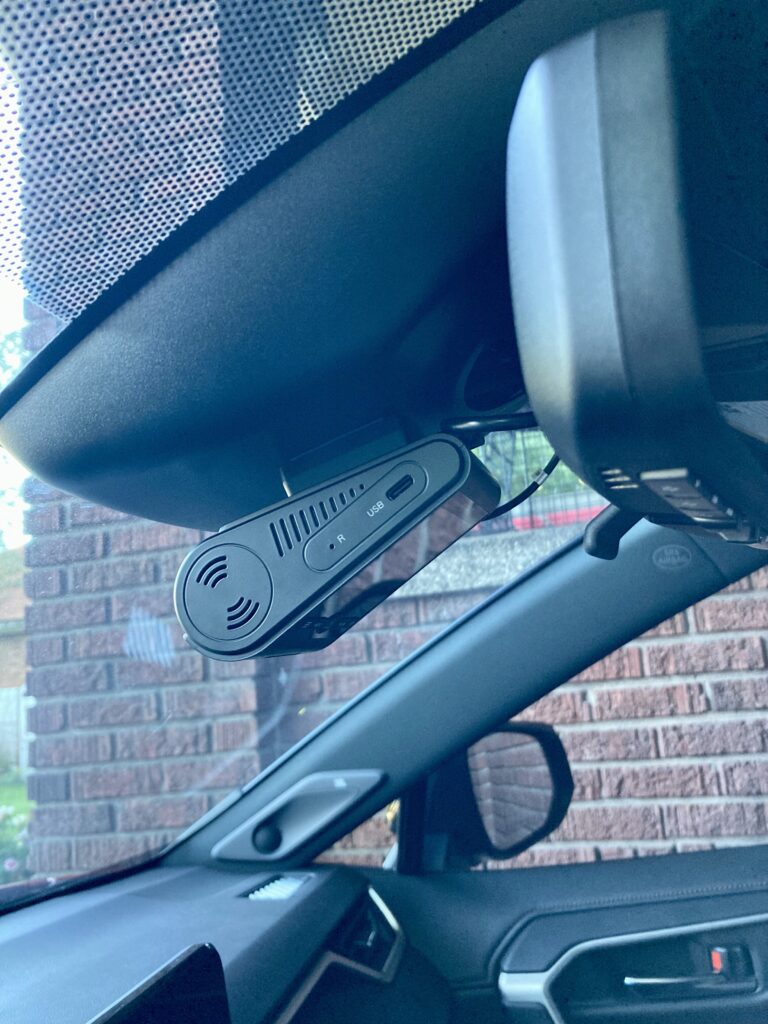
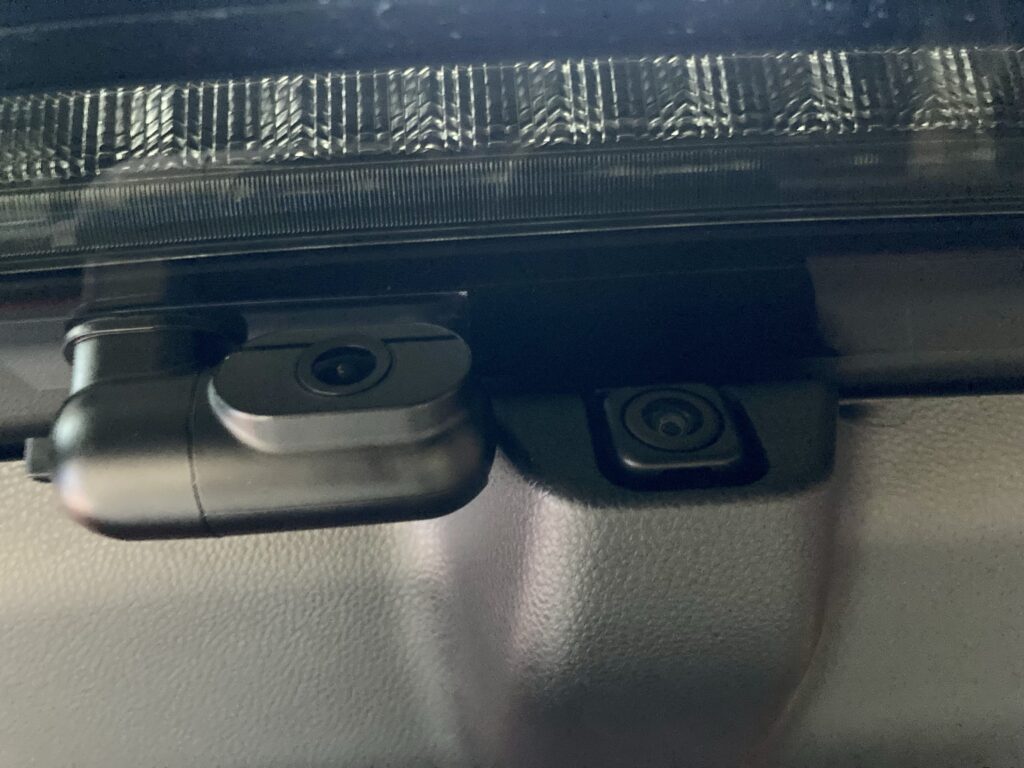
Viofo A229 Dual Dash Cam
Key takeaways here
- Only the top portion of the driver side A Pillar needs to be popped out and the weather strip does not need to be removed.
- Long needle nose pliers are needed to put the driver side A pillar back into place .
- Dish soap, tweezers, and a long zip tie will be needed to fish the electrical through the rear boot.
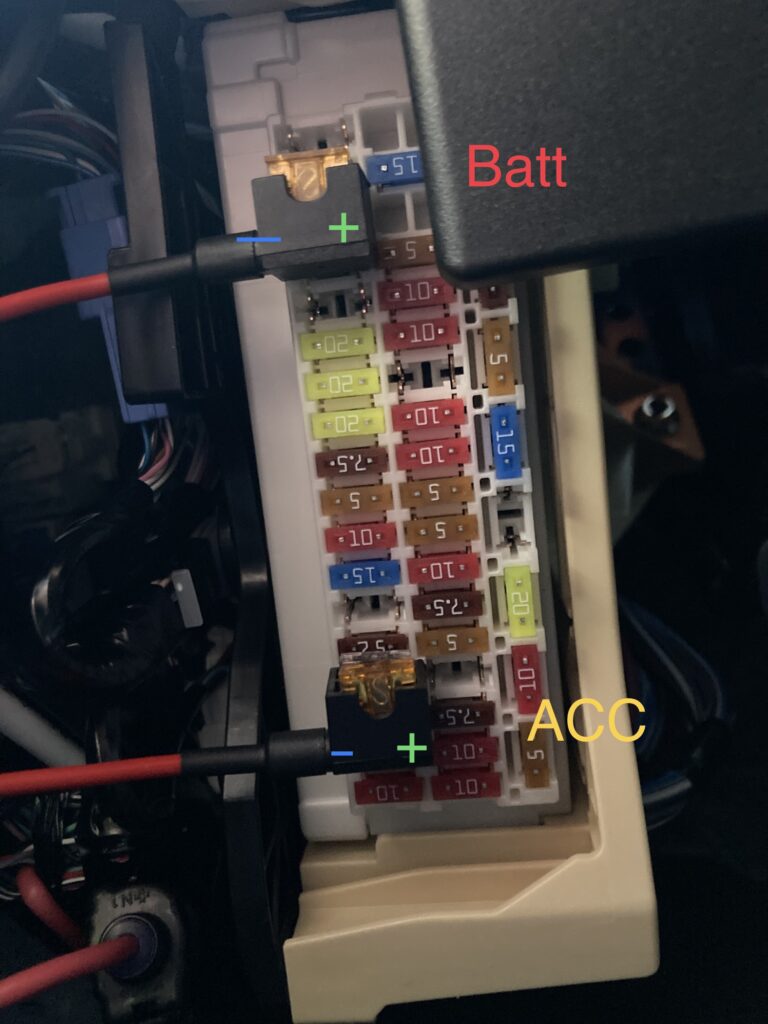
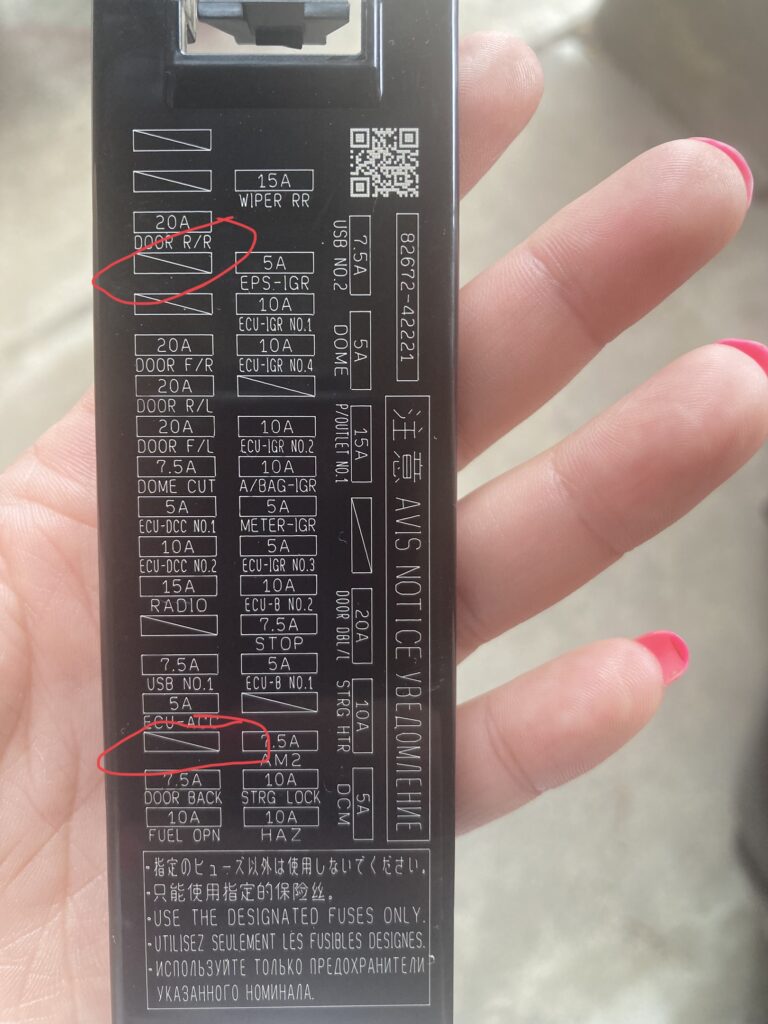
- I wired directly to the fuse instead of using fuse taps. Notched the side of the lid to allow for the electrical wire to have room to exit the fuse box. Wiring to the fuse allowed me to keep the fuse lid in place.
- The static clean plastic does in fact work on tinted glass!
- Do not install the rear camera over a window defrost heating element.
- Mount cameras in a clear clean view area where the windshield wipers clean.
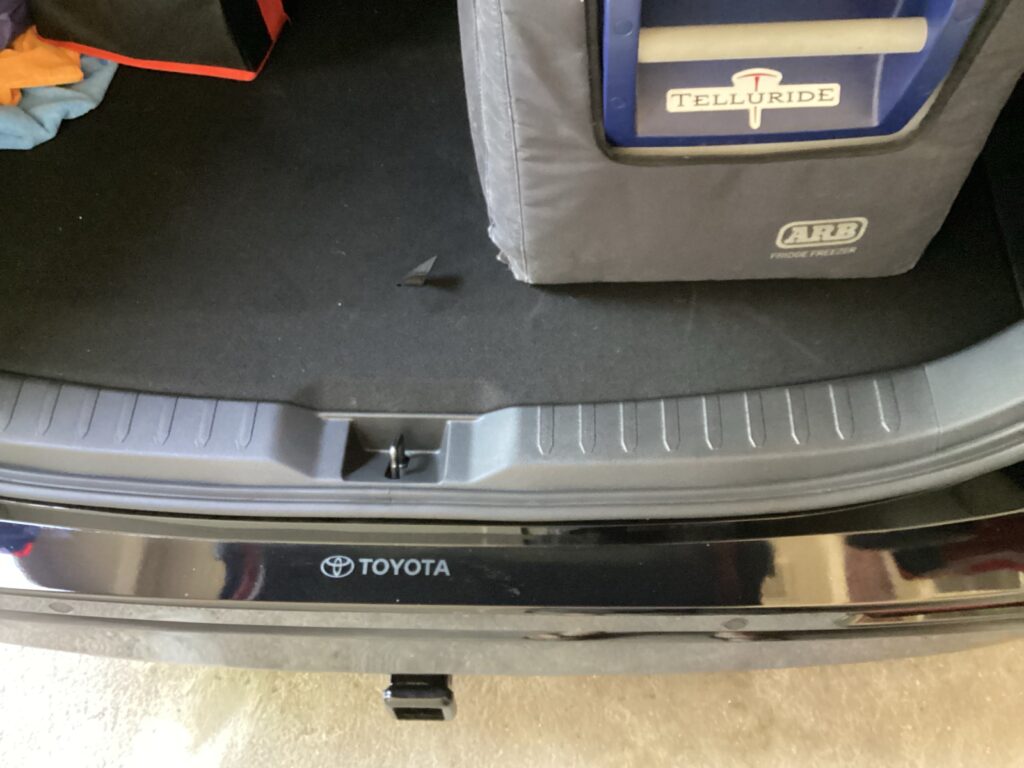
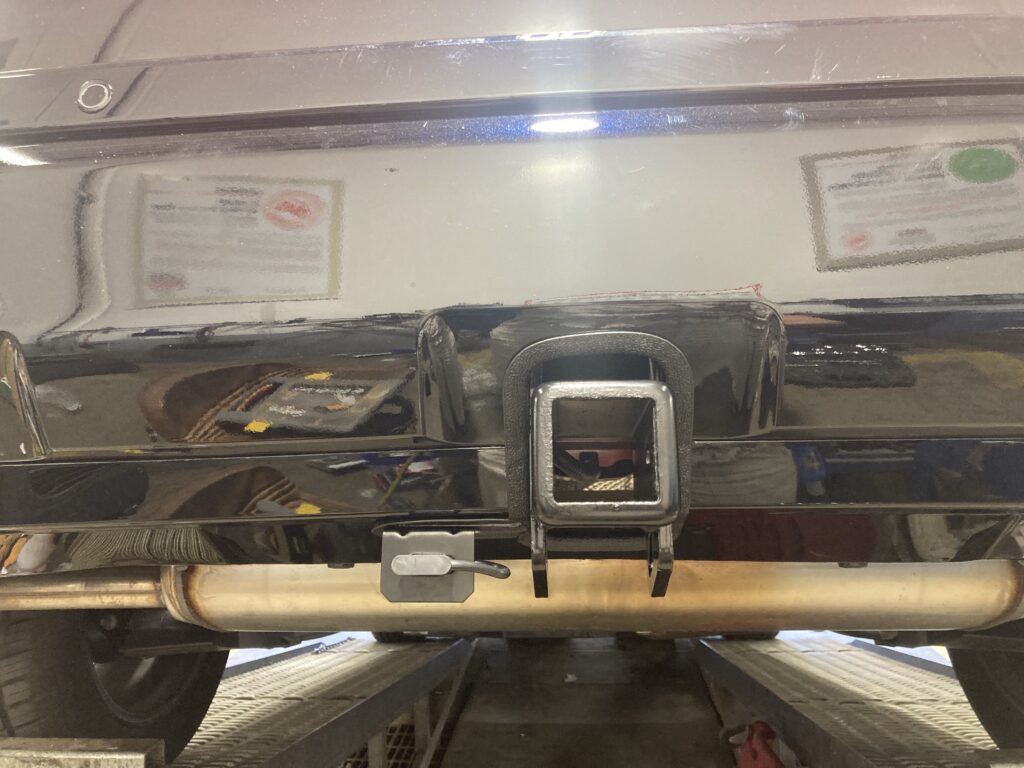
Tow Hitch
The OEM tow hitch is a confounding modification because a lot of installation shops and Toyota dealerships refuse to install it a) because they are afraid of cutting the bumper or b) they want to completely remove the kick sensor. Removing the kick sensor is unnecessary.
- Begin by telling the installer to ditch the included bumper template because it won’t be accurate.
- Cut the opening with rounded corners
- Make the hole around the receiver as tight as possible.
- Give them this image for preserving the kick sensor.
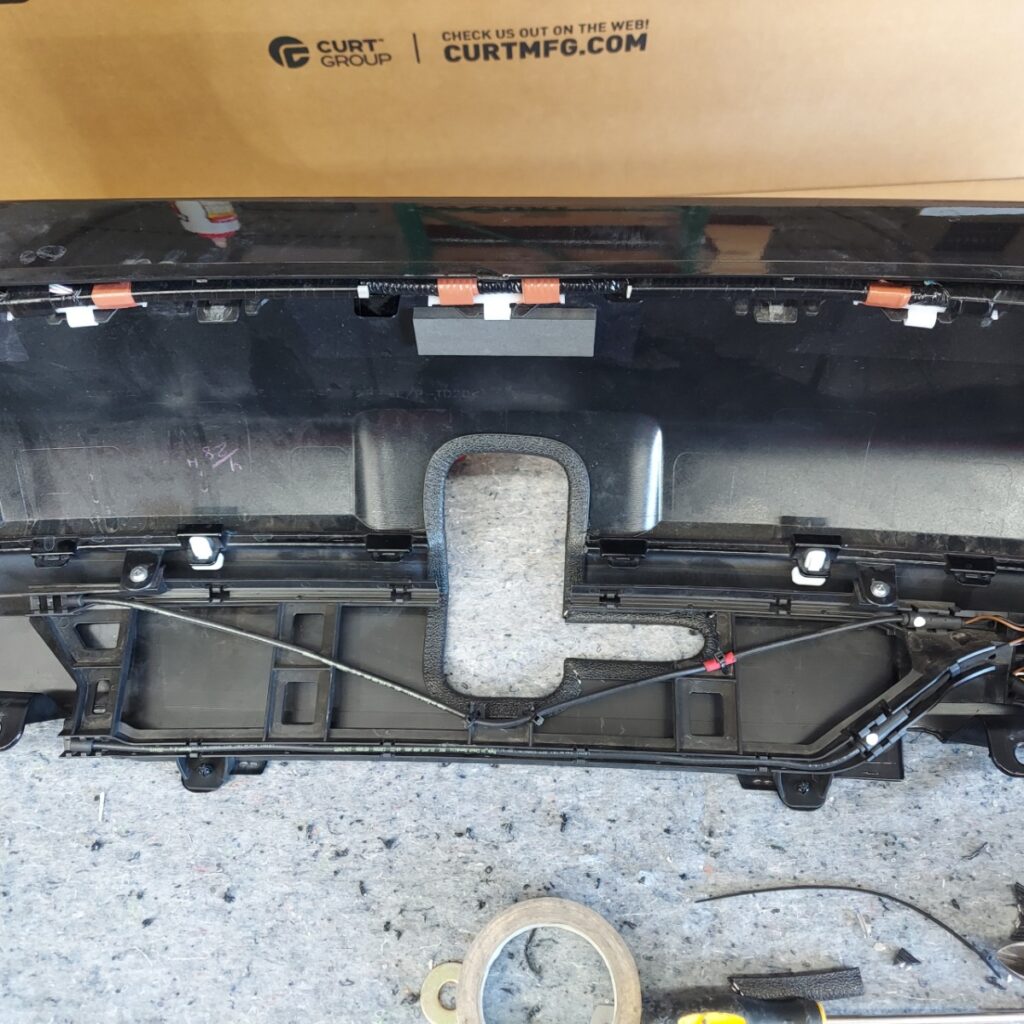
The bumper will need to be notched in 2 locations.
https://youtu.be/Mh7MDqK7Qbg– go to 6:30 and watch for the cut out notches.
Next is uncharted territory and there aren’t any YouTube videos or online guides.
The next few mods took a lot of work, research, and lastly trial and error for me to make happen. These require the use of lot of tools and equipment such as a sewing machine, trim removal kit, a heat gun, electrical crimpers, etc..
Seat Organizers
I found these at ikea and they work great as under seat organizers. I put these under the front driver and passenger seat but they will also fit under the back of the driver and passenger seat as well.
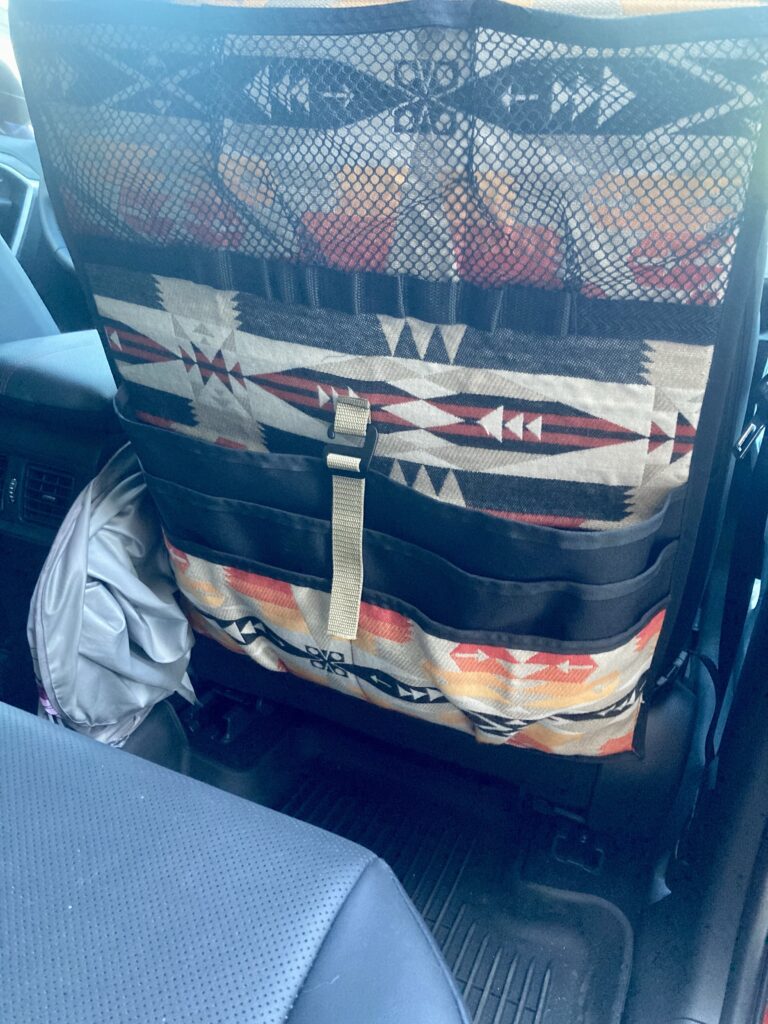
Pudda Basket ❤️

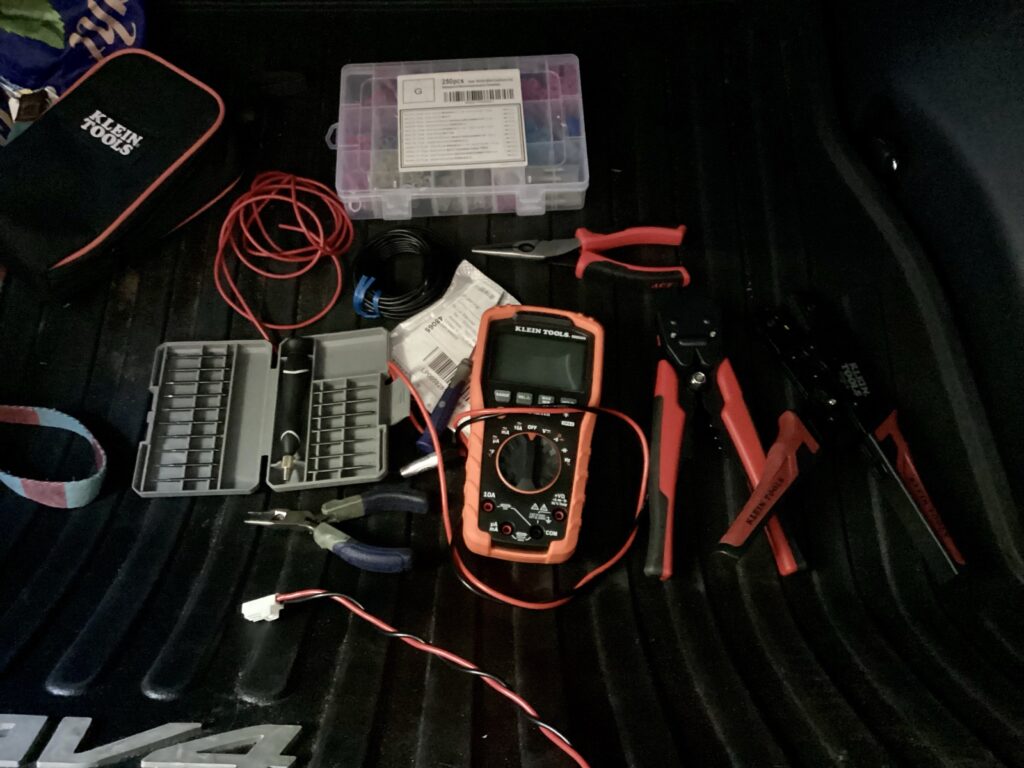
These organizers I made myself and are now FULL of car essentials like fuses, flash lights, road flares, safety jacket, and so much more. I made these using Pendleton upholstery grade fabric and cordura . I followed my own guide on making these.
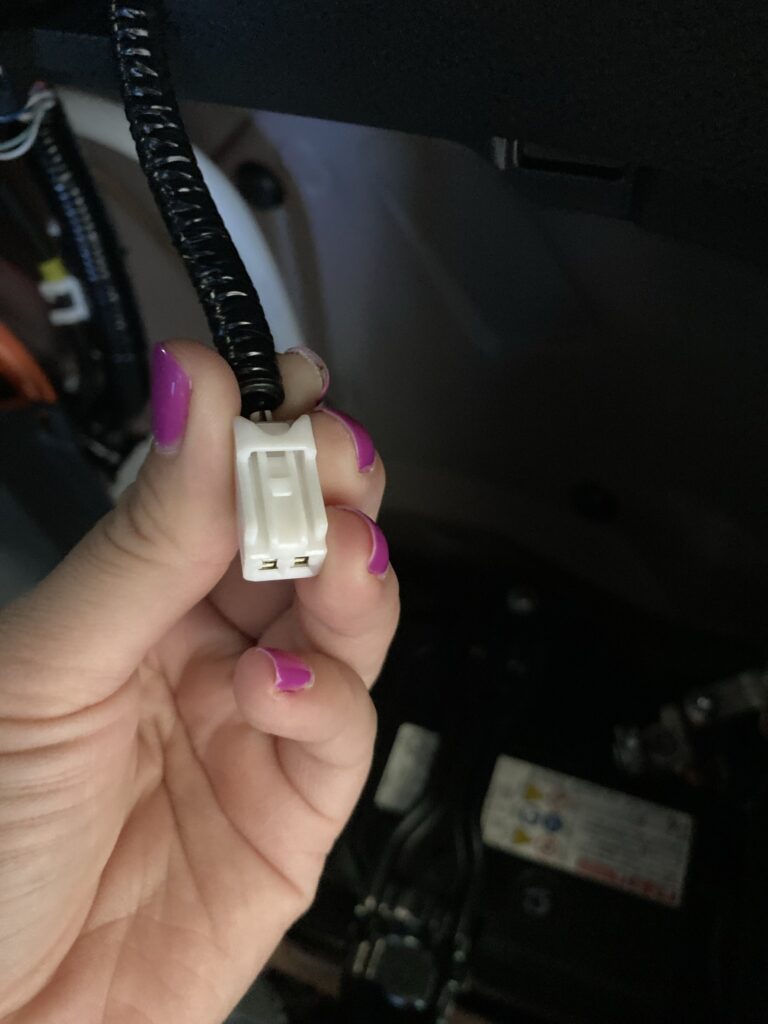
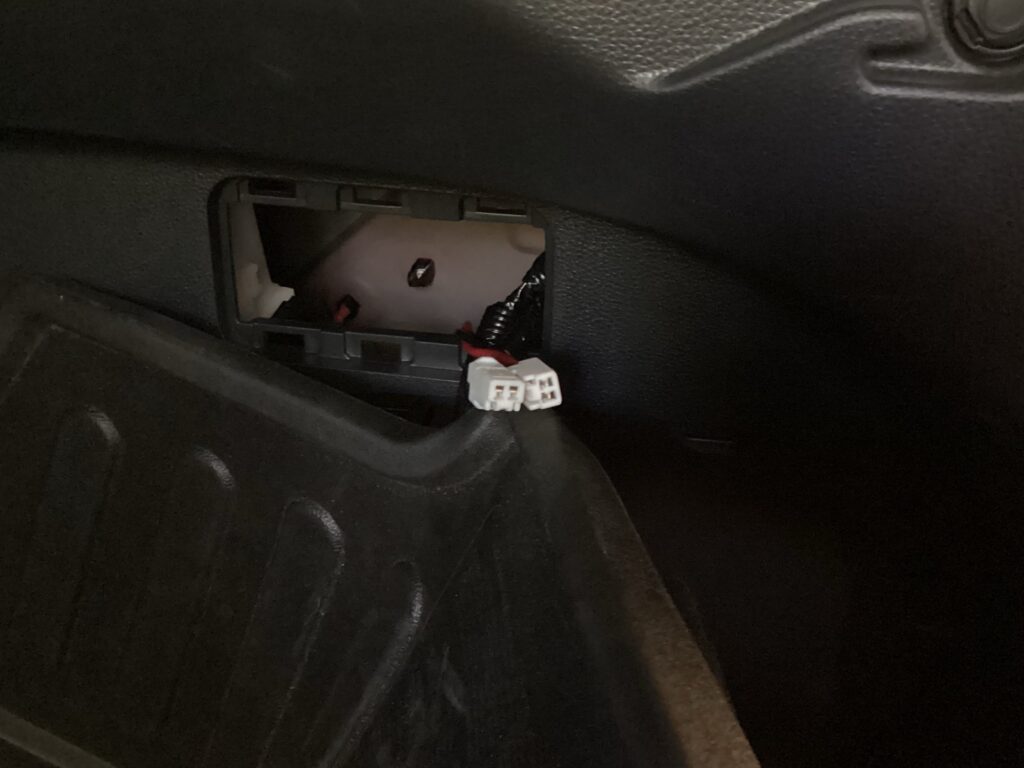
Rear Cargo 12v Constant Power
These next few mods… were a PITA and didn’t go as fast as I expected them to, Despite having all of the necessary tools. I would run into unexpected issues that would take me hours or days to overcome because I needed parts or to modify a terminal crimp connection or two.
For this I Used OEM electrical connectors so that I could easily unplug the existing 12v Female power outlet and plug in my wire harness and connect it via an inline fuse wired directly to the 12v battery. I used 16 or 14 gauge electrical wire and a 10amp rated inline fuse holder.

Having a constant rear 12v allows me to travel with peace of mind using my 12v ARB fridge. We have been traveling with this fridge for 9 years now and it’s actually in use right now as a spare freezer in our garage.
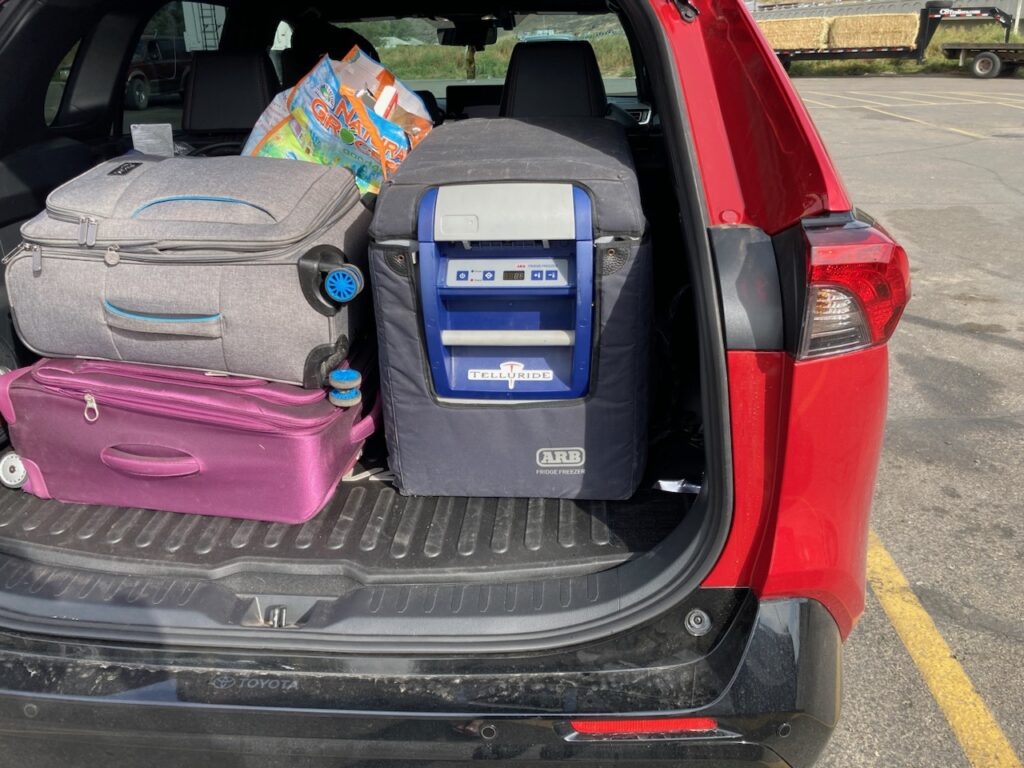
I have 12v constant power wired in our 96 Land Cruiser and our Audi came standard with a rear cargo constant powered 12v power port. The key to having a successful rear 12v powered outlet is to use non parasitic draining power outlets and switches. For example a 12v outlet with an LED light could possibly lead to draining the 12v battery or the installation of an inline rocker switch with built in light can also lead to draining the 12v battery.
⭐️ Another key takeaway here is to never have the vehicle off and leave anything plugged into the 12v constant power for longer than an hour or two. If I were going to use this for camping I would wire a solar panel plug to the battery to keep it charging while parked.
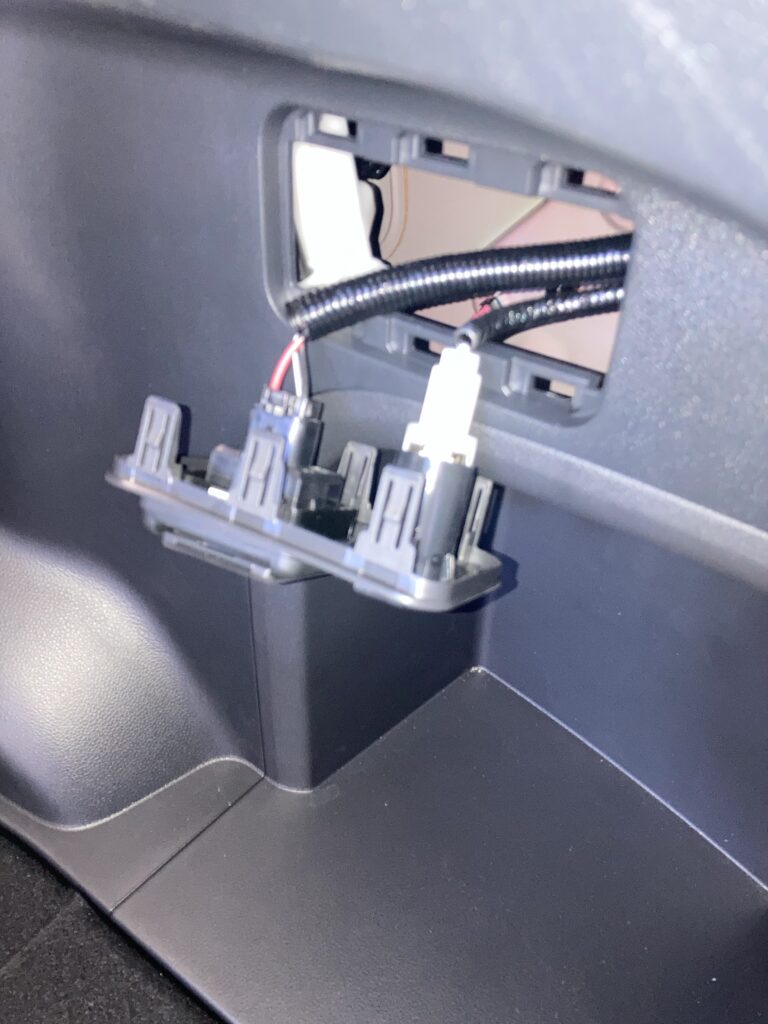
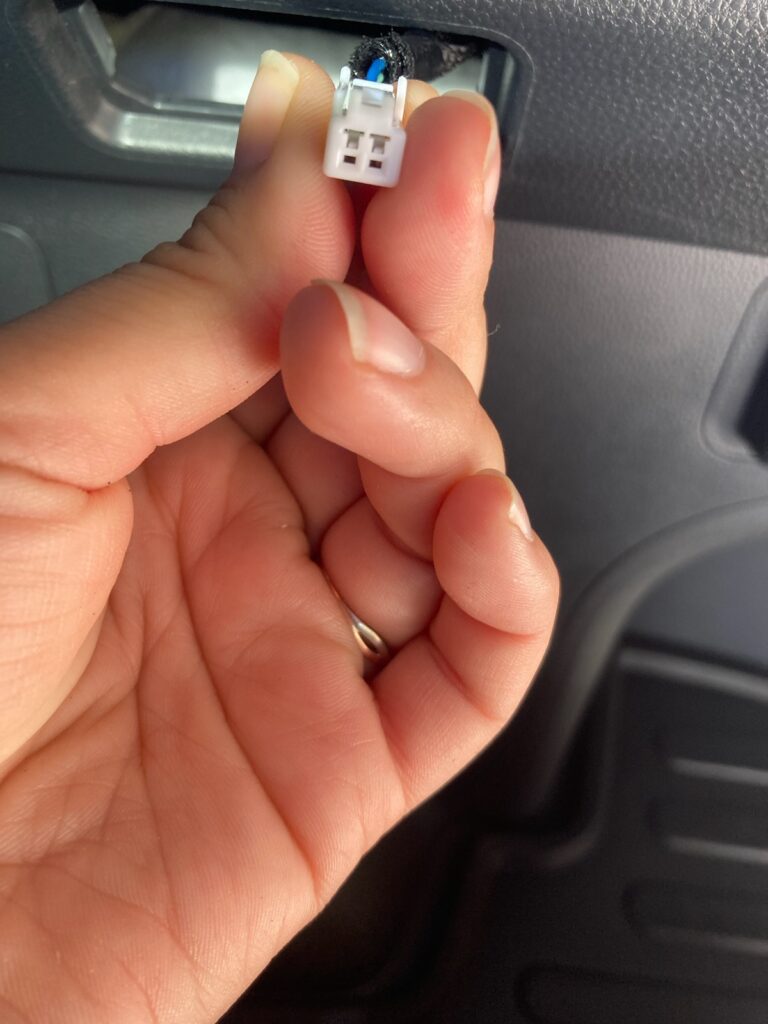
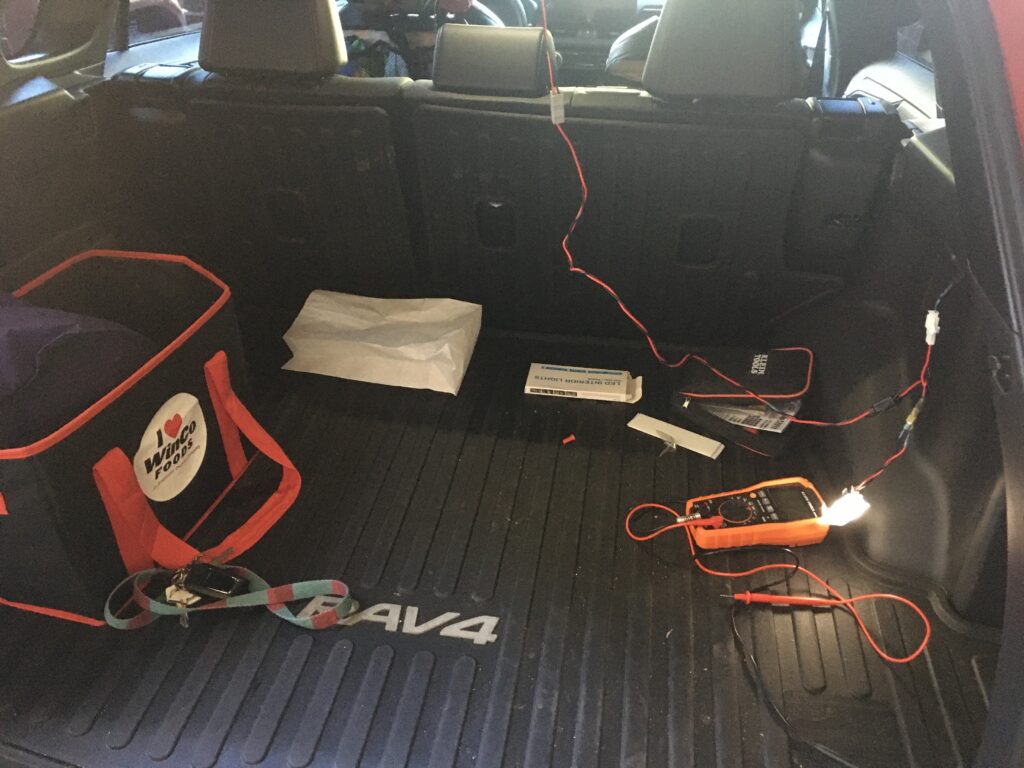
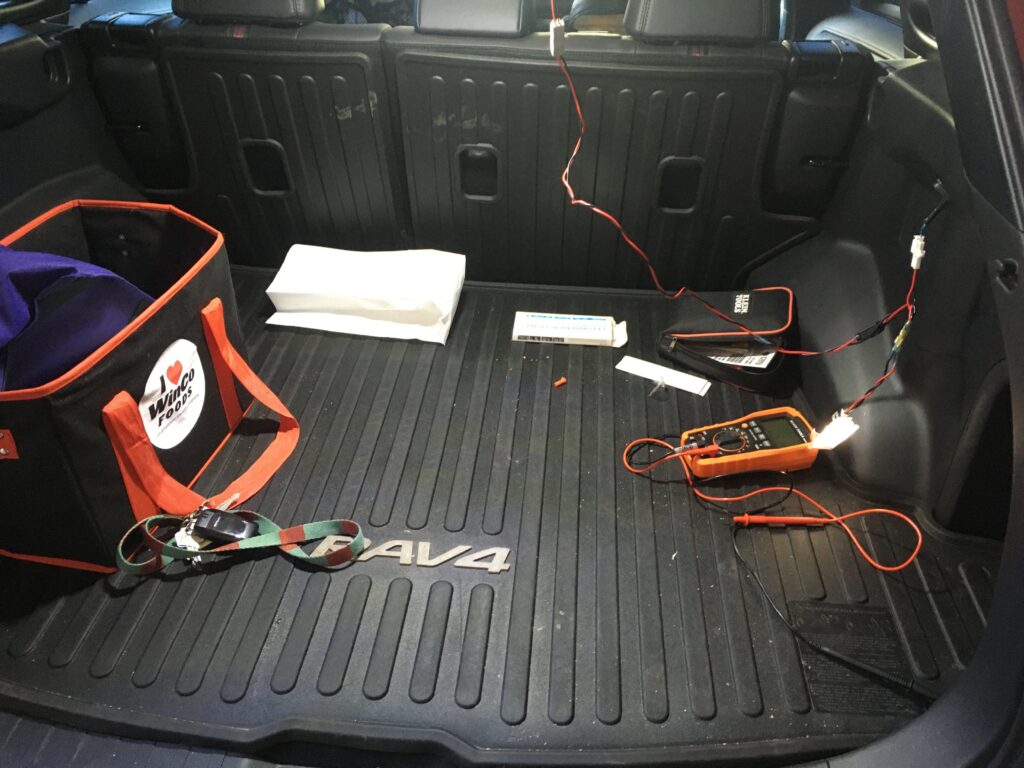
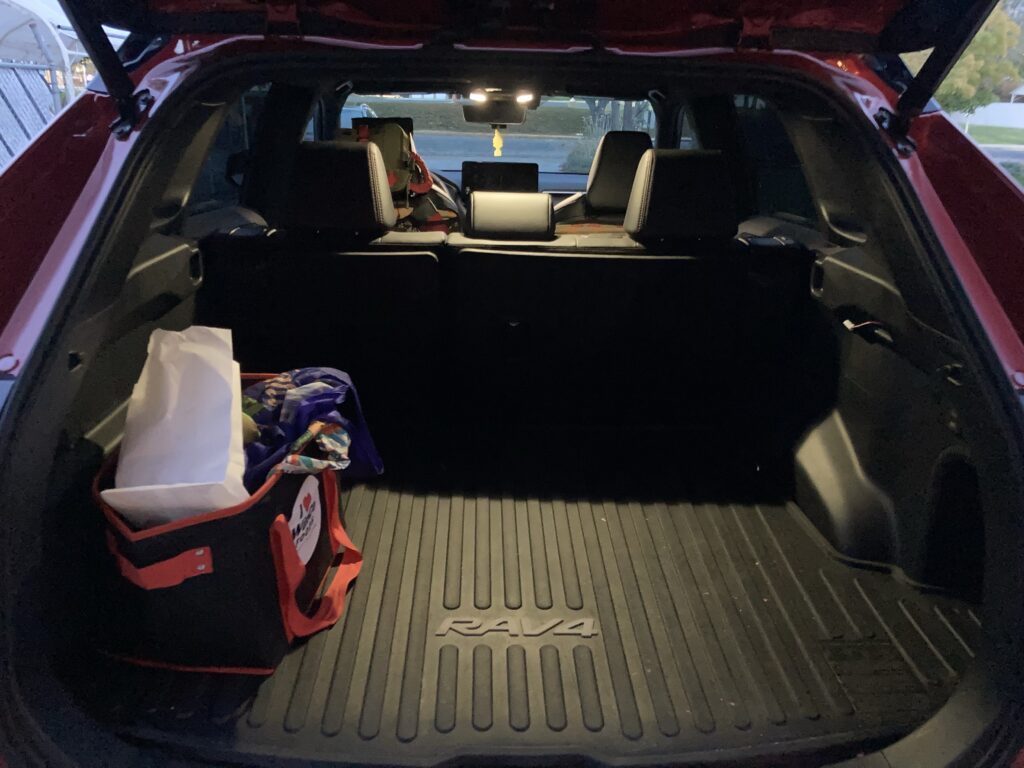
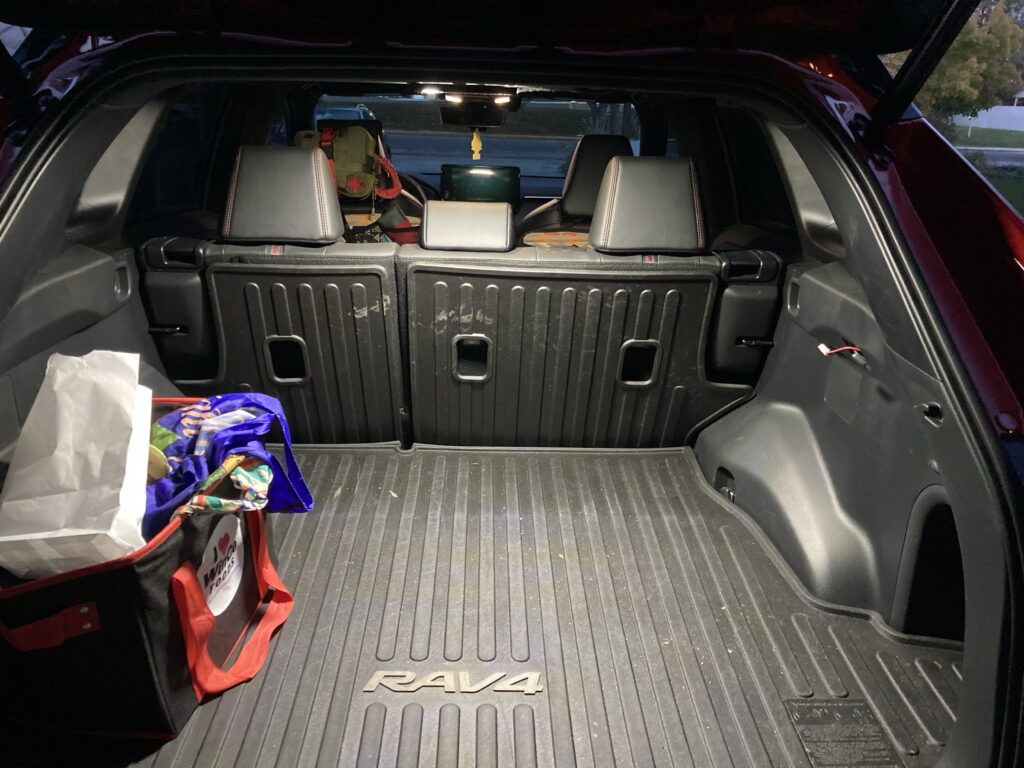
Rear Cargo Dome light
⚠️The connectors used for the 12v constant power are different than what are used here for the installation of additional lighting.⛔️
As we all know the rear cargo area is horrifically dark and there was only one existing lighting kit on the market that involved fishing the electrical wire through the rear hatch and plain and simply that just sounded and looked ridiculous to me. So I found a better way!
$2.75 4ft 16 gauge wire
$4.00 oem connectors
$7.00 for the light
Rear Cargo light Part# 81360-78020.
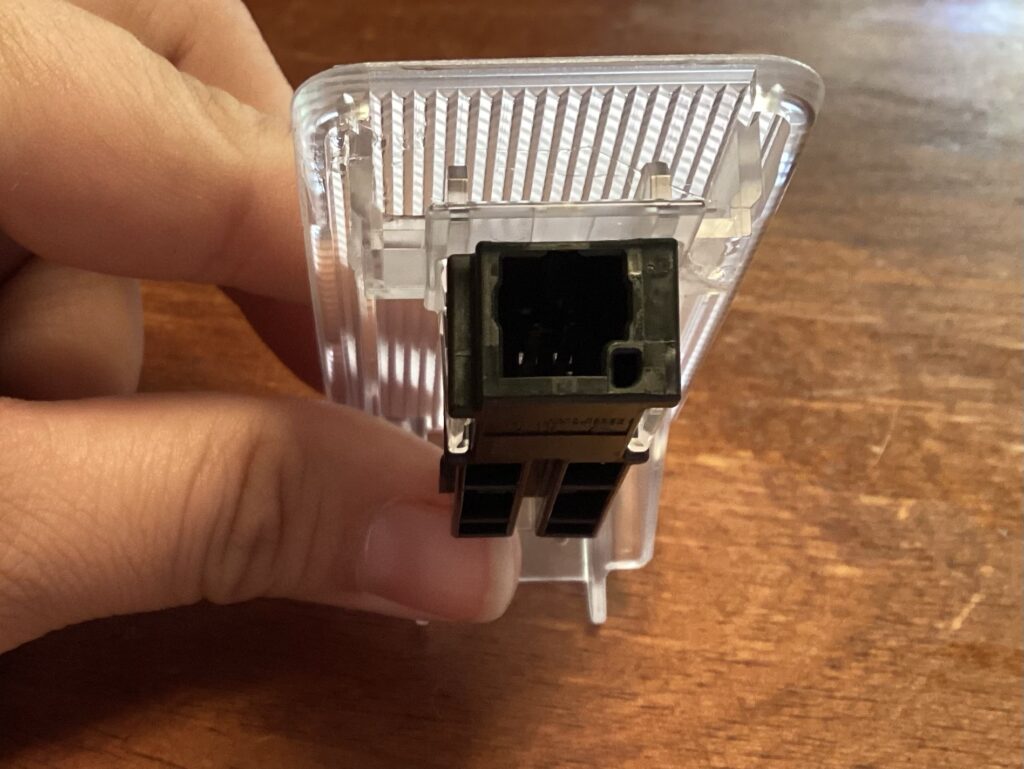
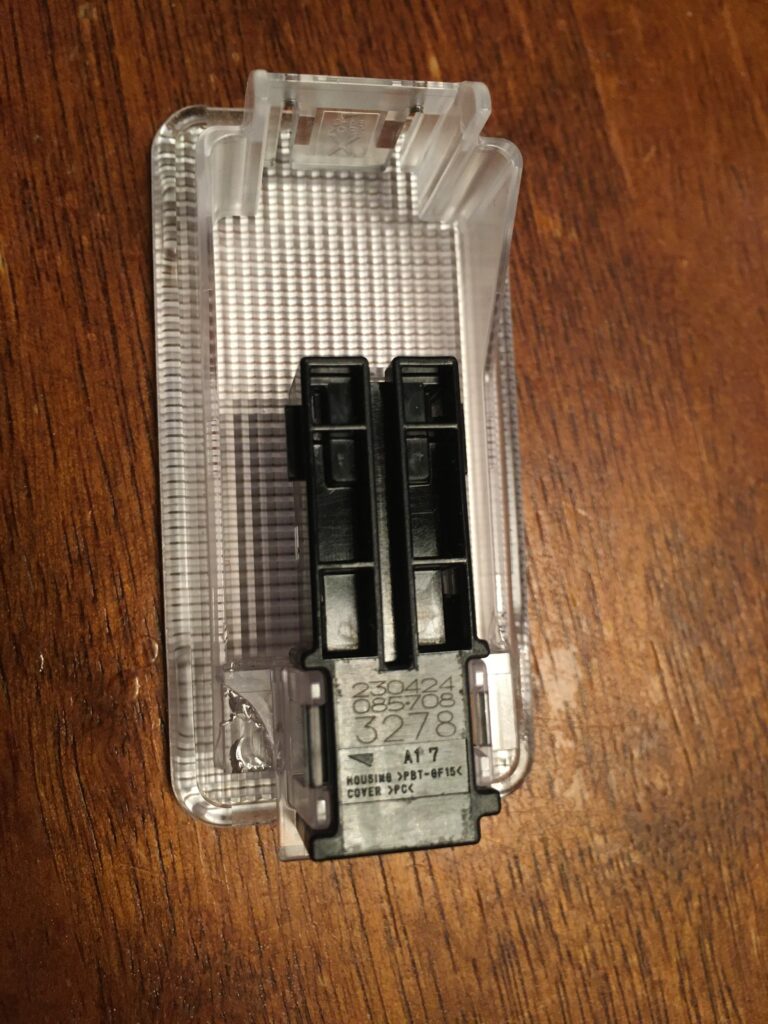
⛔️⚠️ When removing the rear cargo light be careful to not break it.. like we did. It needs to be removed from the left side.
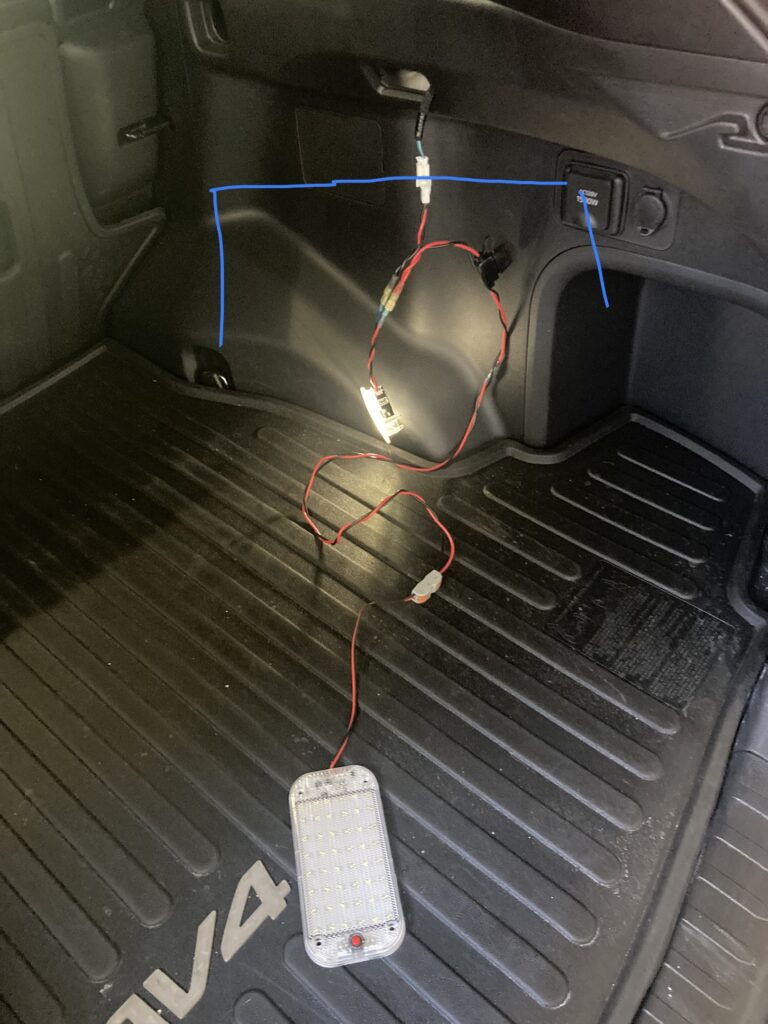
I created a plug and play OEM electrical connector wire harness that plugs into the rear cargo light for power and then the electrical runs up the trim and comes out of the middle headliner clip area.
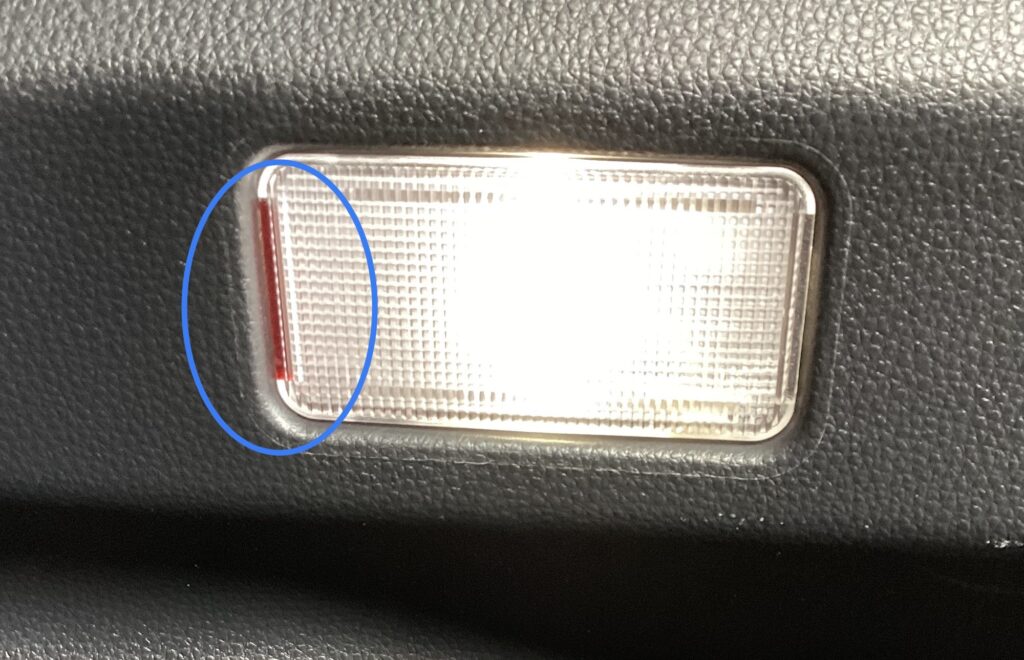
⚠️⚠️⚠️⚠️ to do this took a giant learning curve because the lighting electrical does not behave normally. I couldn’t get the electrical voltage to read on my multimeter until I put the vehicle into “room mode”. Once I did this I was able to get an accurate voltage reading to determine which wire was + and which was -. The dark blue is + and the turquoise is -.
- 48LED 12V-85V LED Car Vehicle Interior Dome Roof Ceiling Reading Light Lamp Interior Car Roof Light with On/Off Switch car dome lights interior https://a.co/d/56dQ0hd
- https://www.aliexpress.us/item/2251832812734800.html?spm=a2g0o.order_list.order_list_main.15.4a501802chL05h&gatewayAdapt=glo2usa&_randl_shipto=US
- 18-16 gauge electrical wiring will work but 18 is probably a better fit for the terminal pins.
- I made a Y harness using 4ft off electrical wire that the oem light plugs into. The other terminal plugs the vehicle 12v oem cable connector into it. From here the power runs up to the dome light via an inline 3amp fuse.
- Inline fuse holder- for continuity I suggest getting an atm-lp mini blade fuse holder because this is the same size fuses found in the vehicle.
I highly recommend working with 18 gauge electrical wiring if you can get your hands on it. It will be much easier crimping the OEM terminal pins however working with it can become increasingly frustrating as it’s so thin and small it is prone to crimping errors.. if you can order the correct terminal pins ahead of time that can also save a bit of needless frustration. fru fr.
Power Folding Side Mirror Kit- Aliexpress/Cartihome
The kit is not plug and play compatible with the Rav4 prime XSE Premium package because of 2 major reasons.
- The 2022+ Prime mirror control switch was changed and is not compatible with the bezel and electrical rocker switch button inlay. These can be modified to work.
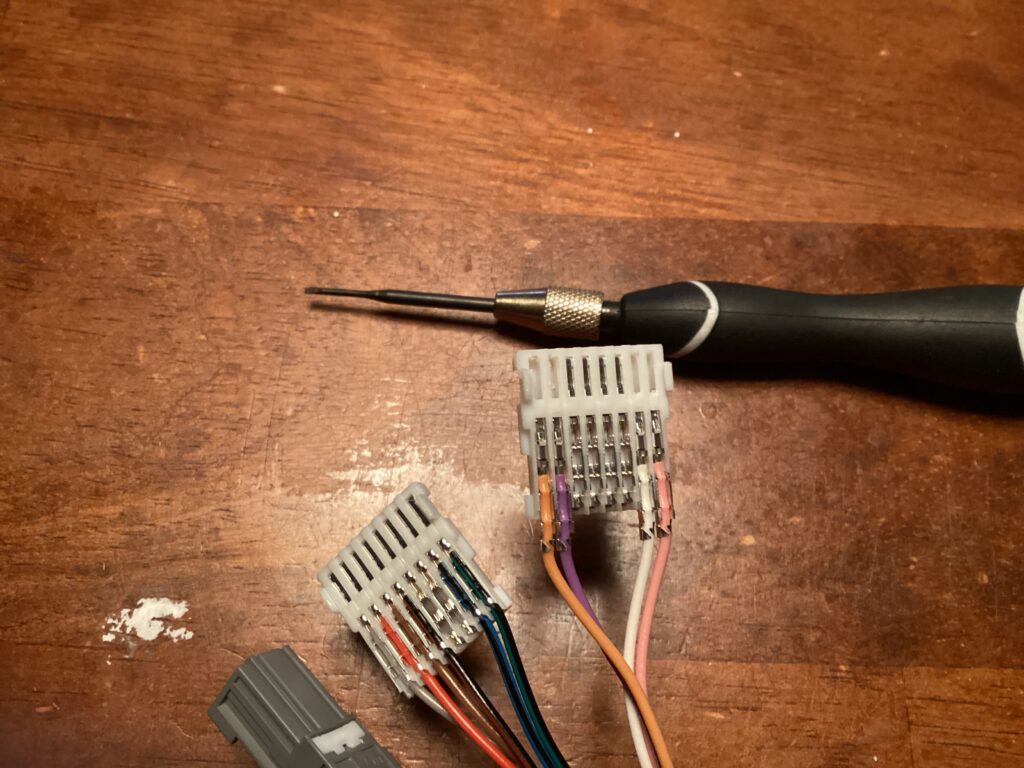
- The 360 camera connector is too large to remove through the housing and there is no way to de pin it so it needs to be cut and soldered in order to. Do this install.
If you still wish to move forward with this upgrade you can purchase the kit from
- Aliexpress
- Cartihome
When the package arrives inspect it and make sure all of the bolts are present. I was missing a bolt.
This is not a complete guide and I will only highlight what isn’t mentioned anywhere else.
Interior Switch
The blue circles are where the button inlay are supposed to latch onto but they do not. The center yellow is where you want to center the inlay. First take 2 small strips of electrical tape and apply them just below the electrical ribbon on the black button housing then wrap it around to the other side in the same area. Make sure to not go higher than the cut out for the electrical ribbon.
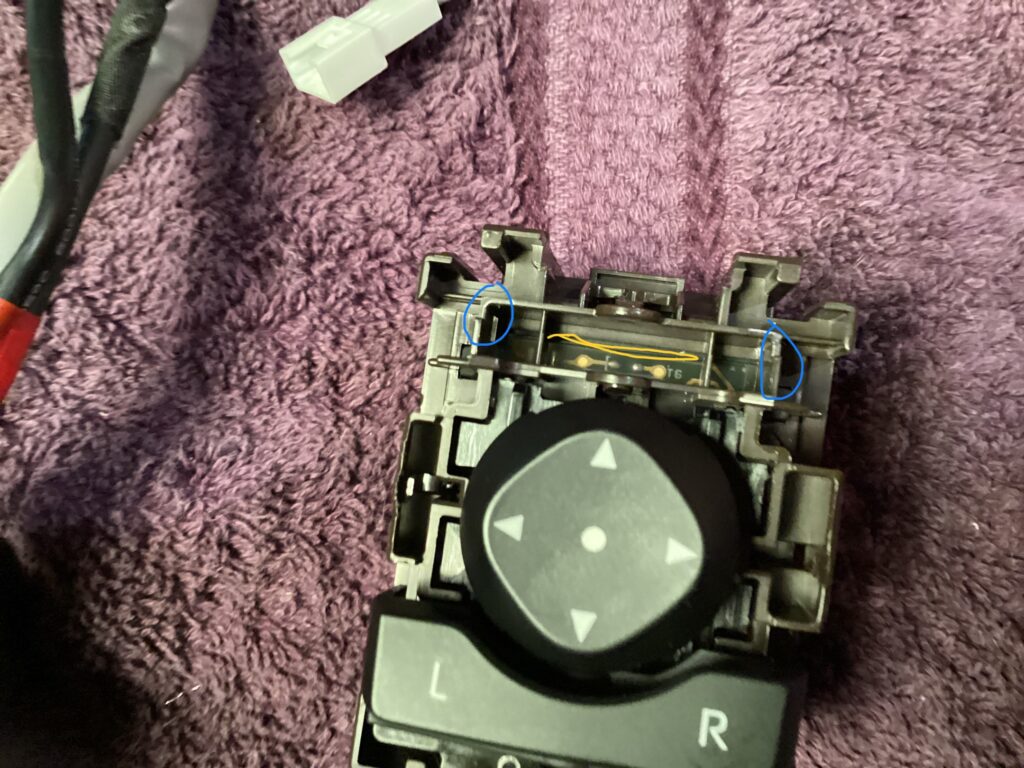
The inlay buttons should just set down into the housing and not move.
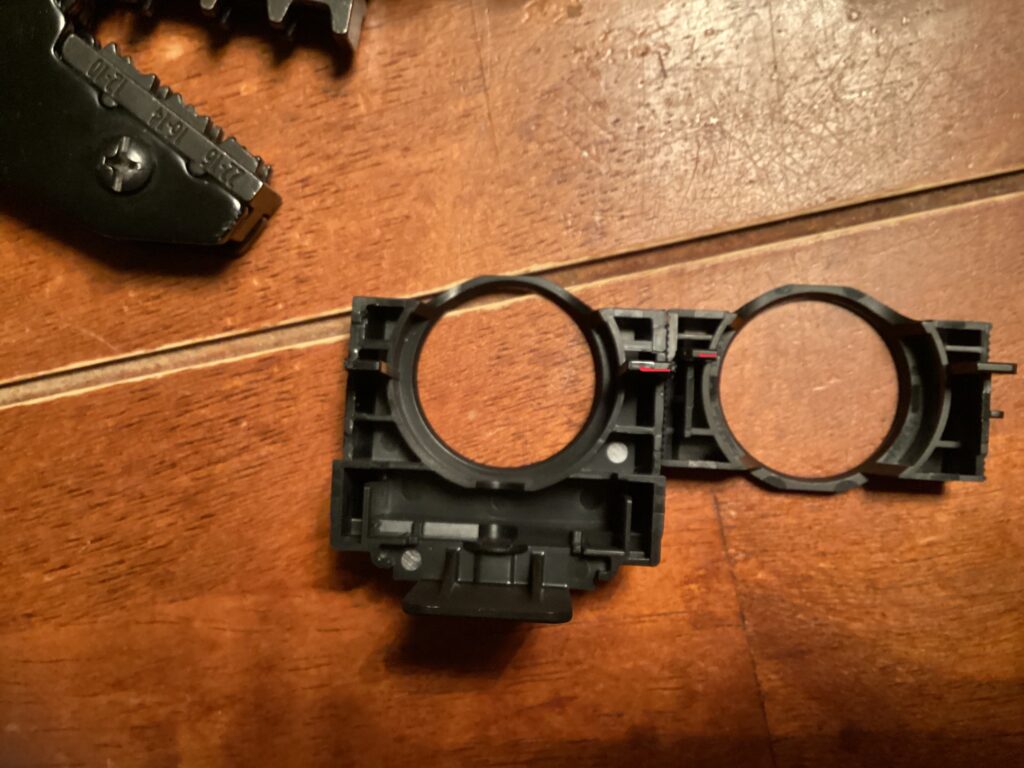

longer fits into this space.
⚠️ When removing the door panel do not remove the master control switch module like done in the YouTube video @ 6:15 into the video Power Folding Mirror Install🙈😆.. this only guarantees you will break a clip. Instead leave the controls in place, unscrew the door screws to remove the door panel, and unclip the door panel, with the window rolled down have a second person hold the door panel while you stand on the exterior side of the door so you can unhook the door latch and lock and then unclip the electrical connections from the power window switch, memory seats, etc.. Once the door panel is removed you can then easily access the clips to remove the control switch module if needed and without the danger of ruining the clips.
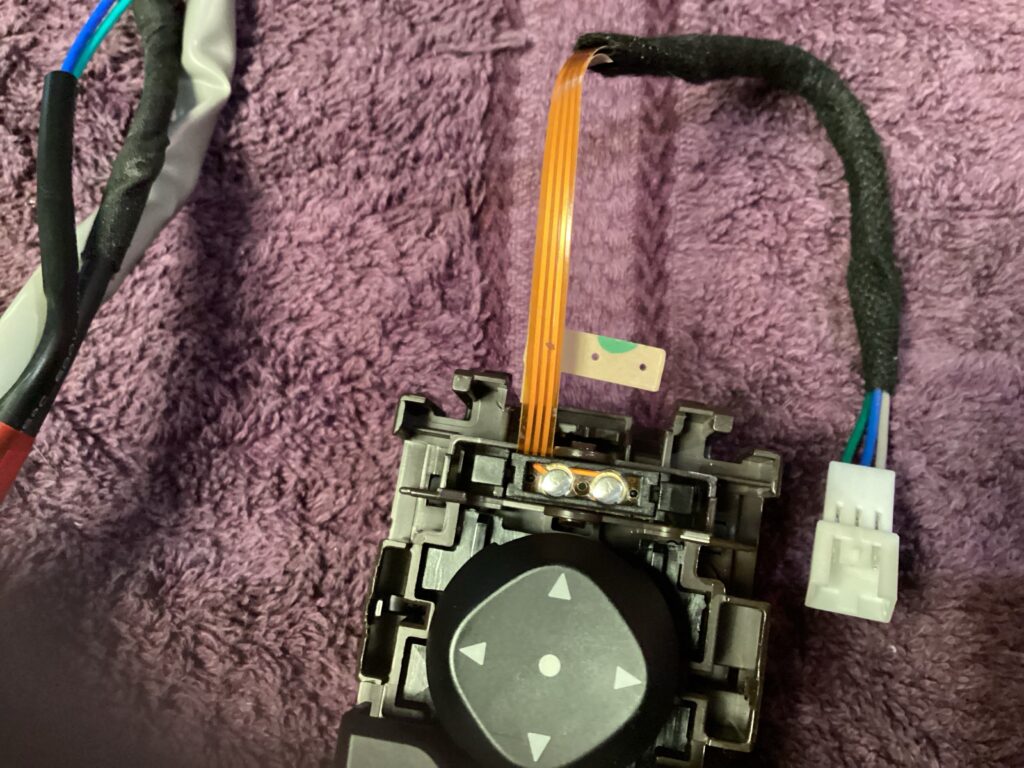
⚠️ There are 3 mounting bolts holding the side mirror to the vehicle. There is also a plastic white pressure clip holding it in place. With one person holding the mirror secure, depress the white clip and the mirror will release from the vehicle.
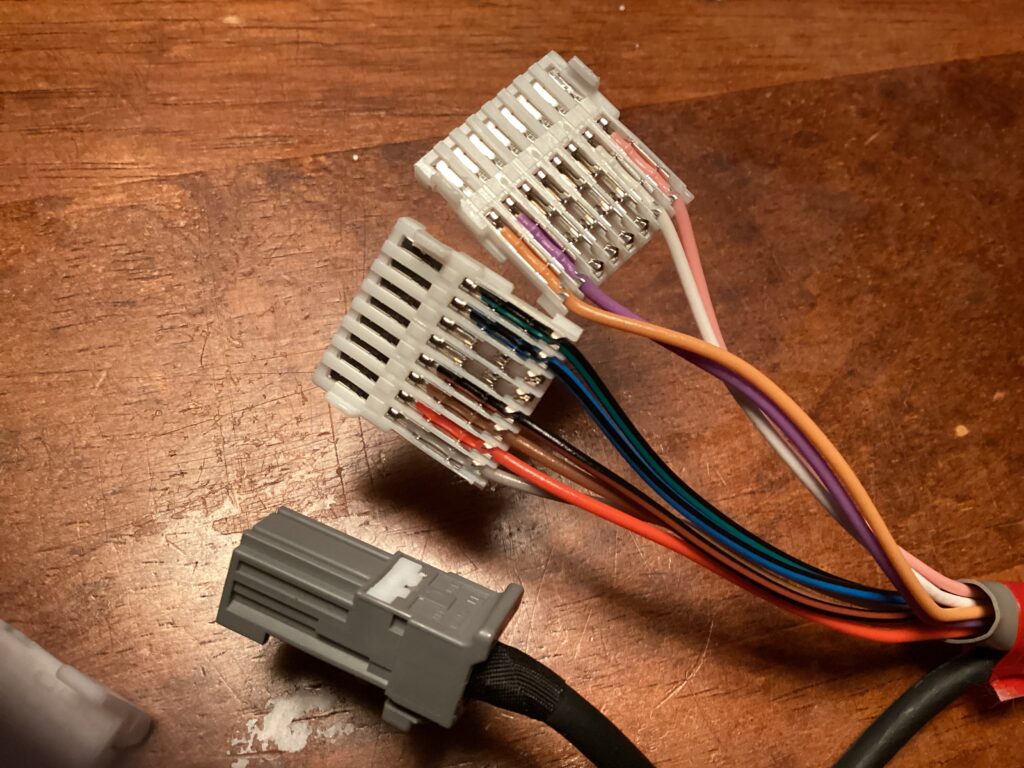
Next depin the white electrical connector.
The power folding mirror kit comes with 6 new screws so you will have 6 OEM screws (12 total from both mirrors) left over after putting the new motor into the housing.
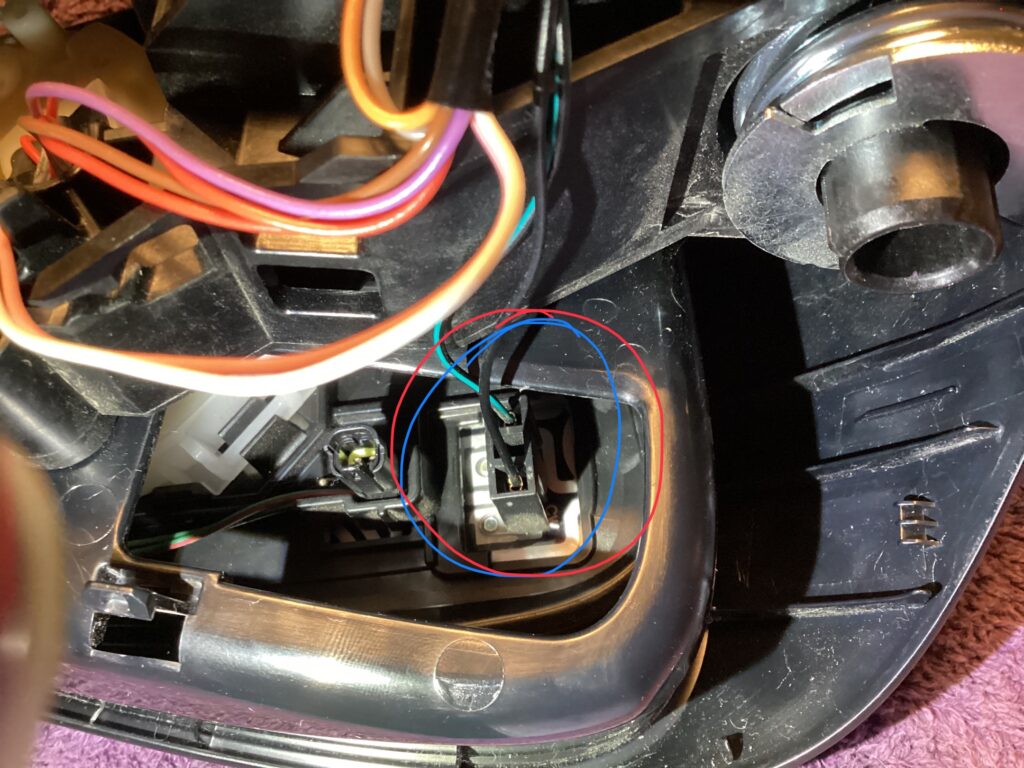
⚠️ The black 2 prong connector, my arch nemesis, was DEFEATED with the use of a flat metal spudger from my iPhone repair tool kit. By placing the spudger under the connector and applying equal upward pressure alternating back and forth between the spade connectors it came free.
⛔️ Make sure to remove the screws from the metal housing before piecing things back together.
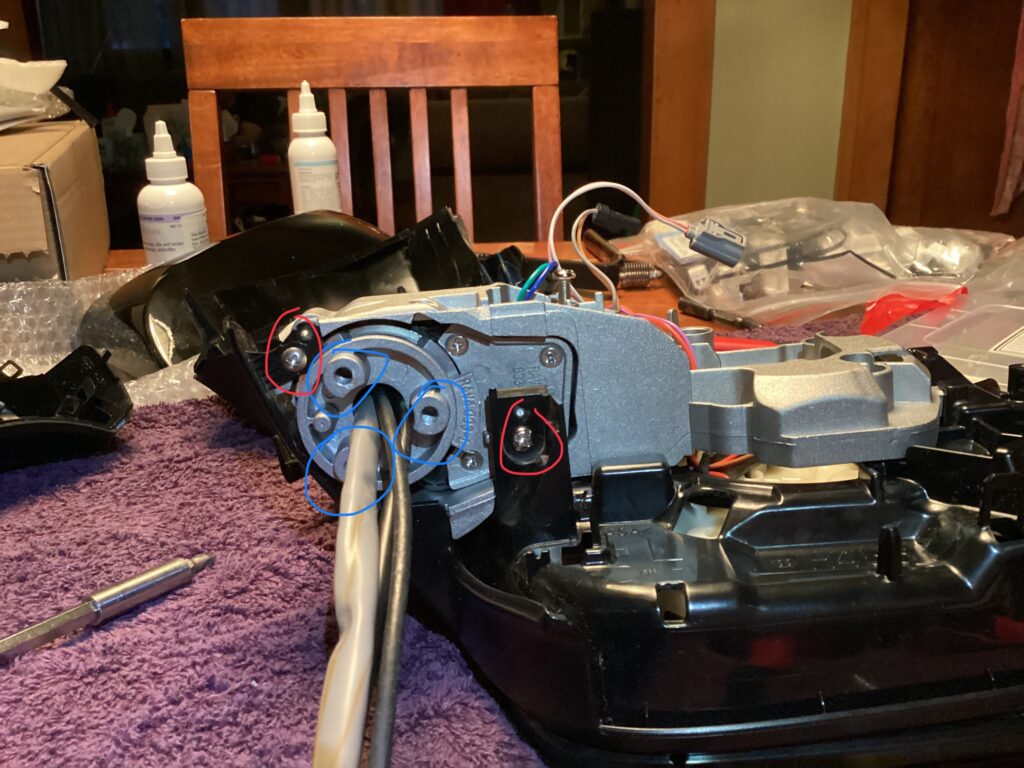
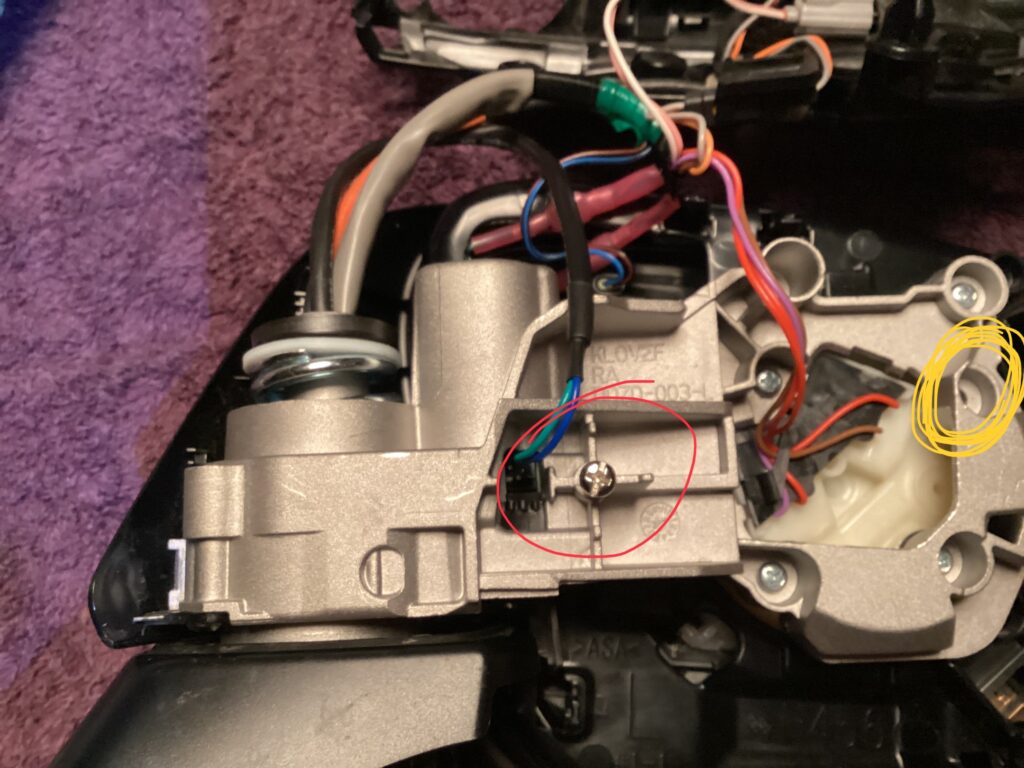
Remove the screw in the red circle before reinstalling the plastic trim. The yellow circle is where I forgot to put a screw. This area gets covered bythe plastic trim so do not forget it.
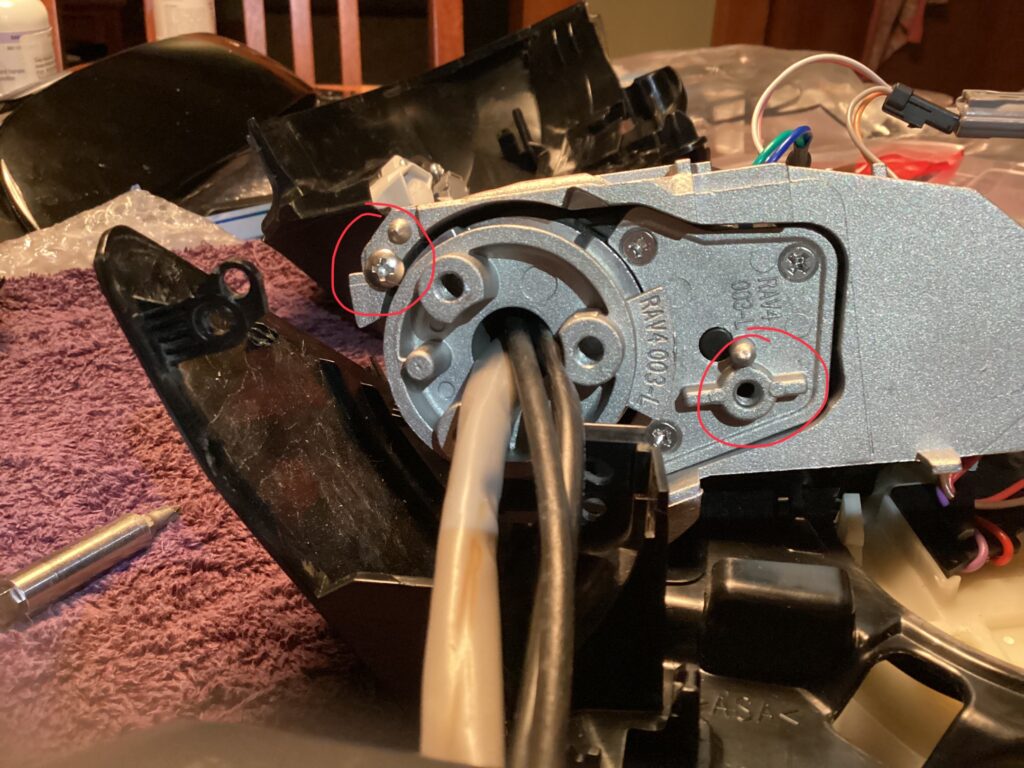
These screws are not identical. So be careful not to lose them or put them back into the wrong spot and strip out there hole.