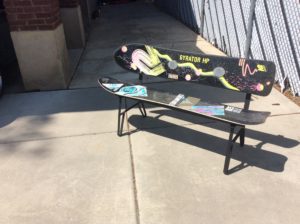
Rustic Living Outdoor Snowboard Bench

I splurged on this project and ordered a snowboard kit instead of fabricating my own frame. I wanted it to be a surprise for Eric.
This is an EASY afternoon project.
Tools
- Cordless drill with Philips head and drill bit
- Level
- Clamps
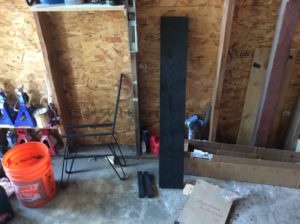
Materials for outdoor bench
- 2 old snowboards
- (1) 2x10x8 lumber (We used some old 2×6 because it is what we had)
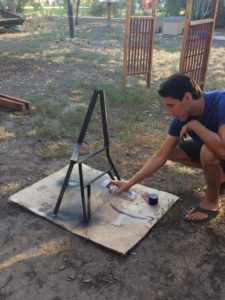
- (1) can of Exterior paint and primer in one spray paint (we used black)
- (1) Rustic Living Snowboard Kit
- 80 grit or similar sand paper
Kit includes
- 20+ black wood screws to secure wood to the bench and snowboards to the wood
- (2) Wrought Steel Chair/Bench Frames
- (2) 2×2 Pieces of wood to secure the snowboard to the back of the bench
Step 1.) Order your Rustic Living Snowboard Kit
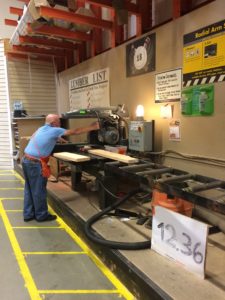
Step 2) Follow the instructions provided in the kit by measuring the underside of your snowboard base and multiply that by 0.74. and then cut your 2×10 to fit.

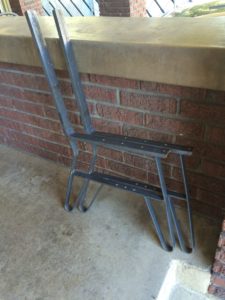
Step 4.) Flip the bench pieces upside down on top of your 2×10 and line up your holes so that all four are on the wood and the front of your board is flush with the steel frame. Drill your pilot holes and screw in the wood screws through the bench frame and into the wood.
Step 5.) Flip the bench upright and place the provided 2×2 wood pieces onto the upper part of the bench flush with the top. From the back side of the bench you can drill your pilot holes before putting in the wood screws.
Step 6.) Using your wood clamps secure the snowboard being used for the back piece to the 2×2 wood and bench frame so that you can level it out.
Step 7.) Use a nail and hammer to score the surface of the snowboard so that your drill bit wont slide out from under you when you begin to drill your pilot holes. Then secure it with the provided wood screws (we used 3 per side).
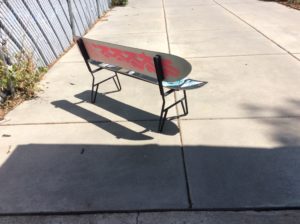
Step 8.) We then duplicated this process for the seat part of the bench.