New to Harvest Right Freeze Dryer – No BS
Preparedness
SHTF for me is if I am too tired to go to the store or cook 🤣 and or it’s a Sunday or Monday in Utah. Cuz life gets real when the restaurants are closed and you are hungry but too tired to go to the store for the missing ingredient to make dinner. Ok all kidding aside this is about getting ones self ready for the day that the FD arrives!
- Do you have the right location to set up a Freeze Dryer?
- Can you afford to install the necessary dedicated power breaker and circuit for the FD?
- Have you joined a Facebook Group for Freeze Drying?
Before Bringing Home a Freeze Dryer
So you decided to buy a Harvest Right Freeze Dryer (HR FD). The first place to begin is with the owners manuals which are your new best friends. YES you actually need to read them before using the freeze dryer for the first time. In fact maybe read them two to three times. I even recommend getting a second set of owners manuals to keep one with the machine and the other set on your coffee table or wherever you spend the most time in your house. In all honesty I like to keep a PDF version of all of my owners manuals downloaded to my IPad. The Fact is that you may actually have to perform repairs to this expensive appliance so get ready and don’t panic!
Harvest Right Owners Manuals PDF & Guides
⭐️✨Quick Tips and Guide Penn State University Extension Office✨⭐️
The freeze drying food guide is finally uploaded and I apologize for the images. Some of the pages images just would not scan and i believe it has to do with the reflective laminate on the pages.
- Owners Manual 5.0
- Owners Manual – 5.0.14- 5.0.16
- Software & Troubleshooting Manual
- Harvest Right Problem Diagnosis Guide
- Guide To Freeze Drying
- Bringing it Home
- Premier pump manual- this is one and the same Owners manual listed above
- Geowell Oil Free Scroll Pump Owners Manual
- Standard Pump–
Replacement Parts & Accessories
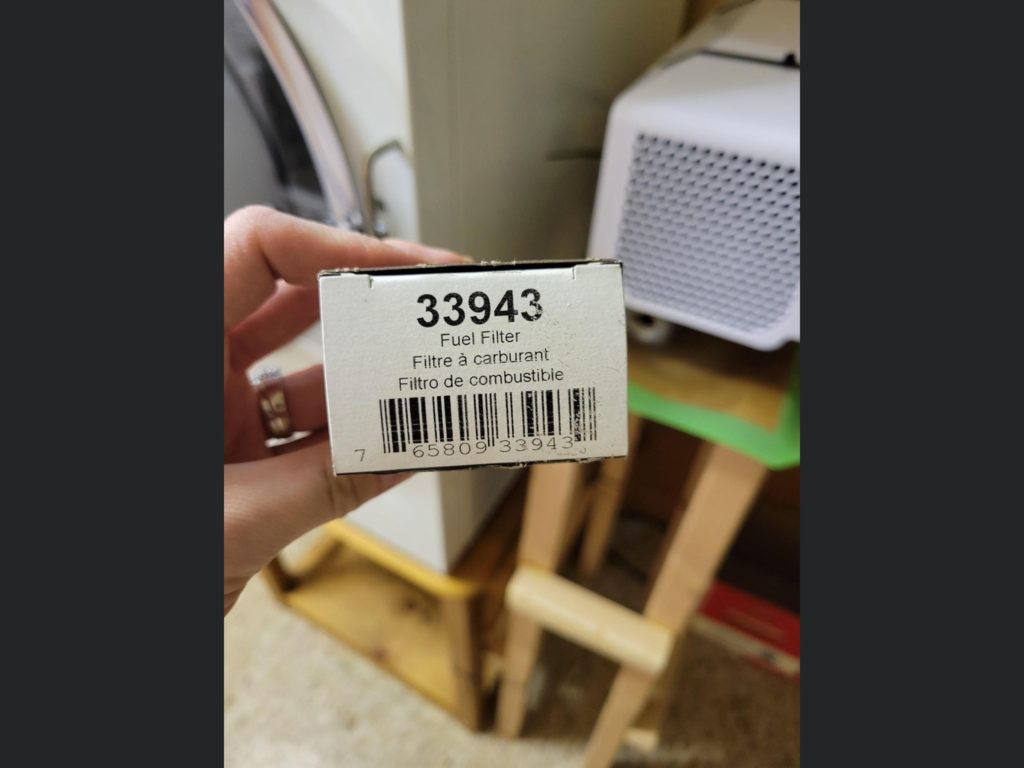
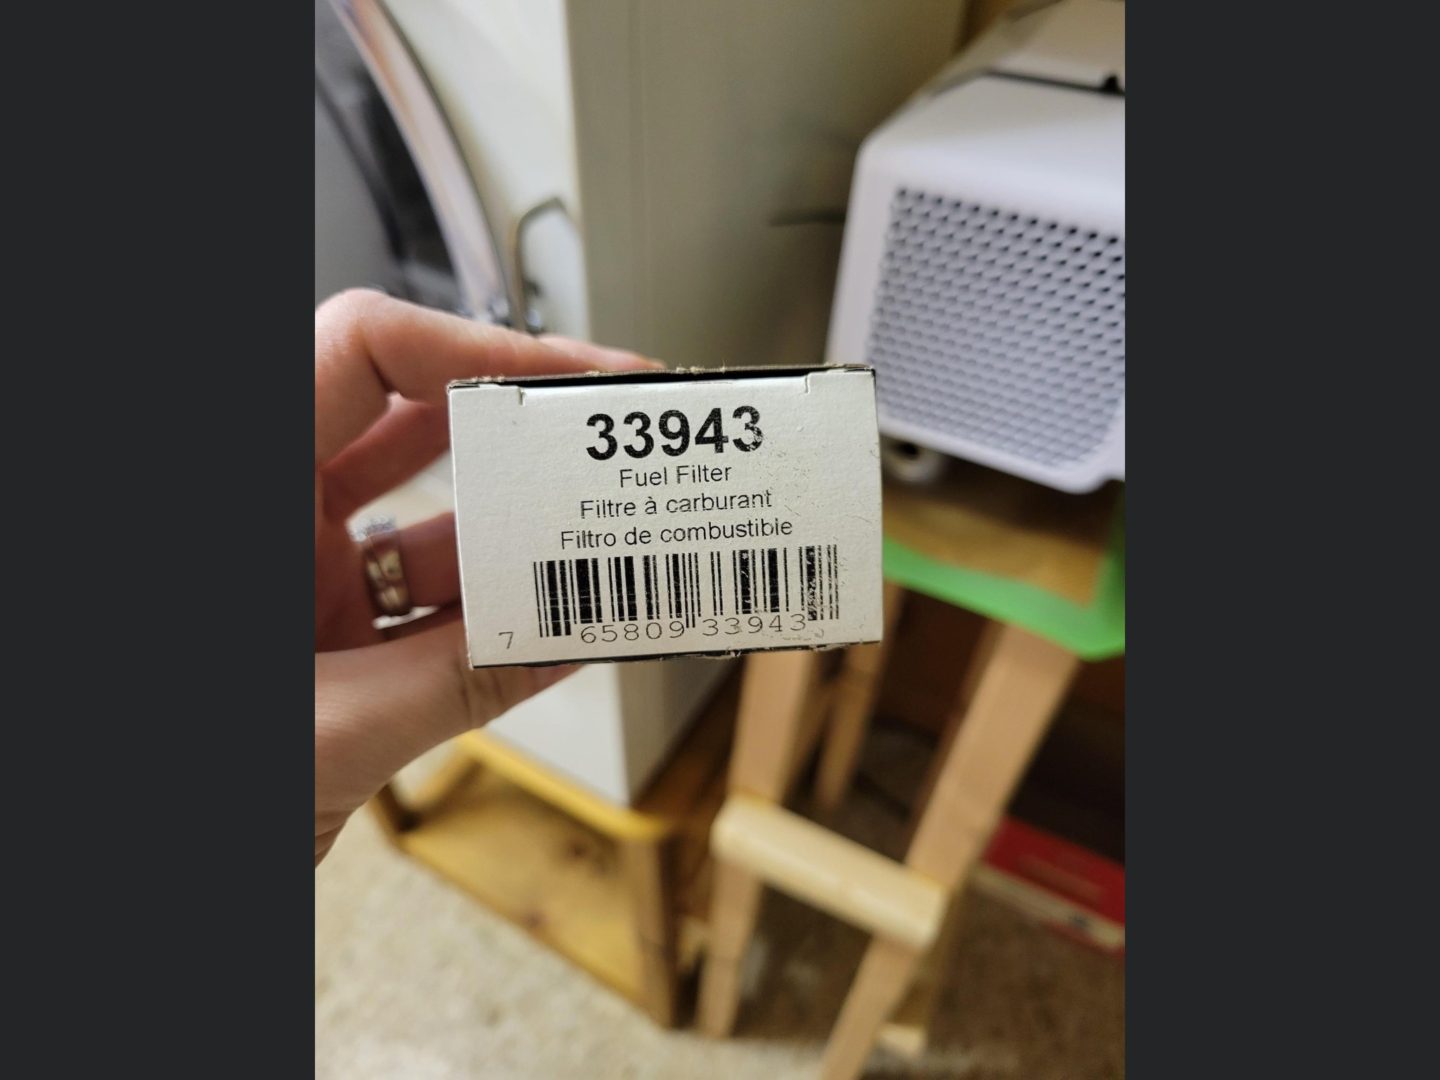
Oil free replacement filter for low profile white pump- 33943
Gas valve water shut off – Upgrade Using a 3/8” gas valve or similar but remember to use yellow gas Teflon tape for the gas valve, only 3 wraps no more or less!.
O-Ring 018 or 1/16 x 3/4 x 7/8
- Cross section 0.070
- I.D.3/4”
- O.D 0.875” 7/8”
Impulse Sealer strips 12” impulse sealer 8mm harvest right tech says they sell 300mm x 2mm $10.00
Where to Install the Freeze Dryer?
Understanding your Home Electrical and Freeze Dryer Power Needs
When installing a medium or small FD it can be used on a standard 120V/110V standard outlet plug pulling a max 16 amps ideally on a 20amp circuit. This circuit should not be shared with other high amp using appliances such as a fridge, freezer, an electric or radiant oil heater, vacuum cleaner, Window AC unit, Dehumidifier, power tools, etc..
For size large freeze dryer a dedicated 20amp 5-20R Nema outlet will need to be installed.
Trace Power Consumption
You can skip this step and hire an electrician!!
An electrician is not likely to do circuit tracing and is even less likely to test each individual circuit for a load test, as I will demonstrate here, unless specifically told to do so!
For this test you will need an AC circuit breaker finder kit $43.00.

Optional is an AC clamp Meter (harbor freight $15.00) or multimeter rated for 20 amps or higher and only if you are confident, capable, and comfortable working with your home electric. This will be a brief oversight and not a comprehensive guide for my electrical.
To take power inventory you can use the clamp meter at the circuit breaker, google your appliance power consumption, look through the online PDF owners manual, or look on the item for a UL sticker On the bottom or back of the electrical item.
Make a list and create a power draw inventory. Creating the power list can help In determining which circuit can be used to run the FD. Identify the different appliances using the circuit intended for the FD and find their amp draw or power consumption for that circuit.
Appliance Draw Examples
- Electric heaters: 1,500 W
- Refrigerators: 1,000 W
- Microwaves: 1,000 W
- Hair Dryers: 1,200 W
- Computers: 200 W
- 32” LCD TVs: 55 W
- Electric Dryers: 4,000 W
- Video Game systems: 100 W
I have two separate 20 amp circuits to my basement;
Circuit A
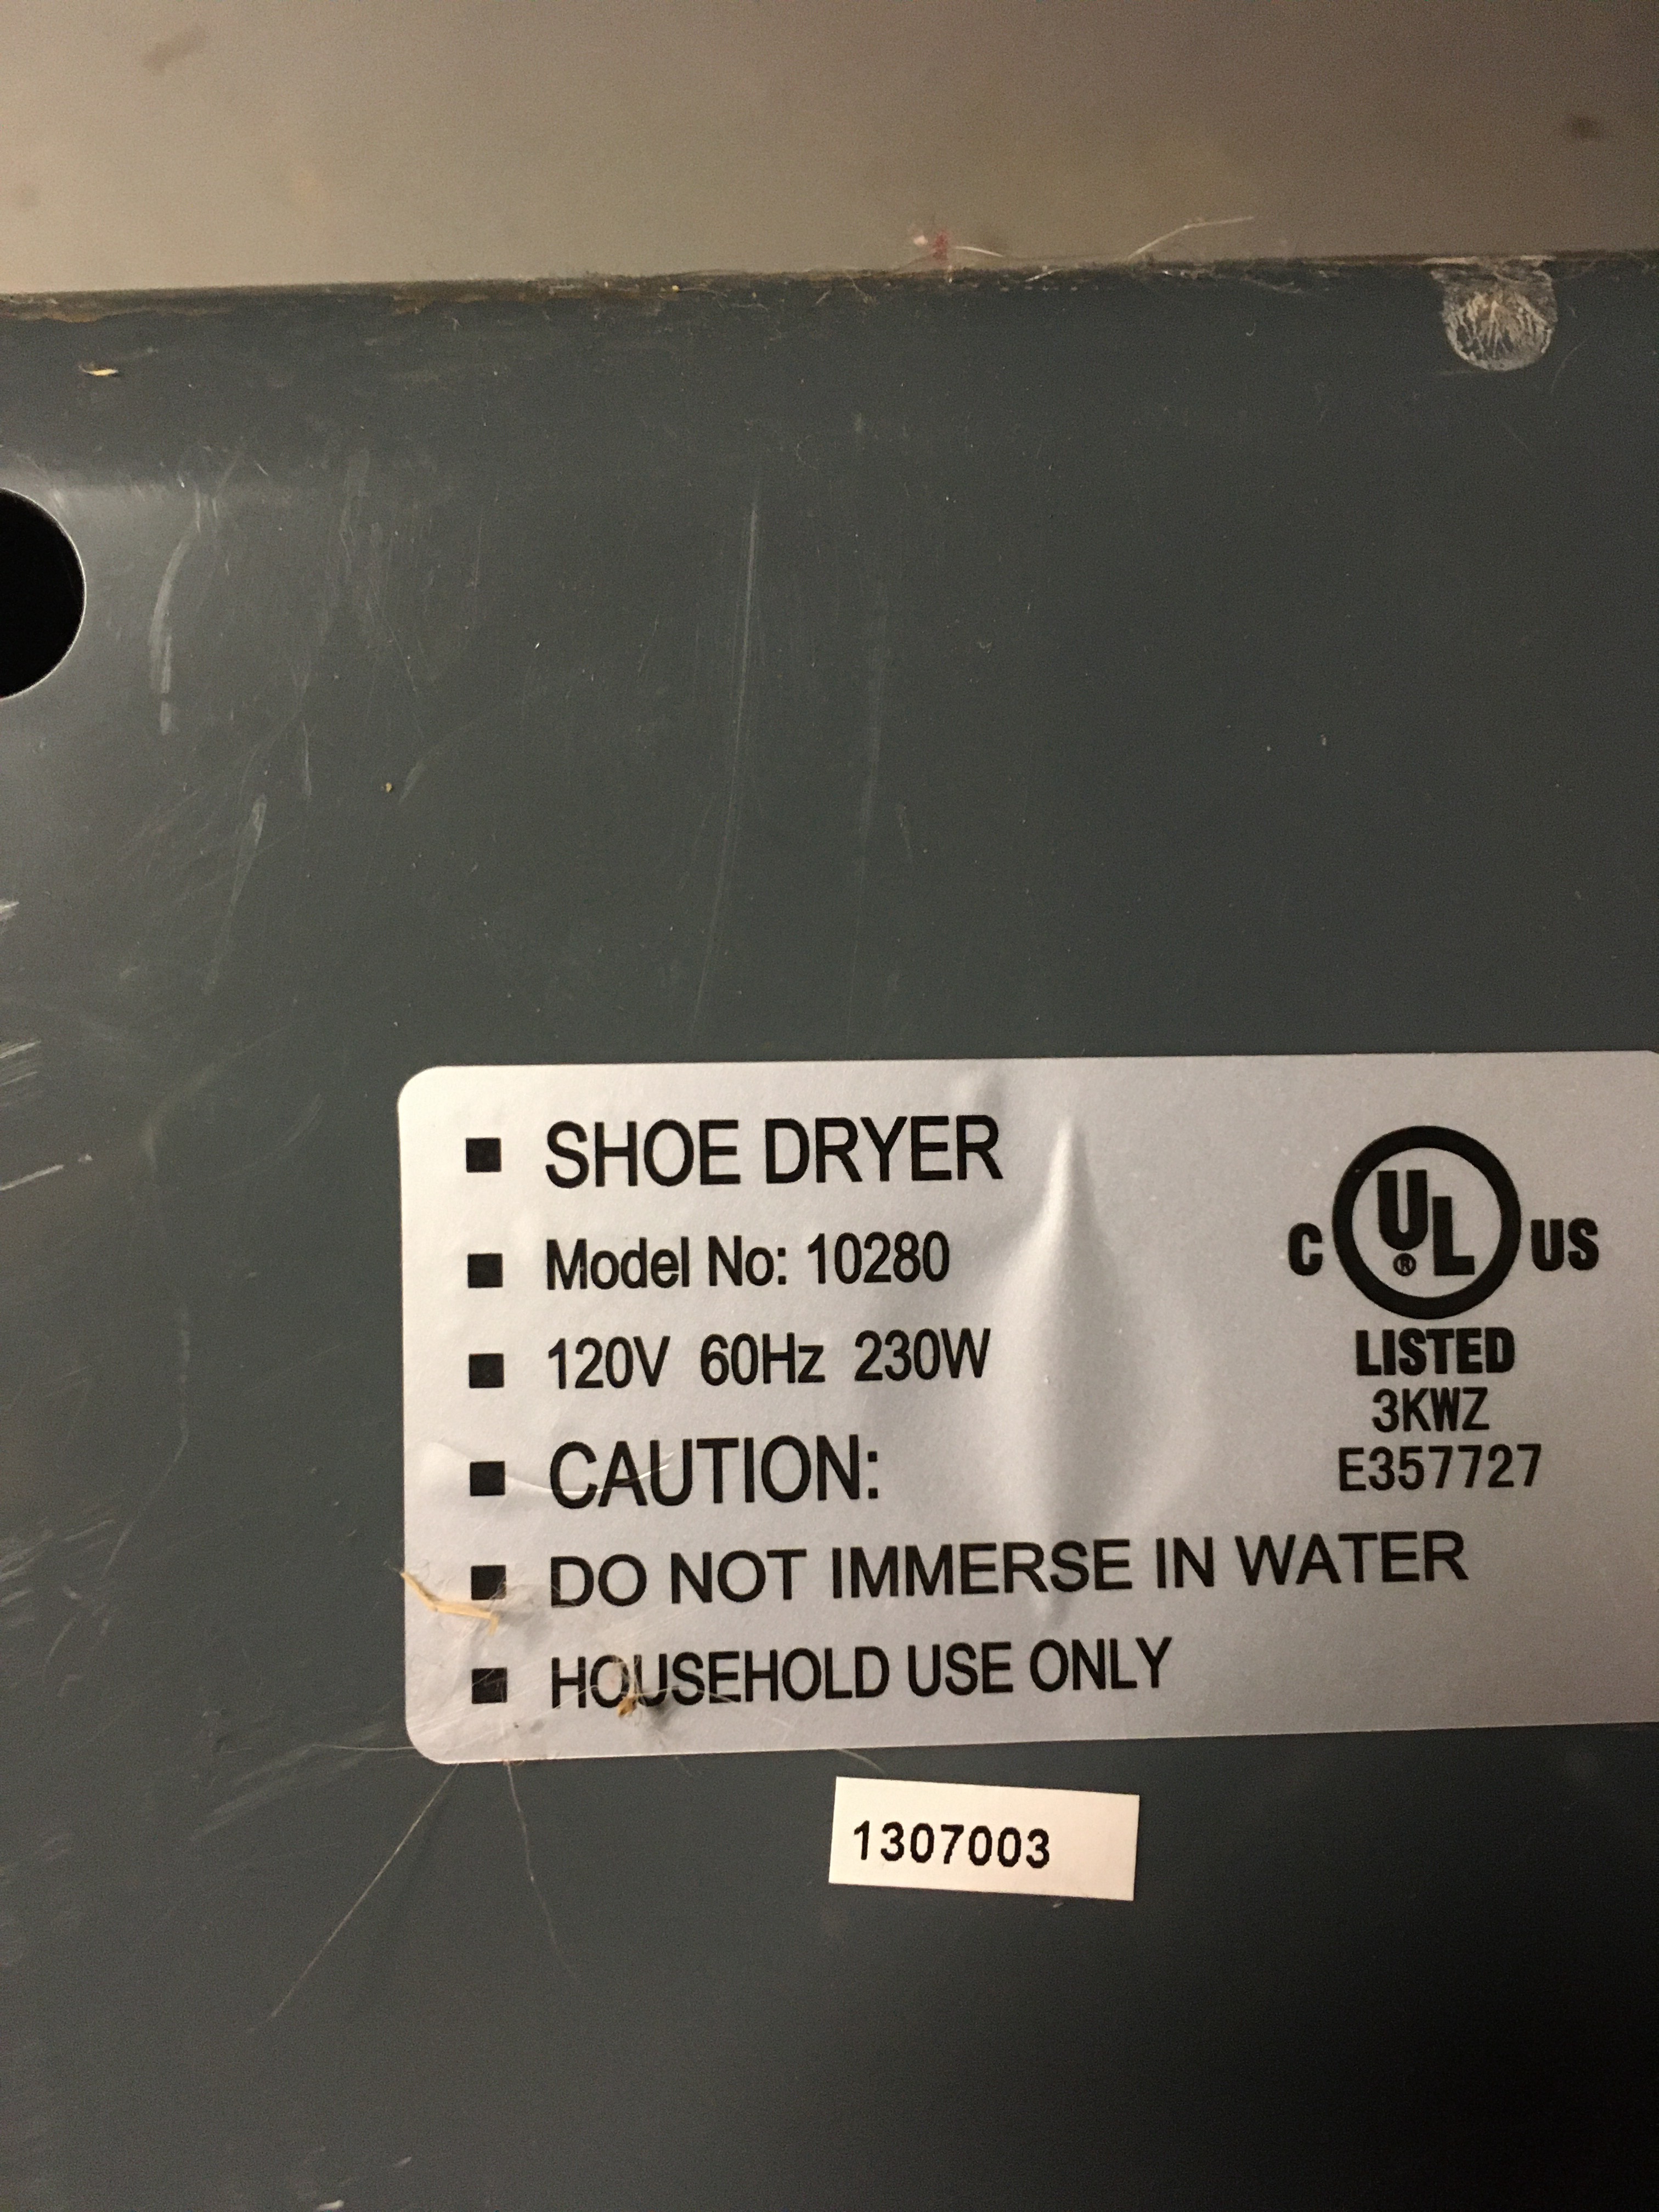
- Boot and glove dryer – 230 watts – 1.92 amps
- ARB Fridge 64.3 watts – 0.535833 amps
- Portable Mr, Heater Portable Shower 2.5 amps – 3 amps
- Shop Room
- Shop vac, waxing iron Chop saw – 14 amp
Circuit B
- Heated outdoor cat beds 40 watts x 3 = 120 watts – 1 amp
- Heated outdoor water dish 25 watts – 0.208333 amps
- TV 91 watts –0.758333 amps
- PS3 190 watts – 1.58 amps
- Arlo doorbell 60 watts – 0.5 amps
- Rachio 24 watts -0.2 amps
- Receiver 95 watts – 0.791667 amps
- Subwoofer 100 watt – 0.833333 amps
- Fireplace (pg 43) 1/2 hp 65W – 0.541667 amps
- Electric hedge trimmer
- Overhead lights
- seasonal outdoor lighting
After reviewing my list it looks like neither of my two 20 amp circuits are suited for the FD installation. Circuit A. has the potential power pull of 14+ amps when using power tools which would blow the breaker if used at the same time as the FD. Circuit B. has a constant draw of roughly 6.6 amps or more. Circuit B. Is tied to our only exterior outlet on the front of our house and often times high powered tools are plugged into it and would flip the breaker by exceeding the circuits power draw if used with a FD.
A circuit breaker is rated for an 80% maximum amp draw as follows,
A 15-amp circuit should be designated for 12-amp load or 1,440 watts.
A 20-amp circuit should be designated for a 16-amp load or 1,920 watts.
Allowing for a 20% electrical buffer compensates for initial power draw surges and prevents circuit breakers from overloading.
- Medium Freeze Dryer 9-11 amp constant, max 16 amp power consumption
- Tabletop impulse sealer 230 watts – 2 amps -4 amps
Power Install
⛔️WARNING DO NOT ⚠️ work on the circuit panel without first turning off the power to the panel box or whole house. Do not proceed if you do not know how to locate your whole house electric shut off or do not see a panel shut off inside the panel box.

Consider the location of the circuit breaker box before going down this path. My circuit panel box is semi accessible from my unfinished basement. If My basement were completely finished I wouldn’t have any access to do this installation and it would require cutting into ceilings and walls of either drywall or plaster and lath. If this were the case I would most likely hire out the job to an electrician.
Honestly I wouldn’t even know where to begin cutting into a finished wall or ceiling to run electrical and I wouldn’t have been able to see or drill an access hole to through the floor joist to pull the electrical wire down into the basement from the circuit panel box if my basement were finished. I would likely have to hire an electrician because drilling holes and cutting drywall this close to an electrical panel blindly can easily cut existing electrical wiring and require a larger chunk of the wall or ceiling to be removed for repairs.
If I had hired an electrician to install this for me, hypothetically in a finished basement then I am 100% sure the electrician would have to surface run the electrical to the desired location because in some situations where this is no above or below crawl space access the only option is to surface mount and run electrical.
Here is the view from my basement to the wall cavity where my circuit panel is mounted. It’s hard to see but all of the electrical wires have to pass through a wood floor joist. This caught me unprepared but thankfully we had all the tools required to handle this challenge.

For my intended medium FD I decided the best option is to install a dedicated 20 amp circuit. If my circuit breaker box were full with no empty spots to add on a new circuit breaker then my best option would be to either
- A) remove a 1” 20 amp circuit breaker and replace it with two slimmer 1/2” single pole 20amp circuit breaker rated for my electrical box or
- B) install a sub panel.
Thankfully I have one 1” 20 amp circuit breaker that I can remove and replace with two single pole 20 amp circuit breakers and open up the extra spot for my new dedicated circuit breaker to the FD.
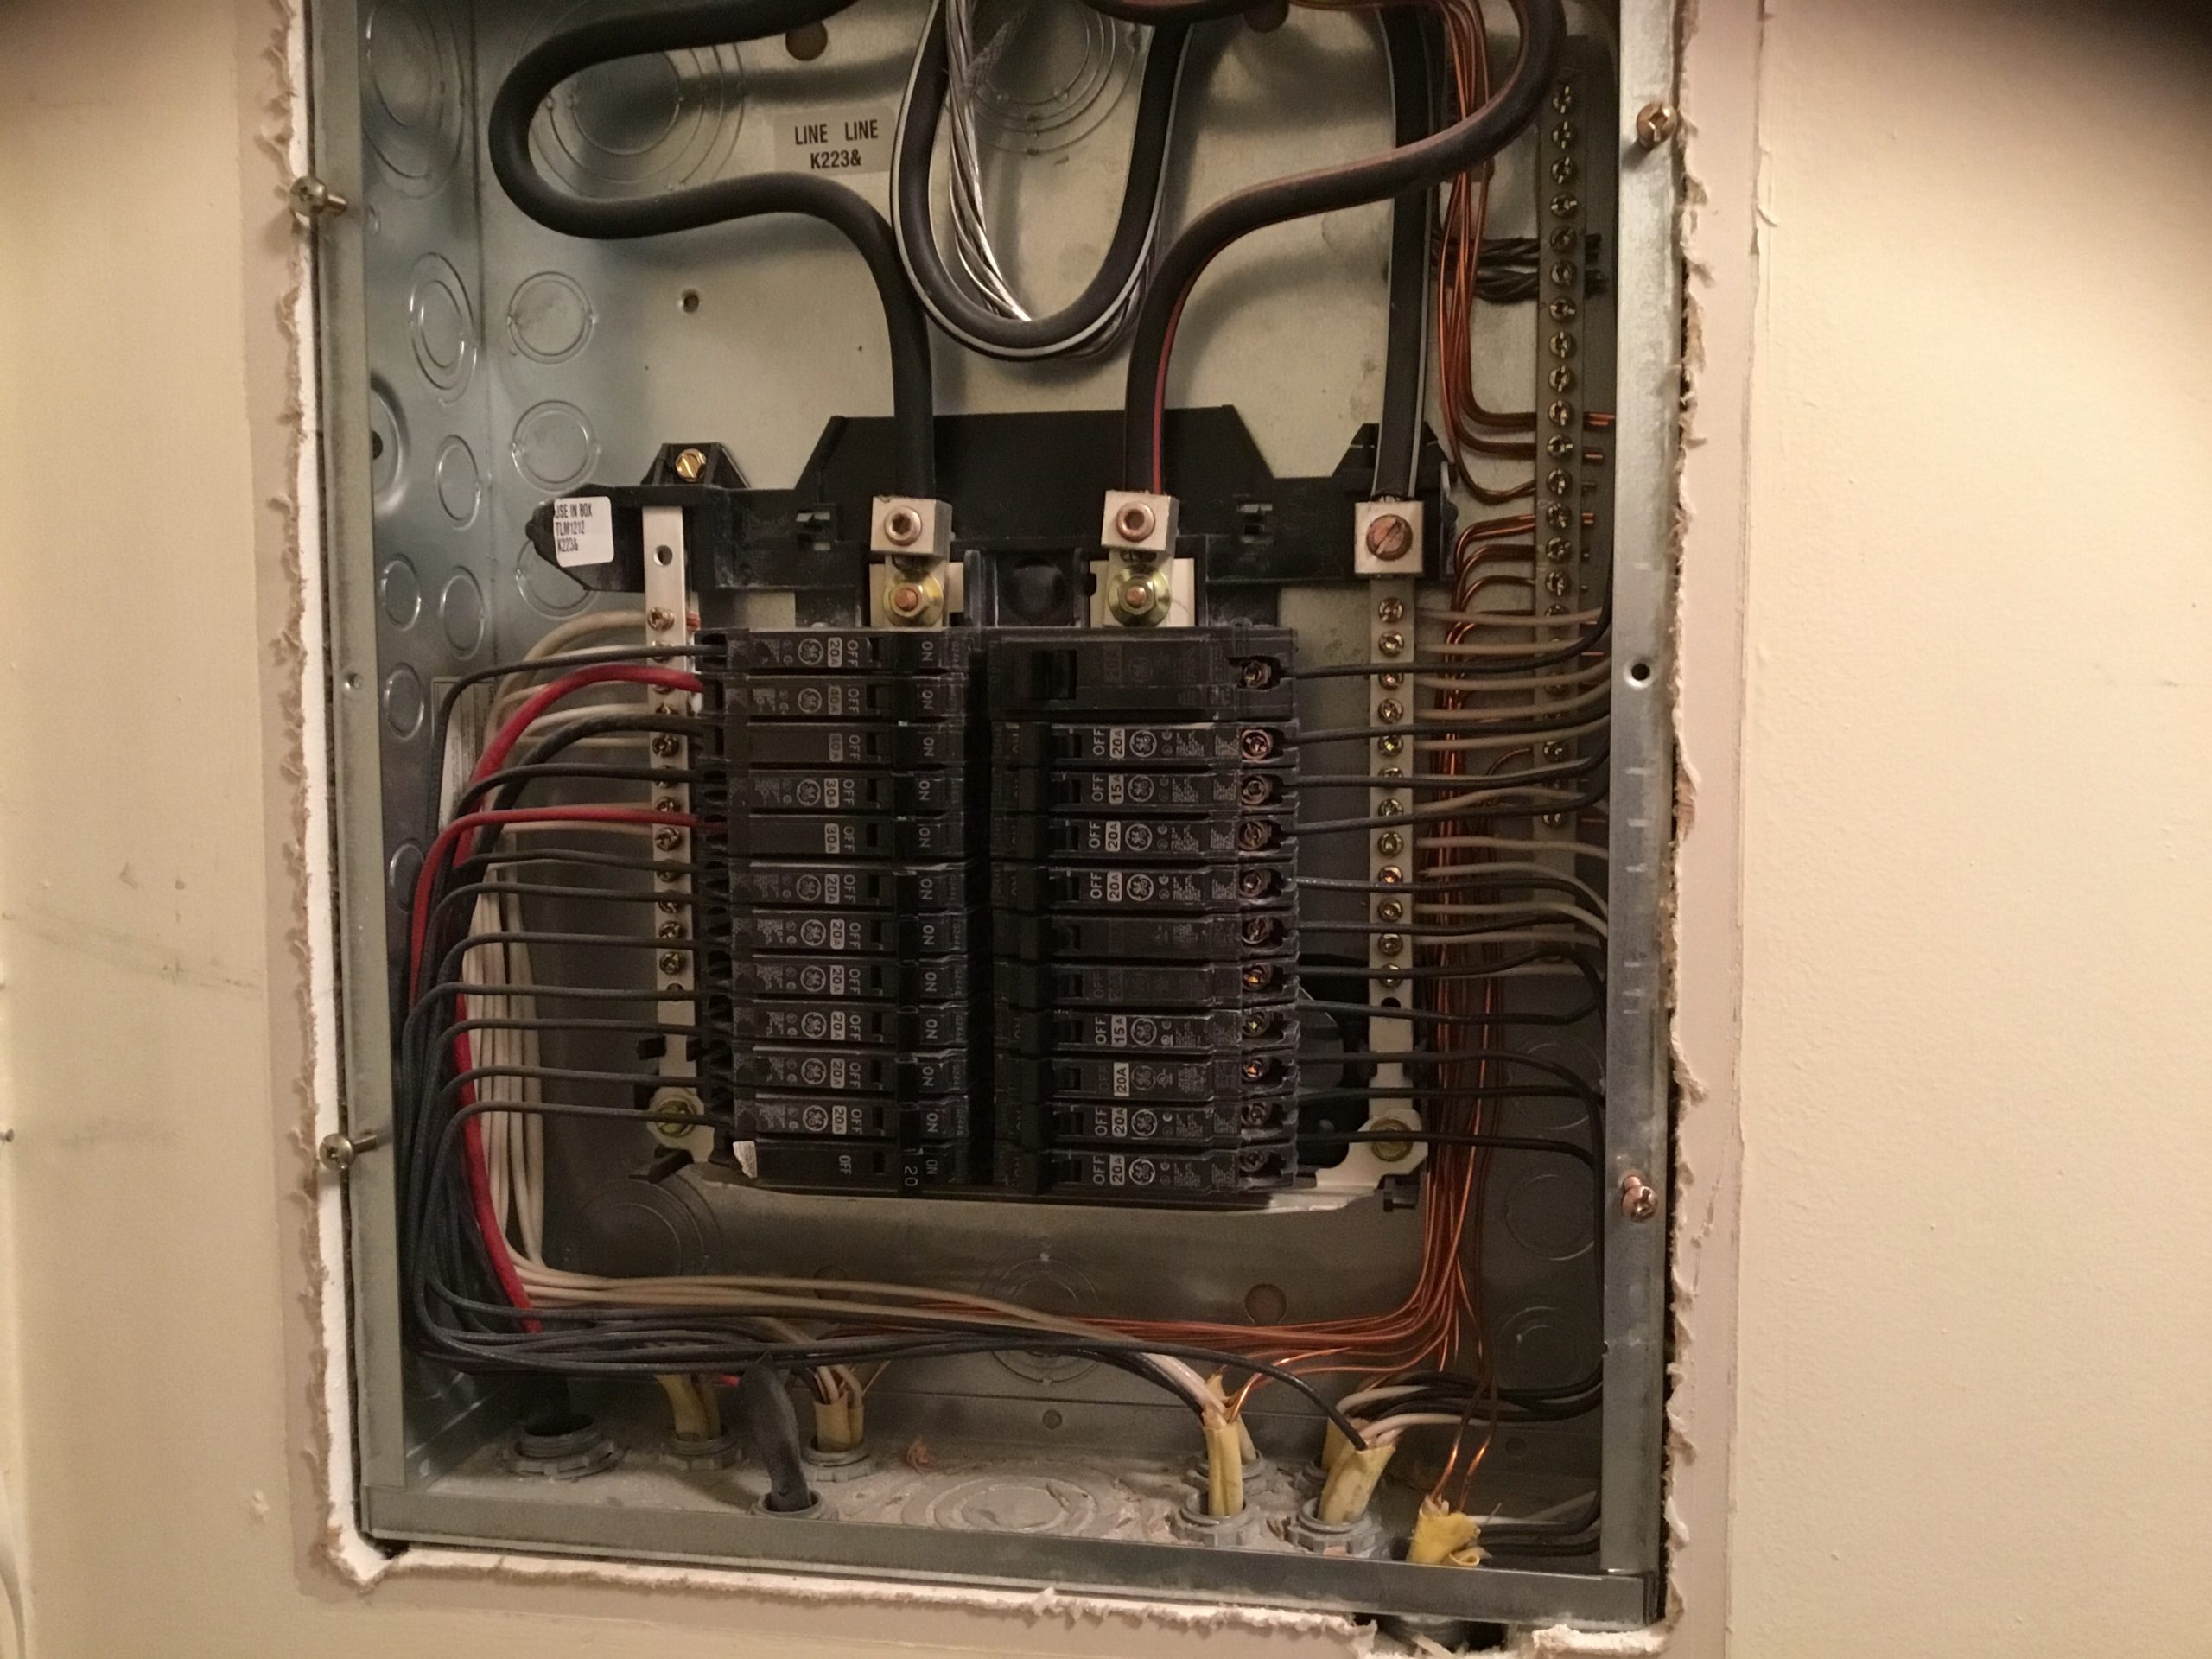
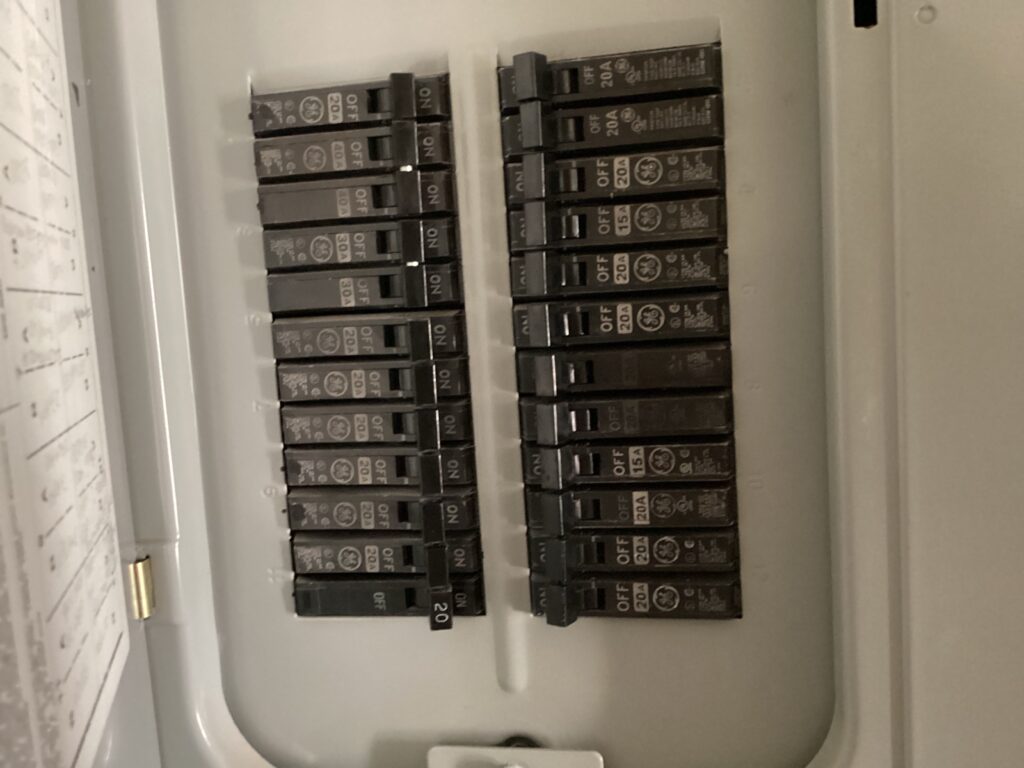
After with two 1/2” 20 amp single pole breakers.
Supplies & Tools
Home electrical wire is identified in thickness with 12 awg being rated for 20 amp of power and 14 awg being rated for 15 amps of power. The thickness of electrical wiring is important to clearly identify before installation as the more power being pulled requires a thicker rated awg and cannot be intermixed. For example you can’t just replace a 15 amp circuit breaker with a 20 amp breaker if the electrical wiring running to that breaker is only 14 awg. Additionally you can’t just replace an in wall electrical outlet rated for 15 amps with a 20 amp in wall outlet without first verifying that there is 12 awg wiring running to that electrical outlet.
- Electrical snake
- Electrical tape
- scissors
- Head Lamps
- Cordless drill with spade bit
- Pliers
- Optional: Drywall knife
- Drywall tape and putty
- Long flat head screw driver or mini cats paw
- #12/2 awg $40.00
- 20 amp slim breaker rated for my circuit panel x 2 $12.00
- Knock out connector/grommet $0.29
- EMT 1/2” conduit $4.99
- EMT 1/2”setscrew offset to box $2.69
- Outlet duplex cover $0.98
- Electrical outlet duplex box $2.96
- Wall mounting straps 4 pack $1.18
Getting Ready
Before setting up the FD it is important to find an appropriate location for installation. Once you have determined the appropriate room, your power outlet, and your 12” set back on either side of the FD unit then the next step is to figure out what the FD is going to sit on.
The key takeaway here is that regular maintenance is required to vacuum out the inside of the machine to remove dust and pet fur from the condenser. This is especially true if this is being used in a basement, garage, or laundry room. To perform this maintenance access to the rear of the machine is required. Therefore consider placing your FD on a wheeled work bench, utility cart, or wheeled table.
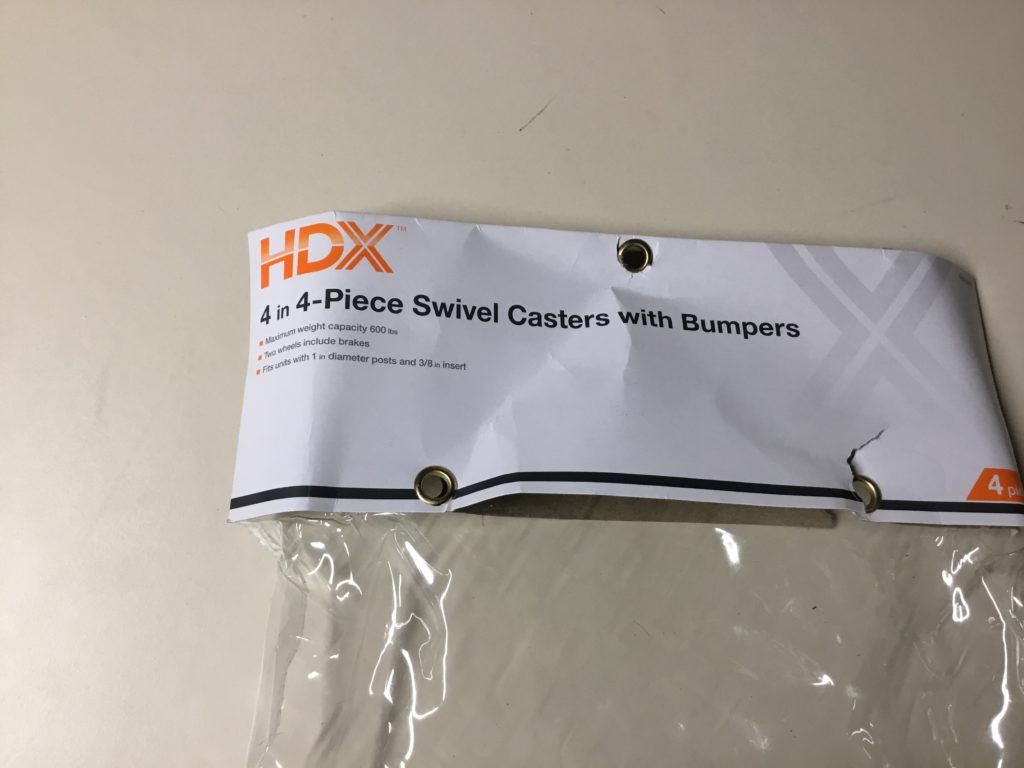
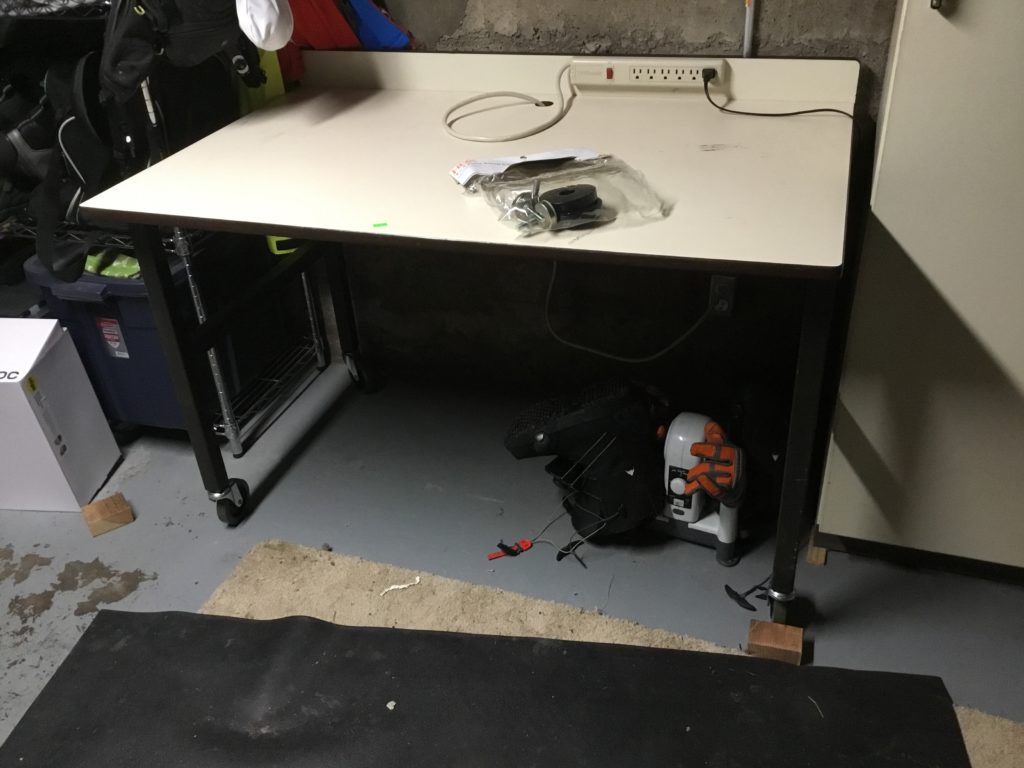
I found this steel table/desk at a local college university second hand store for $6.00. I got this 4” 600lb max capacity swivel caster wheel pack for $22.00. Harbor freight is good place to find a utility cart with wheels at an affordable price.
CAUTION you can’t plug a FD into a power strip or GFI outlet. The power strip came mounted with the table and I will not use it for the FD.
Necessity
These are all items needed to be up and running as soon as the FD arrives!
- Buying the silicone tray mats or parchment pape. I really am disappointed in HR for not including a set of these with every purchase. If you don’t use a tray liner the food may not process correctly but it might just take a longer drying time and will be stuck to the tray when done. Just soak the trays in warm water. In the worst case scenario some people have experienced tray warping due to the food freeze and thawing directly to the surface of the trays. Parchment paper is also important for covering some food items while processing. People who choose to not use these have to scrape and pry the food free from the trays .
- Pants Hanger– use to hang dry silicone tray liners
- Thermal gloves or oven gloves or mitts are needed to protect your hands from the extreme cold temperature of the trays when transporting from the freezer to the freeze dryer. Lastly If the trays are not immediately removed from the FD upon completion then the machine will automatically begin to re freeze the food and trays.
- Kitchen Scale – is needed for weighing trays of food before and after the freeze drying process.
- Spatula – I suggest looking at the dollar tree for a dough pastry scraper tool
- Funnel– I have been using my canning jar funnel but if I didn’t have that I would buy the square top funnel on etsy just search harvest right funnel or find the 3D print file on thingverse.
- Optional Torx head screws – Upgrade to current Allen head screws
- 70% isopropyl or stronger- this is for disinfecting the FD in between washing it with a low sudsing soap. Using a 70/30 formula mix 70% (70% or stronger isopropyl) to 30% (distilled water).
- Example 16oz spray bottle x 70%=11.2oz
- 16oz spray bottle x 30% = 4.8oz
Making a List & Joining a Group
Start with making a list of all the things you think you want to Freeze Dry. Then join a Facebook freeze drying group. Before making a public post in any freeze drying group be sure to..
- Read the owners manuals
- Use the group search bar
- Just sit back and watch for daily inspiration or you can also use the group search bar to look up foods and recipes, troubleshooting or whatever your hearts desire but most likely someone has already asked the same questions so search for it first.
Here are just a few groups that I have observed and here is a quick insight to them.
Harvest Right Freeze Dryers- Freeze Drying Adventures

UPDATE: this group drastically changed for the worse. I didn’t last a full year and I can no longer reccomend joining this group
This group Harvest Right Freeze Drying Adventures is 100% worth joining if you don’t have any behavioral issues or political affiliations coming with you into the group. The members here are 100% freeze drying focused and are very helpful without being condescending or politically motivated. The admin takes an active role in the group and oversight is enforced. It has a much safer feel to the overall experience and is a pleasure to be a member of.

Retired at 40 Freeze Drying Group– I do not recommend this group for everyone- This group is more political based and has a bullying mentality so be prepared to block aggressive members. It has been my experience that this can be a hostile group quick to angry irrational attacking. There Appears to be a not so subtle culture promoting the prepping lifestyle and extremist political ideology and conspiracy theories. Anyone who isn’t in support or in line with the general ideas are likely to be targeted, stalked online, and bullied. There is little to no admin oversight and the group members are free to run rough shot on its other members and bully, insult, and antagonize as they wish! Lastly there is a tsunami of daily new members joining who have not read the owners manual and ask the same brain numbing questions as the previous six new members.

Betty Freeze Drying group– I Do not recommend this group. Be cautious in this group as the mob gang up mentality is alive and thriving here and members will bully others and ban anyone who is not 100% happy satisfied pro HR and about promoting the Admins Etsy store for door pillows. If you say anything that can be interpreted as “negative” expect to instantly be banned! Ex. “There is little evidence to support the use of door pillows”.
The Freeze Dryer Has Arrived!
No Power
So your brand new FD is all set up and plugged in but zero power!! The size Sm and Med units can be used on a regular 15amp 110/120 volt outlet but it’s best to upgrade to a 20 amp circuit and breaker when possible or verify that the 15amp circuit doesn’t have any other high power appliances on that circuit
If you have the Klein multi tester and transmitter use that to verify correct wiring of the outlet. Or use a no contact Volt detector to verify that power is present at the outlet, this however will not indicate correct or incorrect wiring. Also verify no GFI has been tripped upstream. For example we accidentally triggered a GFI in our entryway outlet and all of the power to our basement shut off, oops this was an expensive lesson.
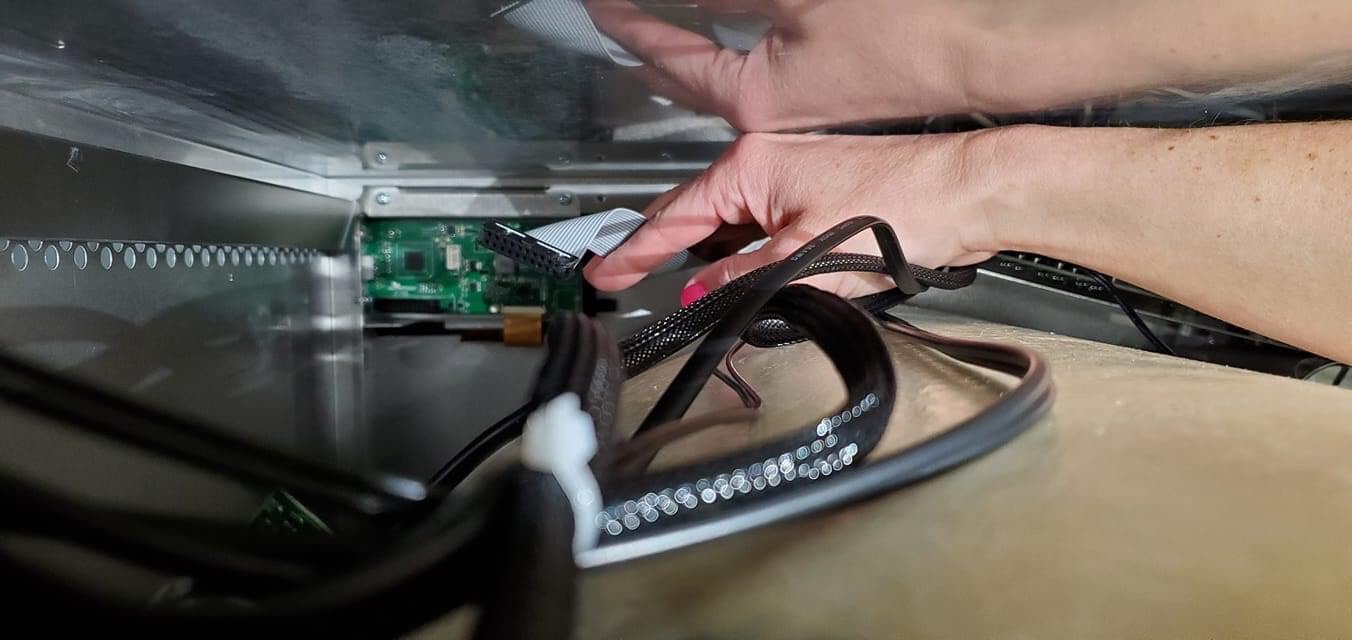
Some FD units arrive and the electrical harness inside the unit is unplugged from the screen. Remove the back panel per Harvest Right instructional video and verify that your harness is plugged in.
Bread Run
Per the owners manual the very first run is to process bread. A great tip offered to me is to douse the bread in vinegar with a spray bottle. Doing this should help eliminate the melted rubber or chemical smell and eliminate the need to run an additional off gassing run.
Off Gasing
Since your unit is newer, it’s possible that there could be an off-gassing problem with the shelves. Usually the shelves have a chance to air out in the warehouse, but sometimes the glue is still a little tacky, causing this problem. Luckily, it’s quite an easy fix.
In order to fix this:
- Clean the shelving unit (some mild dish soap and non-scratch scouring pad, make sure to dry it thoroughly after cleaning)
- Place shelving unit into chamber,
- Shelving unit plugged in and Close the door and drain valve
- Run the heat for 2 hours
- Run heat, and vacuum together for another 12 hours.
- *Change oil (if milky or gunky)
Let the unit cool down. Run a vacuum test with the shelving unit in for another 45mins, if it’s under 500mTorr you’re good to go!
Instructions when working with HR tech support
Mock Batch Instructions:
- Change the oil and send a picture of the sight glass with new oil, skip this step if you have an oil free pump. If you have changed the oil already you can skip this step as well.
- Run a mock batch:
-chamber and shelf must be clean
-no trays, no food, don’t use the door pad
-press “start” , Select “Not Frozen” if that option is not available just select “Let the chamber cool” then select “continue”
- If a vacuum error occurs DO NOT shut off the machine, simply press continue and keep going
Do this 3 times for recurring vacuum errors.
(If you DO get 3 errors and you continue them all and you get a fourth, shut off the machine and send the data to tech support)
- Obtain data
-please send the log files back to tech support
Ambient Humidity
If you live with a lot of ambient humidity check out this thread I have linked below.
https://forums.egullet.org/topic/150588-freeze-dryers-and-freeze-dried-food-part-2/page/8/