80 Series Dual Battery Set Up Part #4
Yay we have made it this far!
Now if two batteries have been installed for the 12V system then there needs to be a way to charge the auxiliary battery while driving and simultaneously protecting the main vehicle battery. This is where power relays and or isolators get involved.
There is a lot of great information out there about the different Dual Battery Systems. I am not going to spend any time here going into great detail about those other systems but I will mention them and share a link to learn more.
Go to Overland Expedition to learn more about the different Dual Battery options. Here are the three main contenders that I was considering.
- Blue Sea
- National Luna
- IBS-DBS
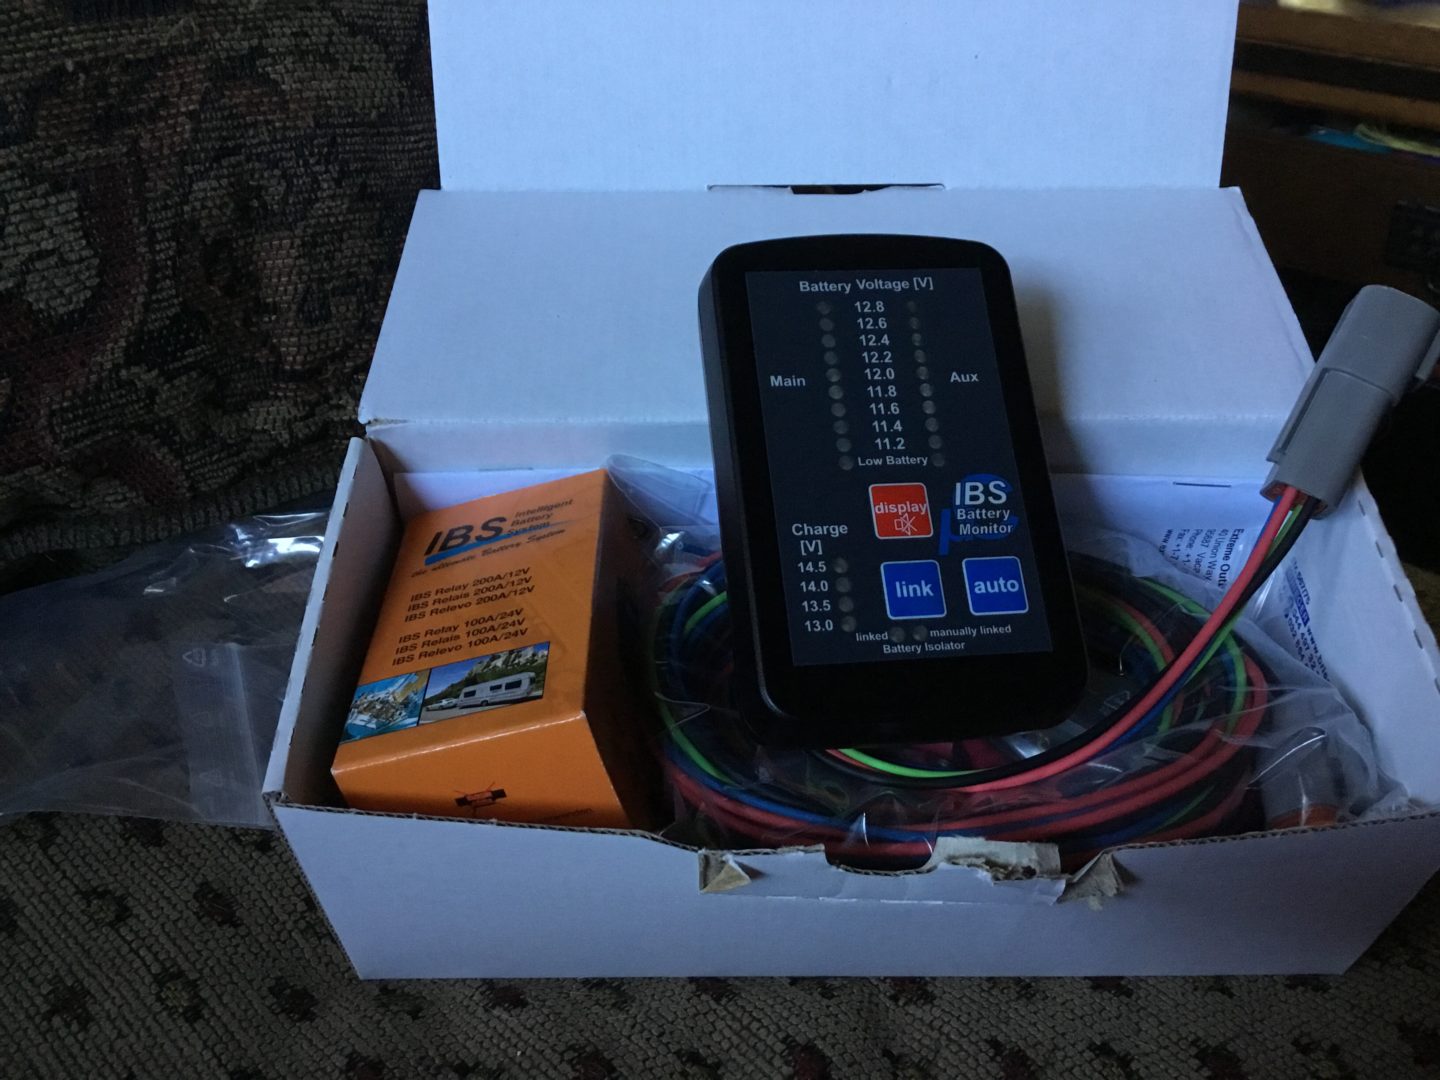
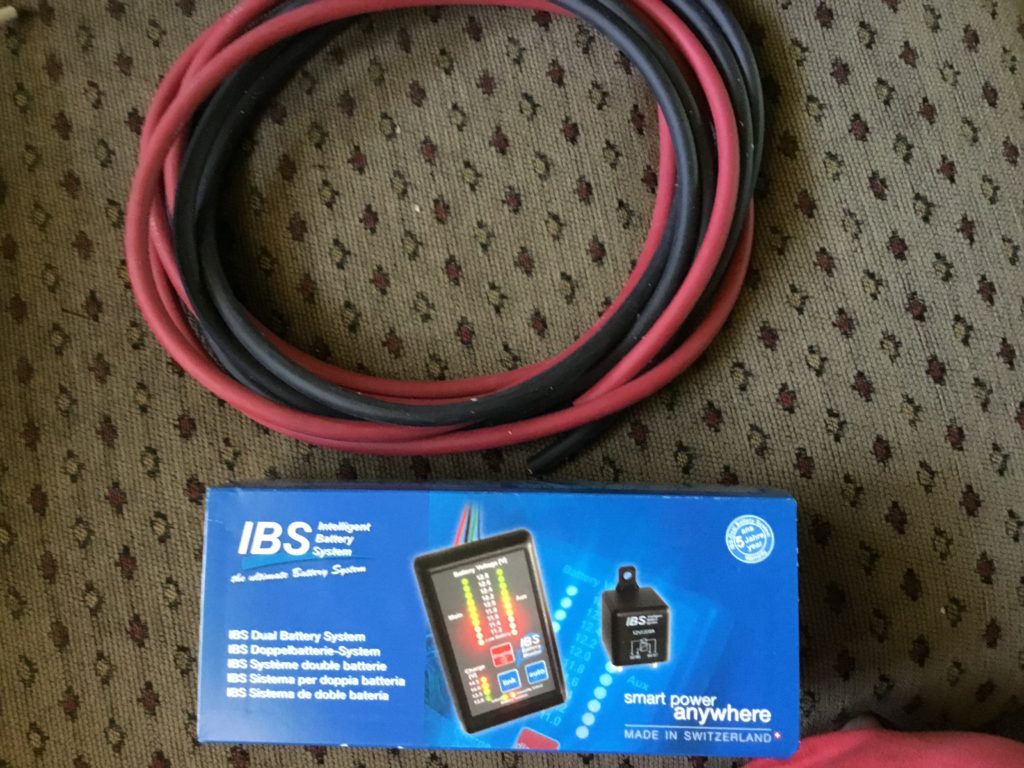
Ultimately I ended up purchasing the IBS-DBS all inclusive smart kit. I read a lot of user reviews on Ih8mud and the Overland Expedition portal and I just couldn’t find anything negative about the IBS system.
There was one consistent complaint about the IBS Boost relay module (RBM). The common problem seemed to be that the RBM has a tendency to over heat and burn out when installed in the engine bay. I am not installing the boost relay so this was a non issue for me.
The Good
- Relays prevent voltage drop
- Automatic charge monitoring
- Easy user interface
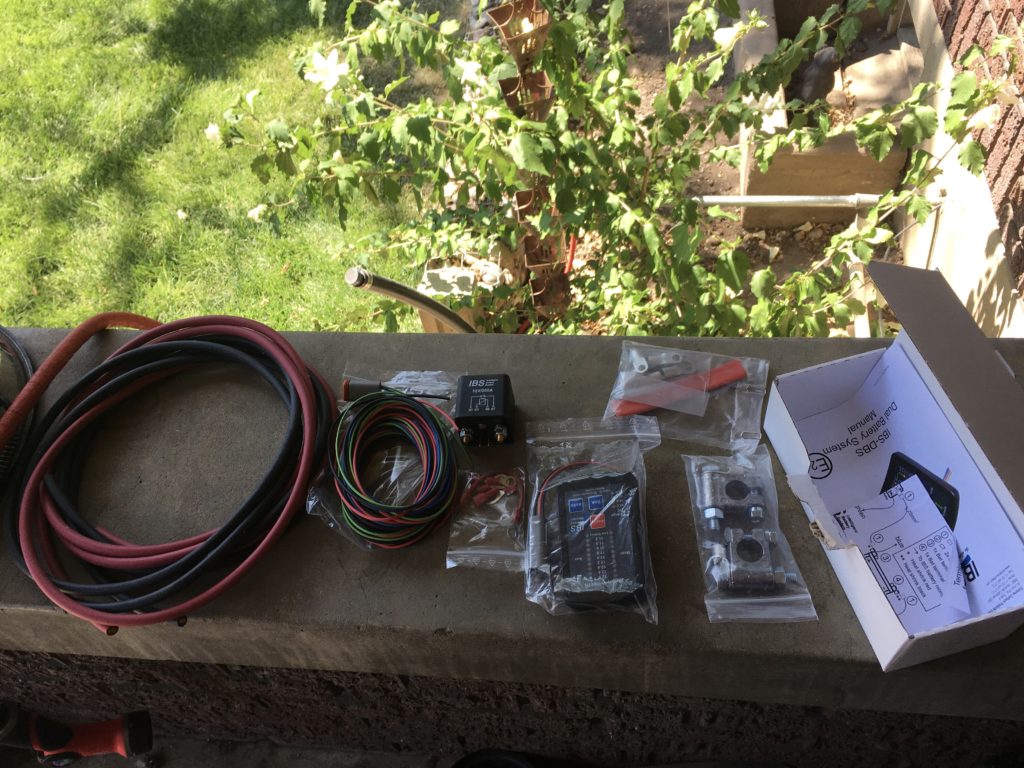
- Nearly all inclusive materials for installation
- PET Sleeve wrap for the 18 gauge wire harness not included.
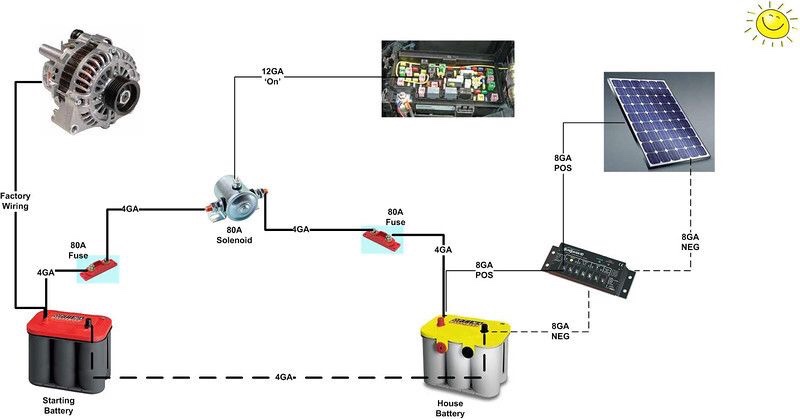
I chose the IBS DBS relay system because there is less voltage drop when using a relay vs solenoid. Also this system uses a smart auto system which means that it will auto sense and adjust both the main and auxiliary battery when charging while driving and when charging from solar power when the vehicle is off and parked. The last determining factor boiled down to ease of usability. Since I can’t get Eric to turn off lights at night time and I had to install all motion sensing or automated smart lights throughout the house then I can’t really expect him to correctly use a system that requires more user interface and adjusting. This system seems to be very straight forward and automated thus reducing the likelihood of someone fouling things up.
The Bad
- Kit does not include braided cable lume
- Monitor is not truly flush mountable
- 4 gauge cable has paper insulation
- Un necessary redundant supplies
- No fuse in the relay connection.
#1. As noted in the instructions no PET sleeving is provided but it is recommended.
#2. So right off the bat I can honestly say that the included “flush mount” is in no way shape or form actually a flush mount.
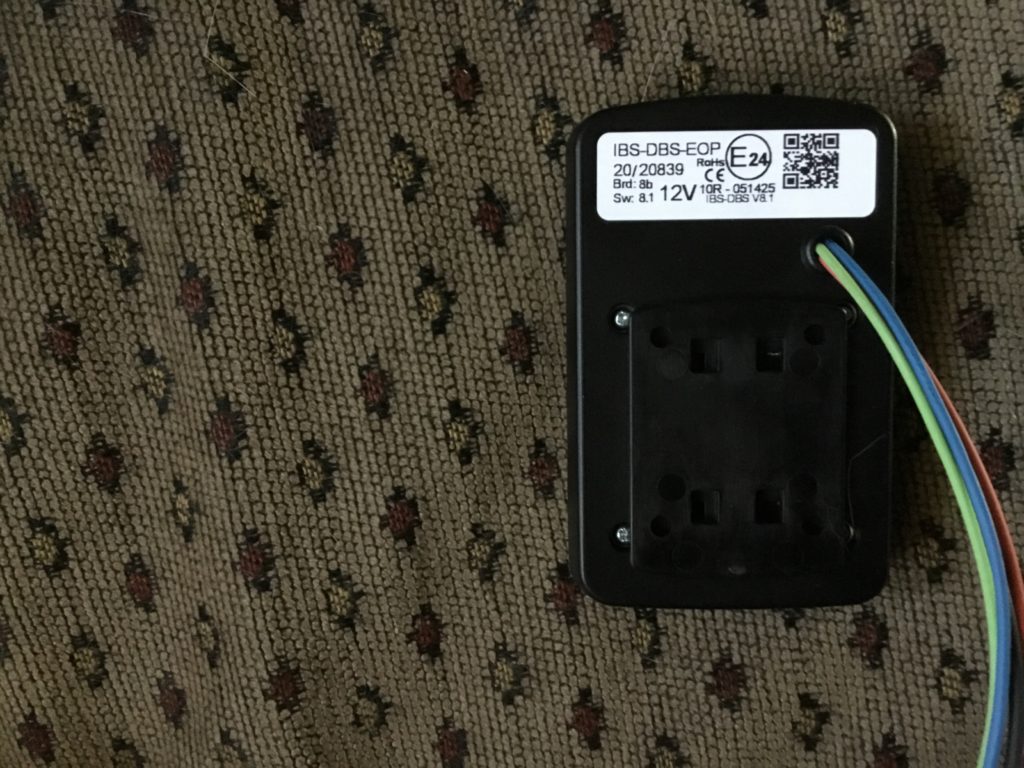
Due to the awkward placement of the wires coming out the back of the monitor housing there is no way to flush mount this device. Even when forced with direct pressure the wires create a 1/4” rise from the intended mounting surface. An upgrade to this would be to offer punch outs on each side of the housing so that users can move the wires where needed.
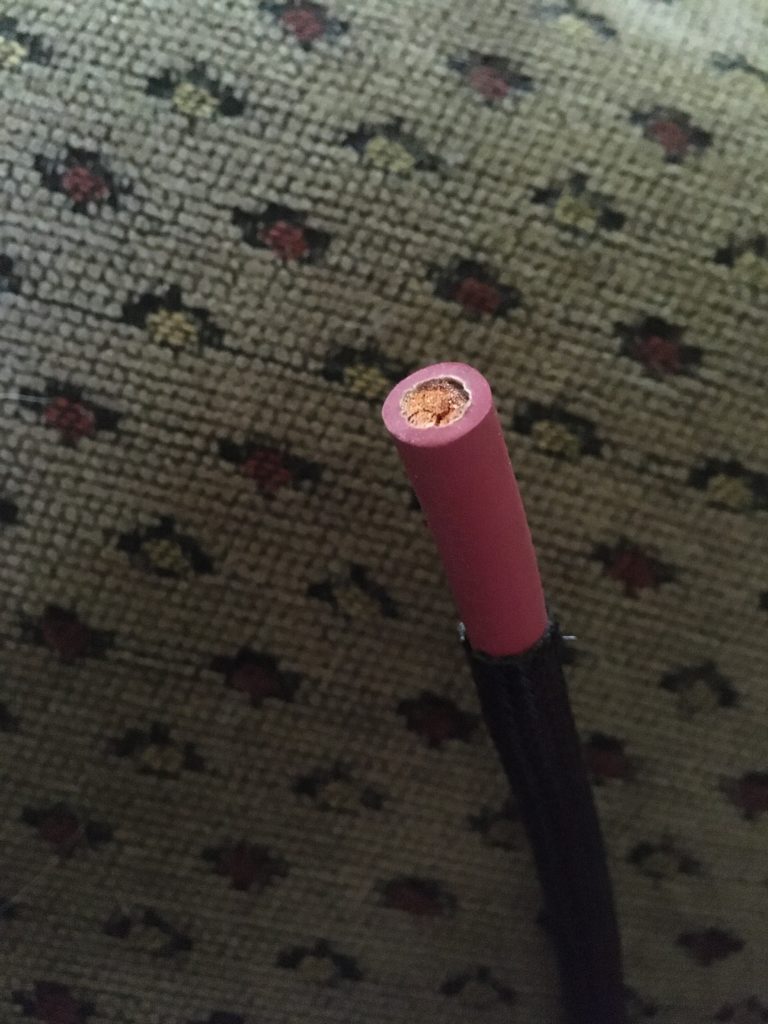
#3. I was disappointed to see the 4 gauge cable sheathed in a paper insulator.
#4. Redundant supplies
The installation kit gave me 10ft of 4 gauge copper cable that I Don’t need because I had already installed a 2 gauge ground cable to the aux battery that connects to the engine block and chassis. The kit also gave me an extra set of military spec flat mount battery cable connectors. The total for these two excess supplies is roughly $65.00.
I would like to see this product be a la carte where customers can choose what extra items are included in the kit but that is unlikely to ever happen.
#5. There isn’t a fuse or circuit breaker built into the 200 Amp relay. This is very important because this system can change the flow of power from the house battery to the auxiliary battery and vice versa. Therefore there should have been a fuse built into the relay to protect each battery from the others potential for overloading.

I contacted the manufacturer regarding this concern and I was reassured that the relay would act like a fuse and blow during a power surge over 200 amps.
Step by Step
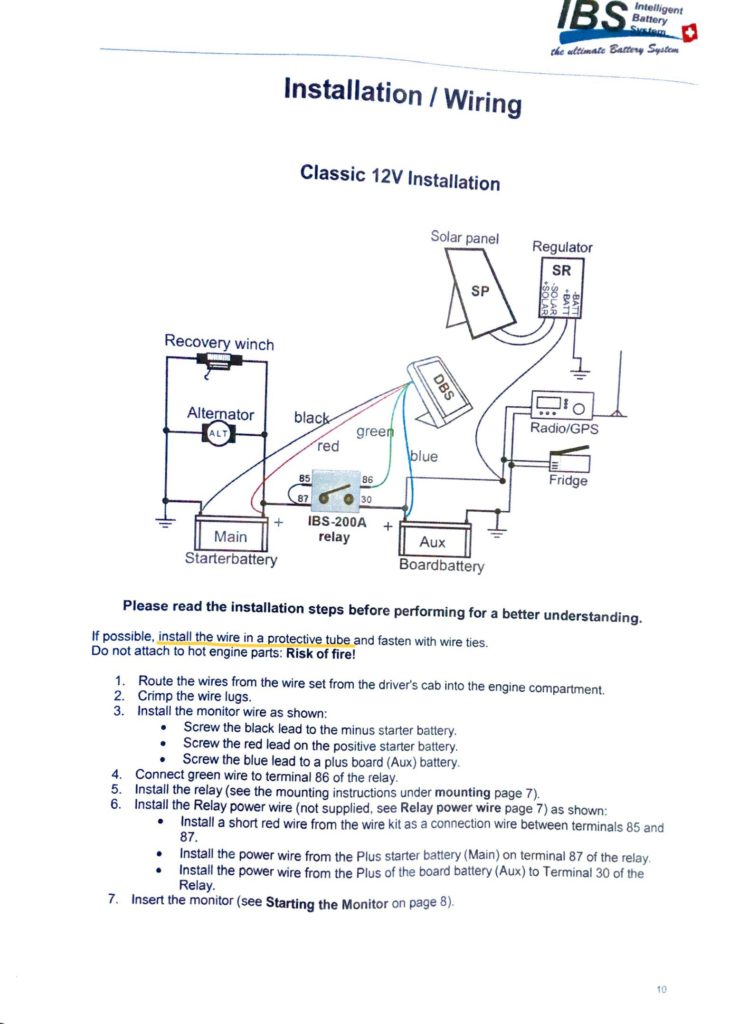
#1. Start by finding a mounting location for the relay closest to the vehicle battery.

#2. Install the wiring harness for the monitor with 1/4 inch braided sleeve before snaking it through the driver side firewall. Cut excess wires before crimping connectors and heat shrink sealing.
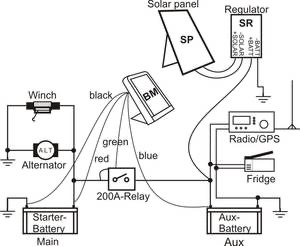
#3. Follow the directions to hook up the green cable to #86, The red jumper cable from the power source #87 to #85, and then eventually the auxiliary red cable to #30.
#4. Install the the 4 gauge red cable with the lug connectors and 3/8 inch and braided sleeve cover before connecting to the battery.
#5. If the auxiliary battery wasn’t previously grounded to the engine block then another option is to now hook up the main battery ground to the main battery.
I personally did not do this for several reasons but most importantly I kept my two electrical systems separate to reduce potential of damaging either battery.
#6. Follow the instructions to set up the monitor controller before hooking it up.