80 series Automotive Auxiliary power Part #3
Running power from the fuse box to the desired appliances.
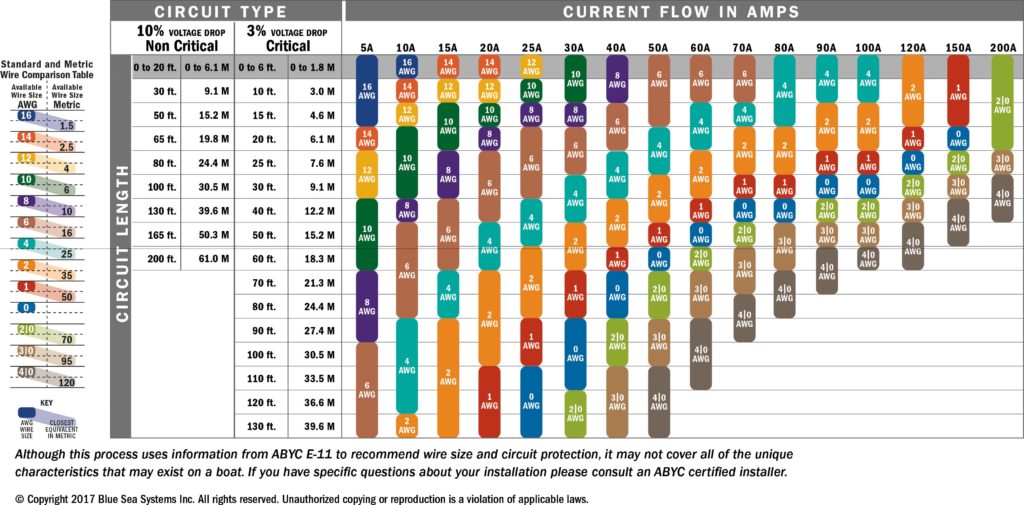
Looking at our power chart and our accessory power needs I can determine that #1. All of my wiring will be less than 6ft in length and nothing will be over 10-20 amps. Therefore I can plan to use 14-16 awg cable and terminal connectors.
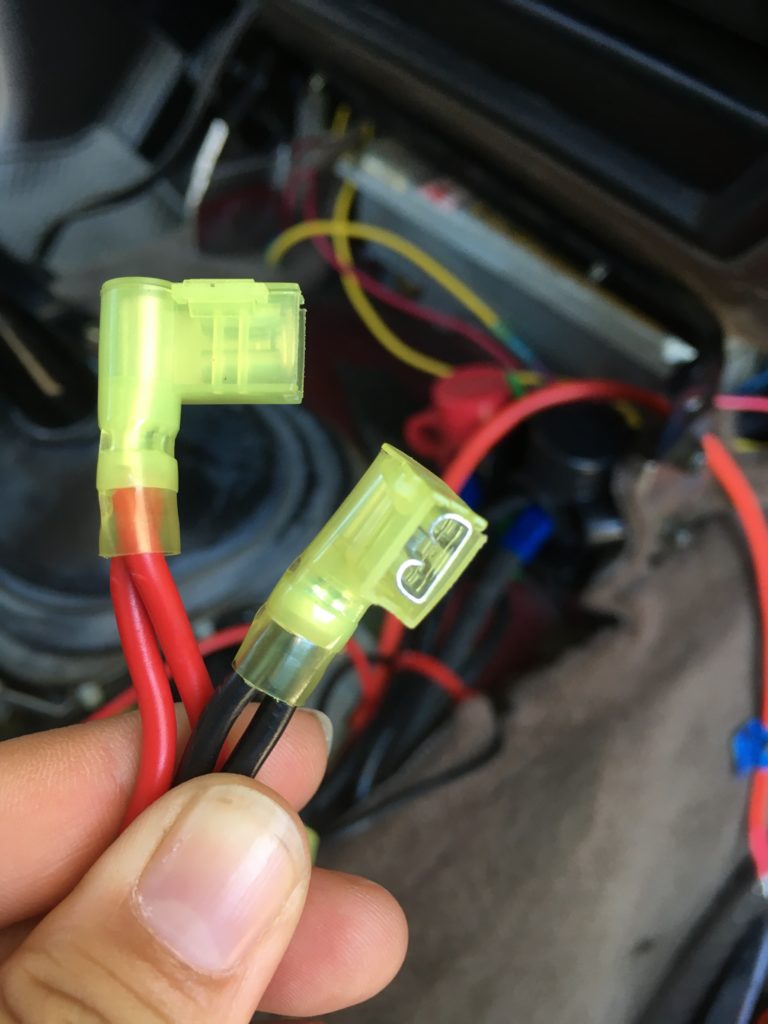
To install electrical pin connectors to accessory sockets in tight spaces use 90 degree electrical connectors. These connectors can be found locally for individual purchase at any True Value and Ace Hardware stores in the nut and bolt drawers.

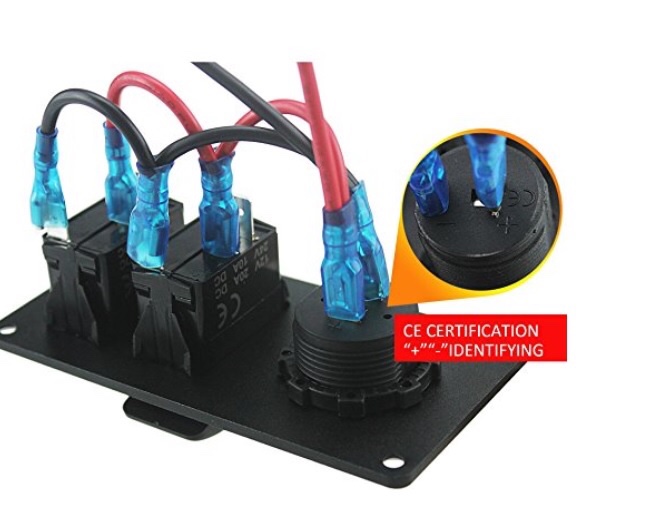
When running power all at once to a panel it is easy enough to pig tail off of the mainline like the pictures above. Remember to run larger gauge cable to accommodate the power pull. So for 2 standard 12v ports I would probably only run 10 amps for both and use 16 awg. If I wanted to run 20 amps for both then I would use 14awg cable.
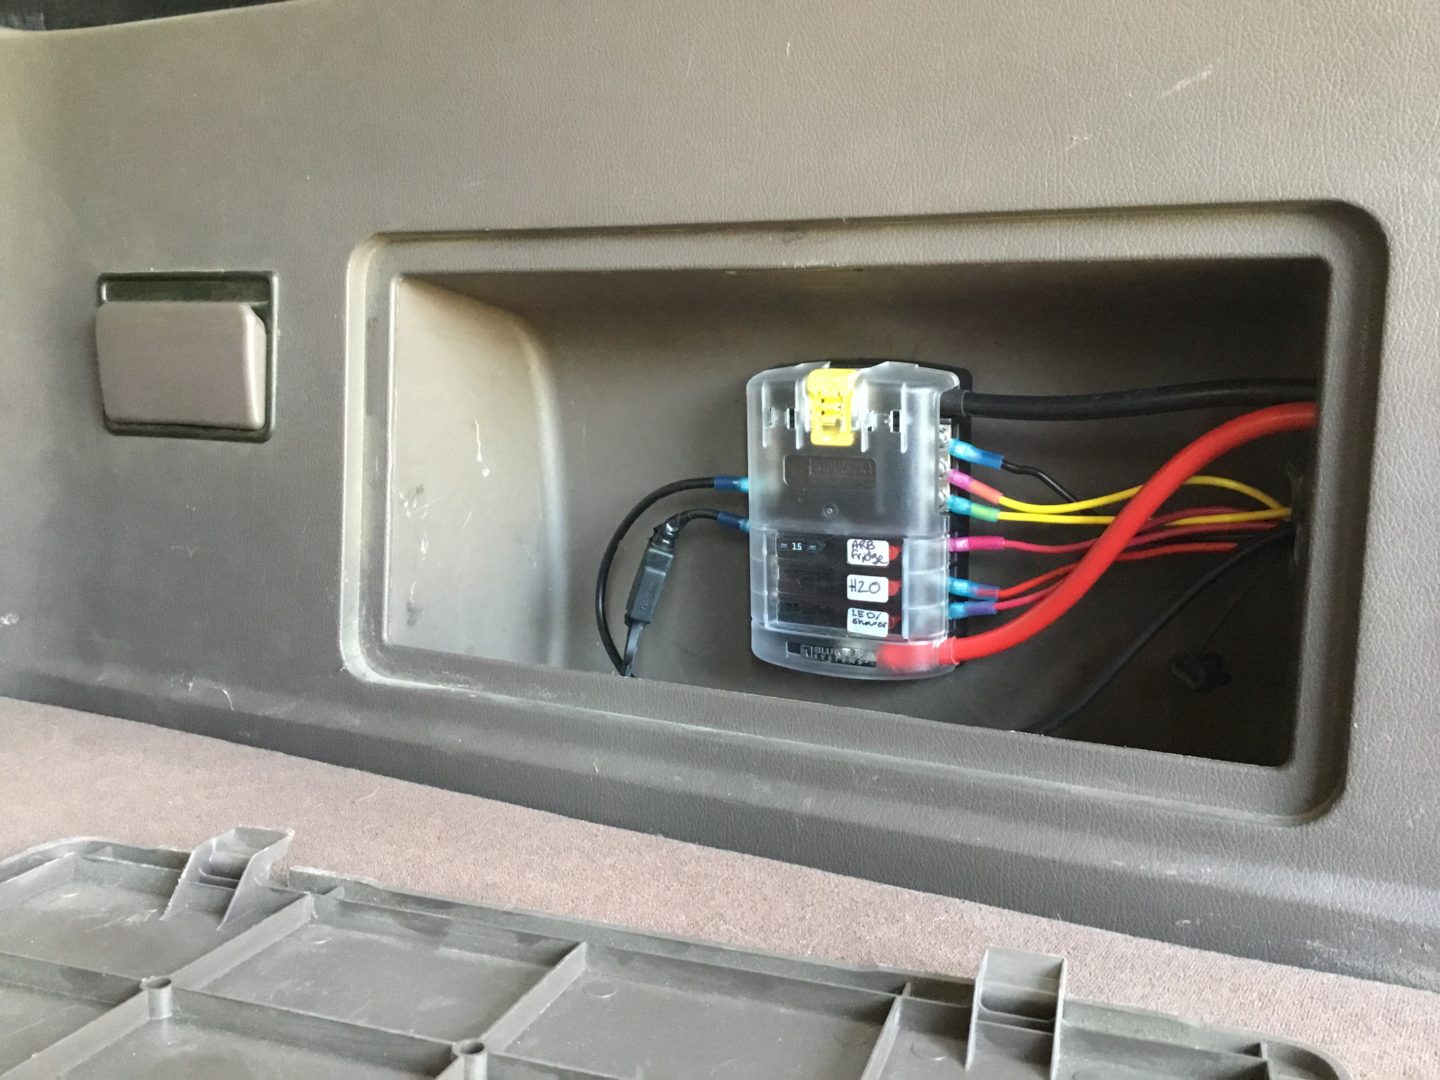
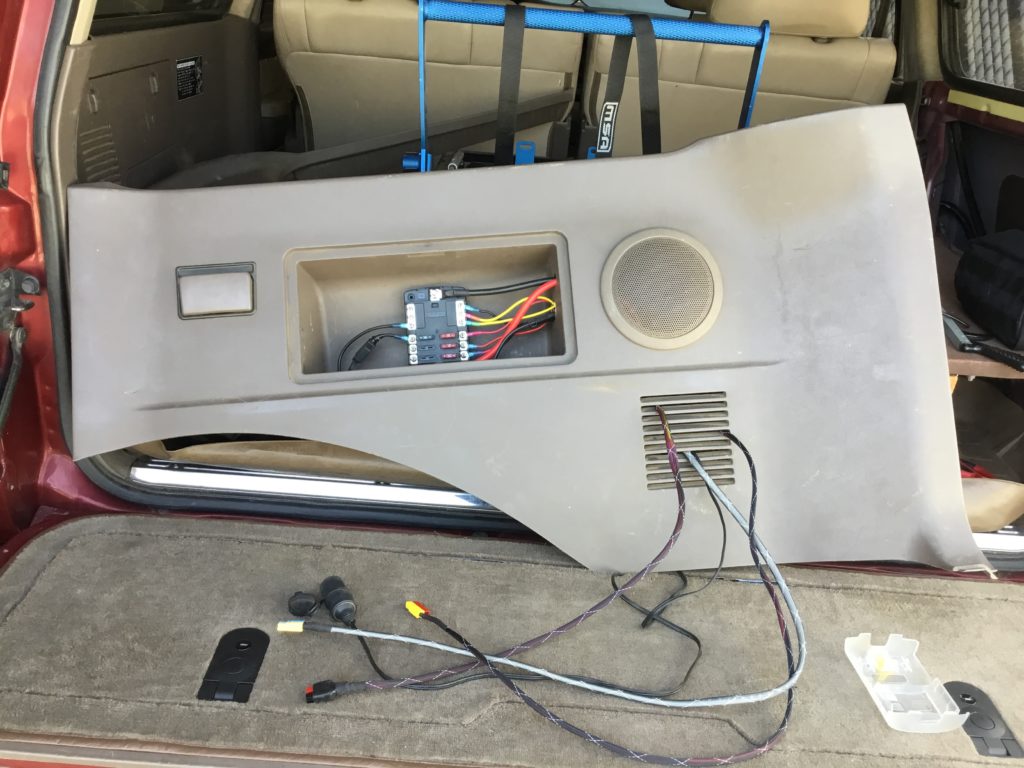
Rear Quarter Panel Power Install
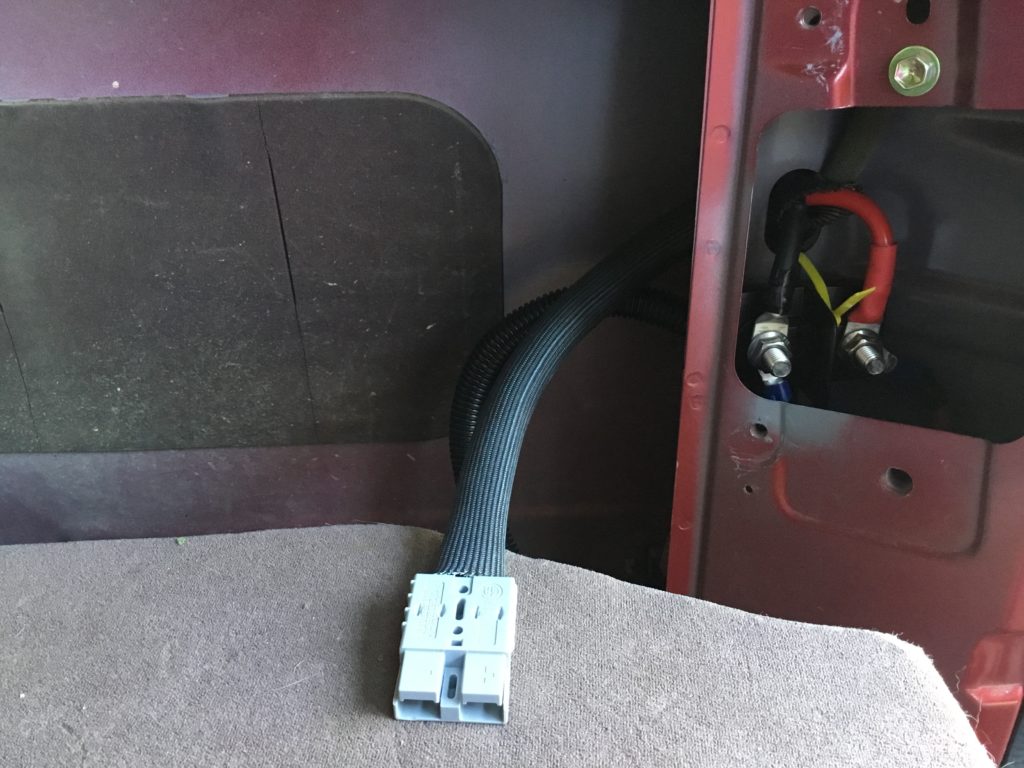
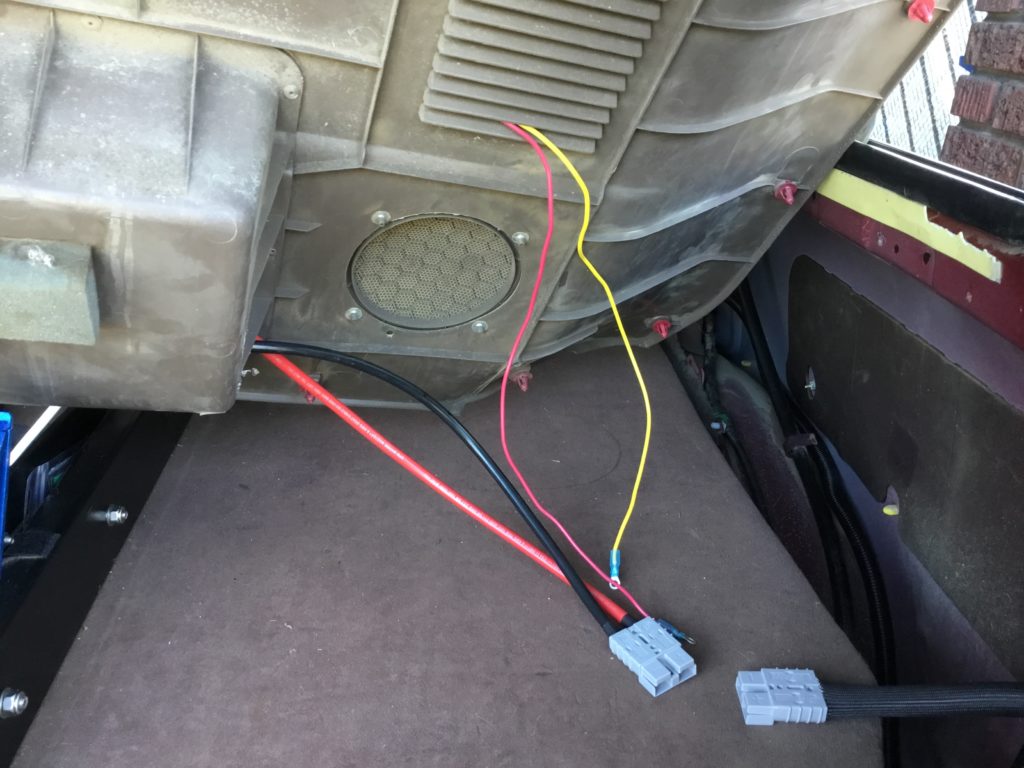
For the power in the rear of the vehicle I mounted a junction block and then ran power to the fuse block. I took the time to add a quick disconnect via the Anderson SB50 to make disassembling the quarter panel easier in the future.
TIP: before working in this area pictured below, where the junction block is mounted, first stuff a plastic bag or towel down into the empty space. If anything drops, like a bolt, then it will be caught on the bag instead of being lost to the black abyss.

Cable Sleeve
For the engine mounted electrical 4 gauge cables I used 3/8” high heat resistant fiberglass cable sleeves to protect the newly installed cables. Inside of the vehicle I used a standard PET braided fire retardant sleeve 1/4”. Adding the sleeves where possible will give an extra layer of protection against electrical fires and potential nicks and cuts from sharp edges.
For the engine electrical I ordered 10ft 3/8”, 1/2” 5ft for my 2 gauge grounding cable, and for the interior rear quarter panel cables I ordered 20ft of 1/4”.
Cumulative Shopping List
After your plan is drawn out and all power needs are listed then start making your shopping list.
- Power electrical cable (4 awg) to run from the engine bay
- Battery terminal lugs ((4) 4 awg 3/8 ring & (2)… 2 awg grounding rings)
- For hooking up the 4 awg power cable to the battery and junction block
- Circuit breaker (60 amp)
- (2) 4awg 1/4 ring connectors high heat rated tinned
- Junction block(s) (+/-)
- Note the terminal stud size
- Junction Terminal Rings
- Relay(s)
- Relay harness or DIY connectors and wiring
- Switches and electrical wire (16 or 14 gauge 2 strand)
- Fuse block(s) (blue sea or Bussman)
- Note the terminal stud sizes in order to buy the corresponding terminal rings
- I purchased fuse blocks with integrated grounding busbars.
- Terminal Rings lug connector kit (buy a kit) sized to the terminal stud and the gauged electrical cable.
- 90 degree right angle disconnect female spade assorted connector kit.
- Electrical wiring to run from the fuse block to the accessory ports and appliances 14 or 16 gauge double strand).
- PET fire retardant cable sleeve for interior wiring
- Heat resistant cable sleeve for engine bay cables
- Accessory power ports
- Dual USB charger, 12v cig outlet, volt meter, Anderson power pole connectors, etc..
- Heat shrink wrap
- Automotive trim retaining clips
- Optional
- Anderson power pole connectors for plug and play disconnect of wiring. This will be imperative for quick dismantling and unplugging of the electrical wiring of the rear quarter panel fuse block from the wired accessories when pulling apart the trim panel.
Junction studs are 3/8”
Battery terminal connectors are 3/8”
Fuse block A. Positive and negative terminal #10-32 power out #8 screw terminal
Fuse block B. Positive and negative terminal #10-32 Power out #8 screw terminal
- ARB air compressor (2) 8-10 gauge 3/8” lugs for battery terminal
- Powerwerx $1.19 each
- Amazon $6.99 8 awg
- Advanced Auto Parts
- (5) 4 gauge 3/8” lugs battery terminal & junction studs- high heat rated
- Powerwerx $1.49 each
- Harbor freight $2.99 pack of 2
- (4) 6 gauge 3/8” lug/terminal rings for junction studs
- Multiple 10 awg female connectors and (3) 3/8” terminal rings (2) #10 1/4” terminal rings. -apart of heat shrink connector kit from Amazon.
- Lowe’s $7.49 2 pack high heat rated for engine bay
- Relay and switch PIN connectors. These connectors can easily be found in the multi connector pack purchased from Amazon.
Sourcing Materials
I found that sourcing materials locally was extremely difficult because the sizes I needed weren’t on hand and other items were sold out. Otherwise it is a break even cost analysis. It was $19.05 for the lug connectors and going to multiple different local stores. OR order everything at once from Powerwerx.com with S&H $19.89. I bought what I could local and then ordered the rest from powerwerx.
The best solution for buying supplies is to order supplies through genuindealz.com with free S&H or Grainger.com and do local pickup thus avoiding shipping cost.
- https://www.genuinedealz.com
- https://powerwerx.com
- https://www.grainger.com
- Batterycablesusa.com
Tools
There are quit a few tools not mentioned or pictured such as wrench set and ratchet set.
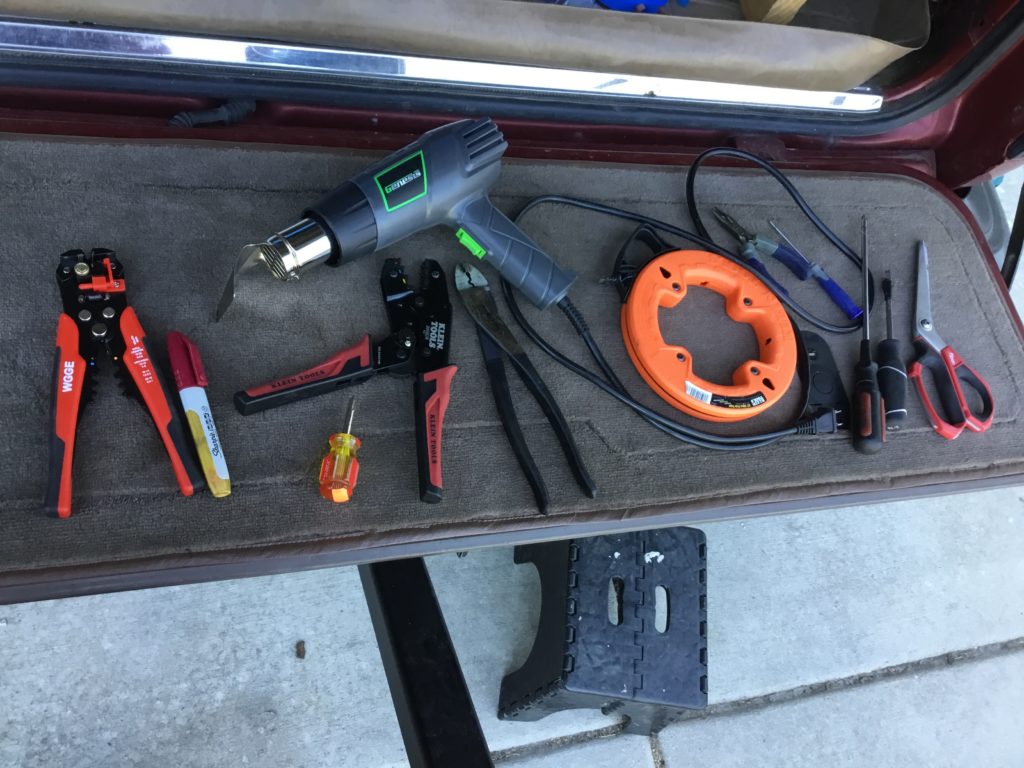
- Wire strippers
- Wire crimpers
- 1 1/8” hole saw
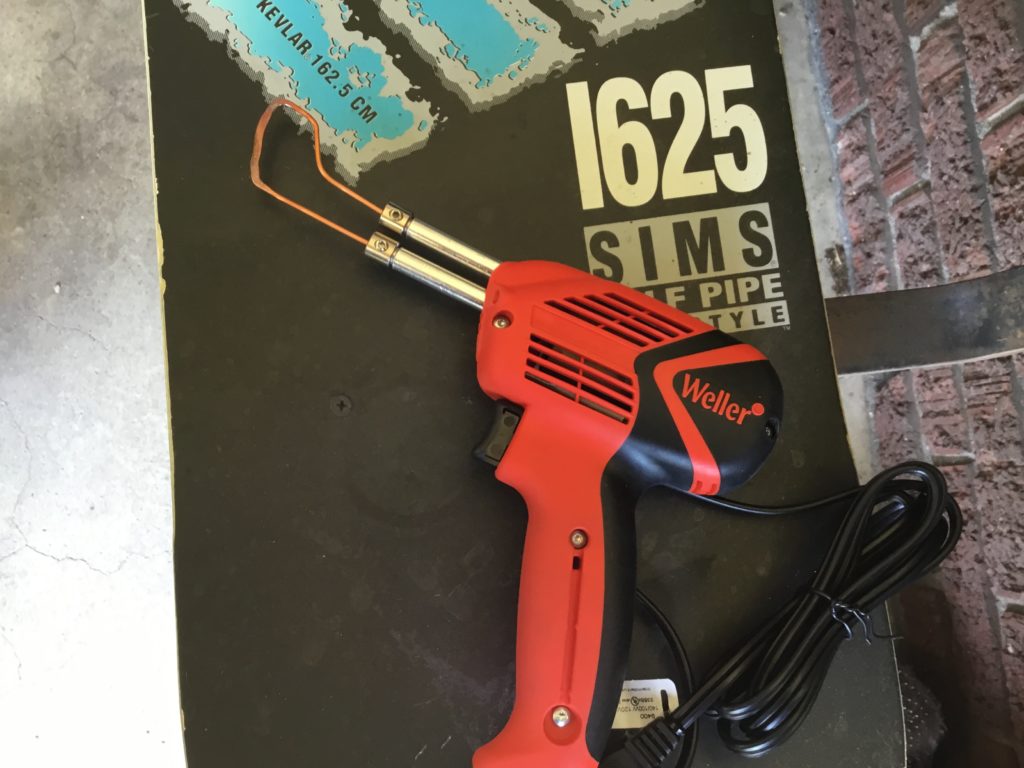
- Optional soldering equipment
- Heat gun for heat shrink wrap.
- Hot knife for cutting the PET cable sleeve
- See my DIY hot knife guide to use a solder gun for a hot knife!
Accessories
- 12v or Anderson port for
- Road pro fan (1 amp)
- Aqua Cube (2.5amp/hr with 5 amp 250V ceramic fuse max pull) -Anderson
- ARB fridge (7.5 amps) – Anderson
- LED light strip (F8 AL 250V mini AGC fuse) Anderson
- h2o (3.3 amps+ 3 amps= 6.3 amps)- Anderson
- Dual USB charger