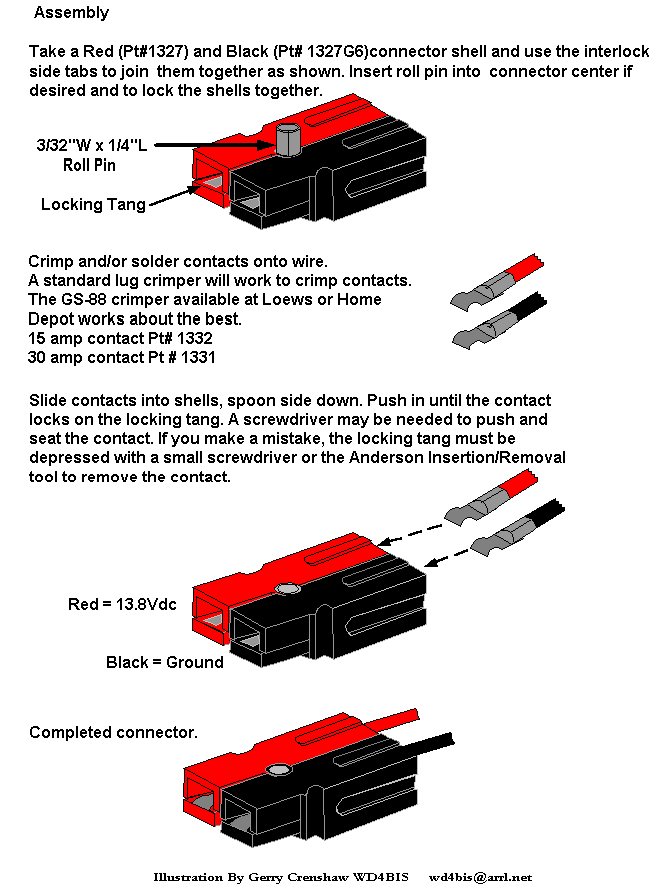
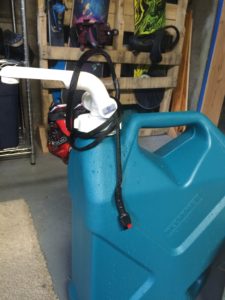
12v Overland Water System for Reliance Jumbo Jug

Automatic 12v water faucet for jerry can!
❤️One of my foundation block essential camping gear items is this automatic water system❤️+ the manual foot pump water spigot. I made this to be plug and play zero maintenance. No batteries to charge or replace!
9/2024 UPDATE: The water system stopped working. I found a blown fuse at the circuit box. Much to my horror I discovered that I did not in fact install an inline fuse on my pump wiring despite my instructions here indicating to do so 🙈💔. I do not know how I missed this step but please learn from my mistake. The Lesson here is to make sure and install an inline fuse to protect the pump and faucet actuator switch.
Blown fuse = destroyed faucet actuator switch.
So I replaced the pump last year, 9/2024, after the blown fuse and on initial testing with the replacement pump it all worked. I put it away for the winter and brought it back out for testing for camping season only to discover it was dead! So I ordered a new pump (3rd pump). Hooked everything up and it was still dead! So I ruled out any issues with my wiring harness etc.. so I replaced the faucet and everything works again! So now I have 2 working pumps and a 3rd to be returned.
I originally thought that whatever blew the fuse killed the pump but the real damage was done to the faucet electrical components. I hooked up the original pump, the 2024 replacement pump, and the 3rd pump that arrived 2025 and they all worked with the new faucet.
Original Build 2018
Dometic has come out with a similar item that runs off of a rechargeable battery (will need to be charged every few months (3 months) and eventually rechargeable batteries replaced) and uses proprietary threaded connectors. It claims to be compatible for use with all water cans. Personally I don’t need more battery operated devices in my life and thankfully I made this plug and play on demand 12v water system for the 7 gallon Reliance water can.
Thankfully I am not the first person to think of this idea and I was able to find a lot of inspiration for this build. The good people at Livingoverland.com inspired me by posting their 2011 water system outline and I am taking it a step further. If you visit the Livingoverland web site it will say that you can buy one of these systems pre made or in a DIY kit. However the web site has said that for more years than I care to remember. I have personally aimlessly waited for over two to three years for them to begin re-selling these systems before I realized it was a fruitless waiting game and I hunkered down to build my own.
I made this in 2018 and Needless to say there weren’t any listed parts or detailed instructions on how to build the system for the reliance water can so I have done my best to put this together. I found two different online sources for how to build this water system using a scepter water can, however those water cans are around $64.00 and are very heavy in weight. I liked the lighter weight of the Reliance 7 gallon water can, the price, and the fact that it holds 1 gallon more than the more expensive scepter can. I welcome any ideas or suggestions on improving this build.
Easy to use automatic Faucet
Parts List
3.3 amps + 3 amps= 6.3 amps
-
2024 price $38.00
-
Shurflo 94-009-10 or the 94-009-01.
$39.76
- (They are the same exact item but differing colors.)
- (They are the same exact item but differing colors.)
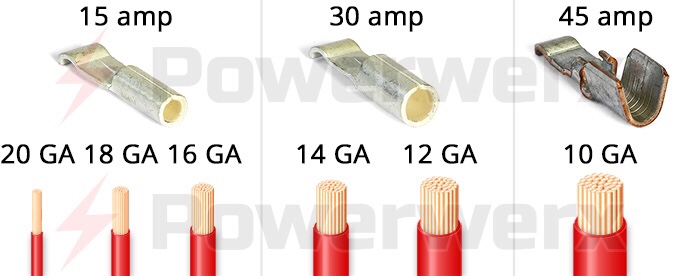
- 3-5ft of 18/2 AWG $8.00 (preferably marine grade electrical wiring can be found at local electrical supply store, on amazon, or powerwerx.com)
-
3ft of 3/8″ID food grade tubing
- Can be purchased by the ft. locally at your nearest brewery supply shop or online here More Beer.
- I purchased my 3ft tubing locally for $1.95
- Can be purchased by the ft. locally at your nearest brewery supply shop or online here More Beer.
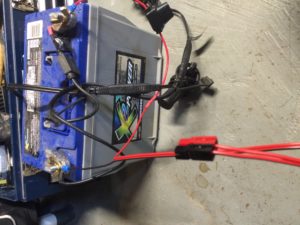
- Anderson Power Pole Power Connectors $3.00
- Anderson Power connector dust covers $9.99
- Silicone Caulking OR 5/16″ Rubber Wire Grommet
- Small zip ties
- Crimp and Heat Shrink Butt Splice Connectors
$6.21
- Reliance Jumbo 7 gallon water can $19.99 Sportsman’s Warehouse
-
Inline marine grade fuse holder
Tool List
- Ratcheting Crimpers $11.99 Harbor Freight
- 5/16″ drill bit.
- Heat gun
- Xsmall flat head screw driver (for working with Anderson power poles)
Build
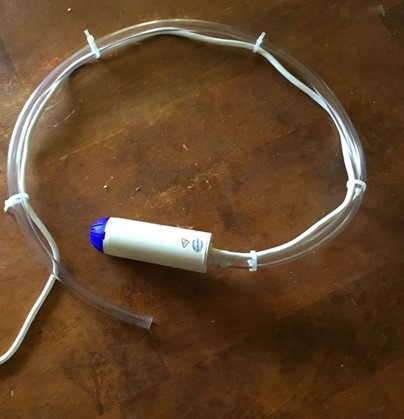
1. Attach the 3/8″ inch internal diameter tubing to the pump.
- This part posed a bit of a challenge as I had to use a candle to heat the plastic tubing to allow for enough expansion to get it onto the barbed pump connection. I recommend using the low setting on a heat gun instead.
2. Secure the Pump Tubing and Electrical
Use the small zip ties to attach the pumps electrical cord to the tubing and cut the excess zip tie.
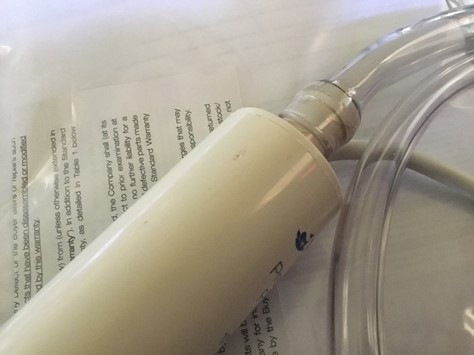
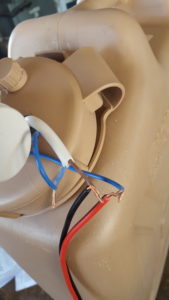
3. Attach the Shurflo Faucet
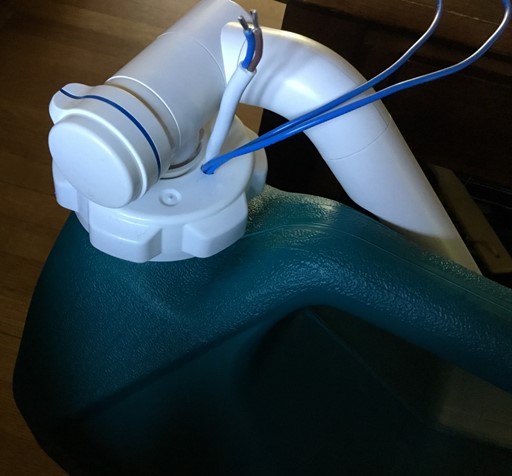
Attach the Shurflo faucet to the reliance lid by first placing the included shurflo riser upside down before securing it in place with the additional rubber washer and nut.

4. Mark the Spot to Drill
Attach the lid to the water can and mark you desired location for your power cords to pass through the lid.
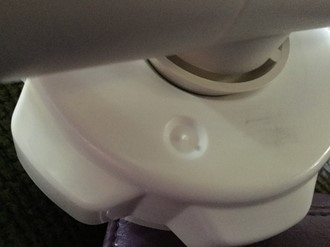
I didn’t have a permanent marker but I did have a pencil to scratch out my marked spot where I wanted to drill for my electrical cords. You can also see in this picture the inverted orientation of the shurflo riser.
5. A) Turning the Reliance lid upside down then drill a hole in the lid using a 5/16″ drill bit.
-
I didn’t have a 5/16″ drill bit so I used a ¼” bit. I found that the ¼” opening was still too tight to fit all four electrical wires through so I offset the drill toward one side to widen the hole. After a few attempts I finally managed to widen the hole enough to fit all four wires.
B) Place the rubber grommet before running your wires through the hole. OR
C) Wait to silicone the cut hole until the electrical wiring is complete.
Pull the wires through, leaving at least ¼” of slack on the two blue electrical wires running the faucet.
6. Inline Fuse
To prevent damage to the pump in the event of an electrical surge install an inline glass fuse holder. I forgot to add the inline fuse and blew a pump. I like the Marine grade 1/4″ x 1 1/4″ fuse holder. If you plan to plug this into a regular 10-15amp DC power socket like the cigaret lighter socket in a vehicle then an inline fuse installed on the power cord is ESSENTIAL! If you go dig up car chargers and look inside the top of the corded 12v male adapter you will always find an inline fuse. This fuse protects the electronic devices and accessories plugged into the 10-15 amp socket from power surges.
 “”
“”
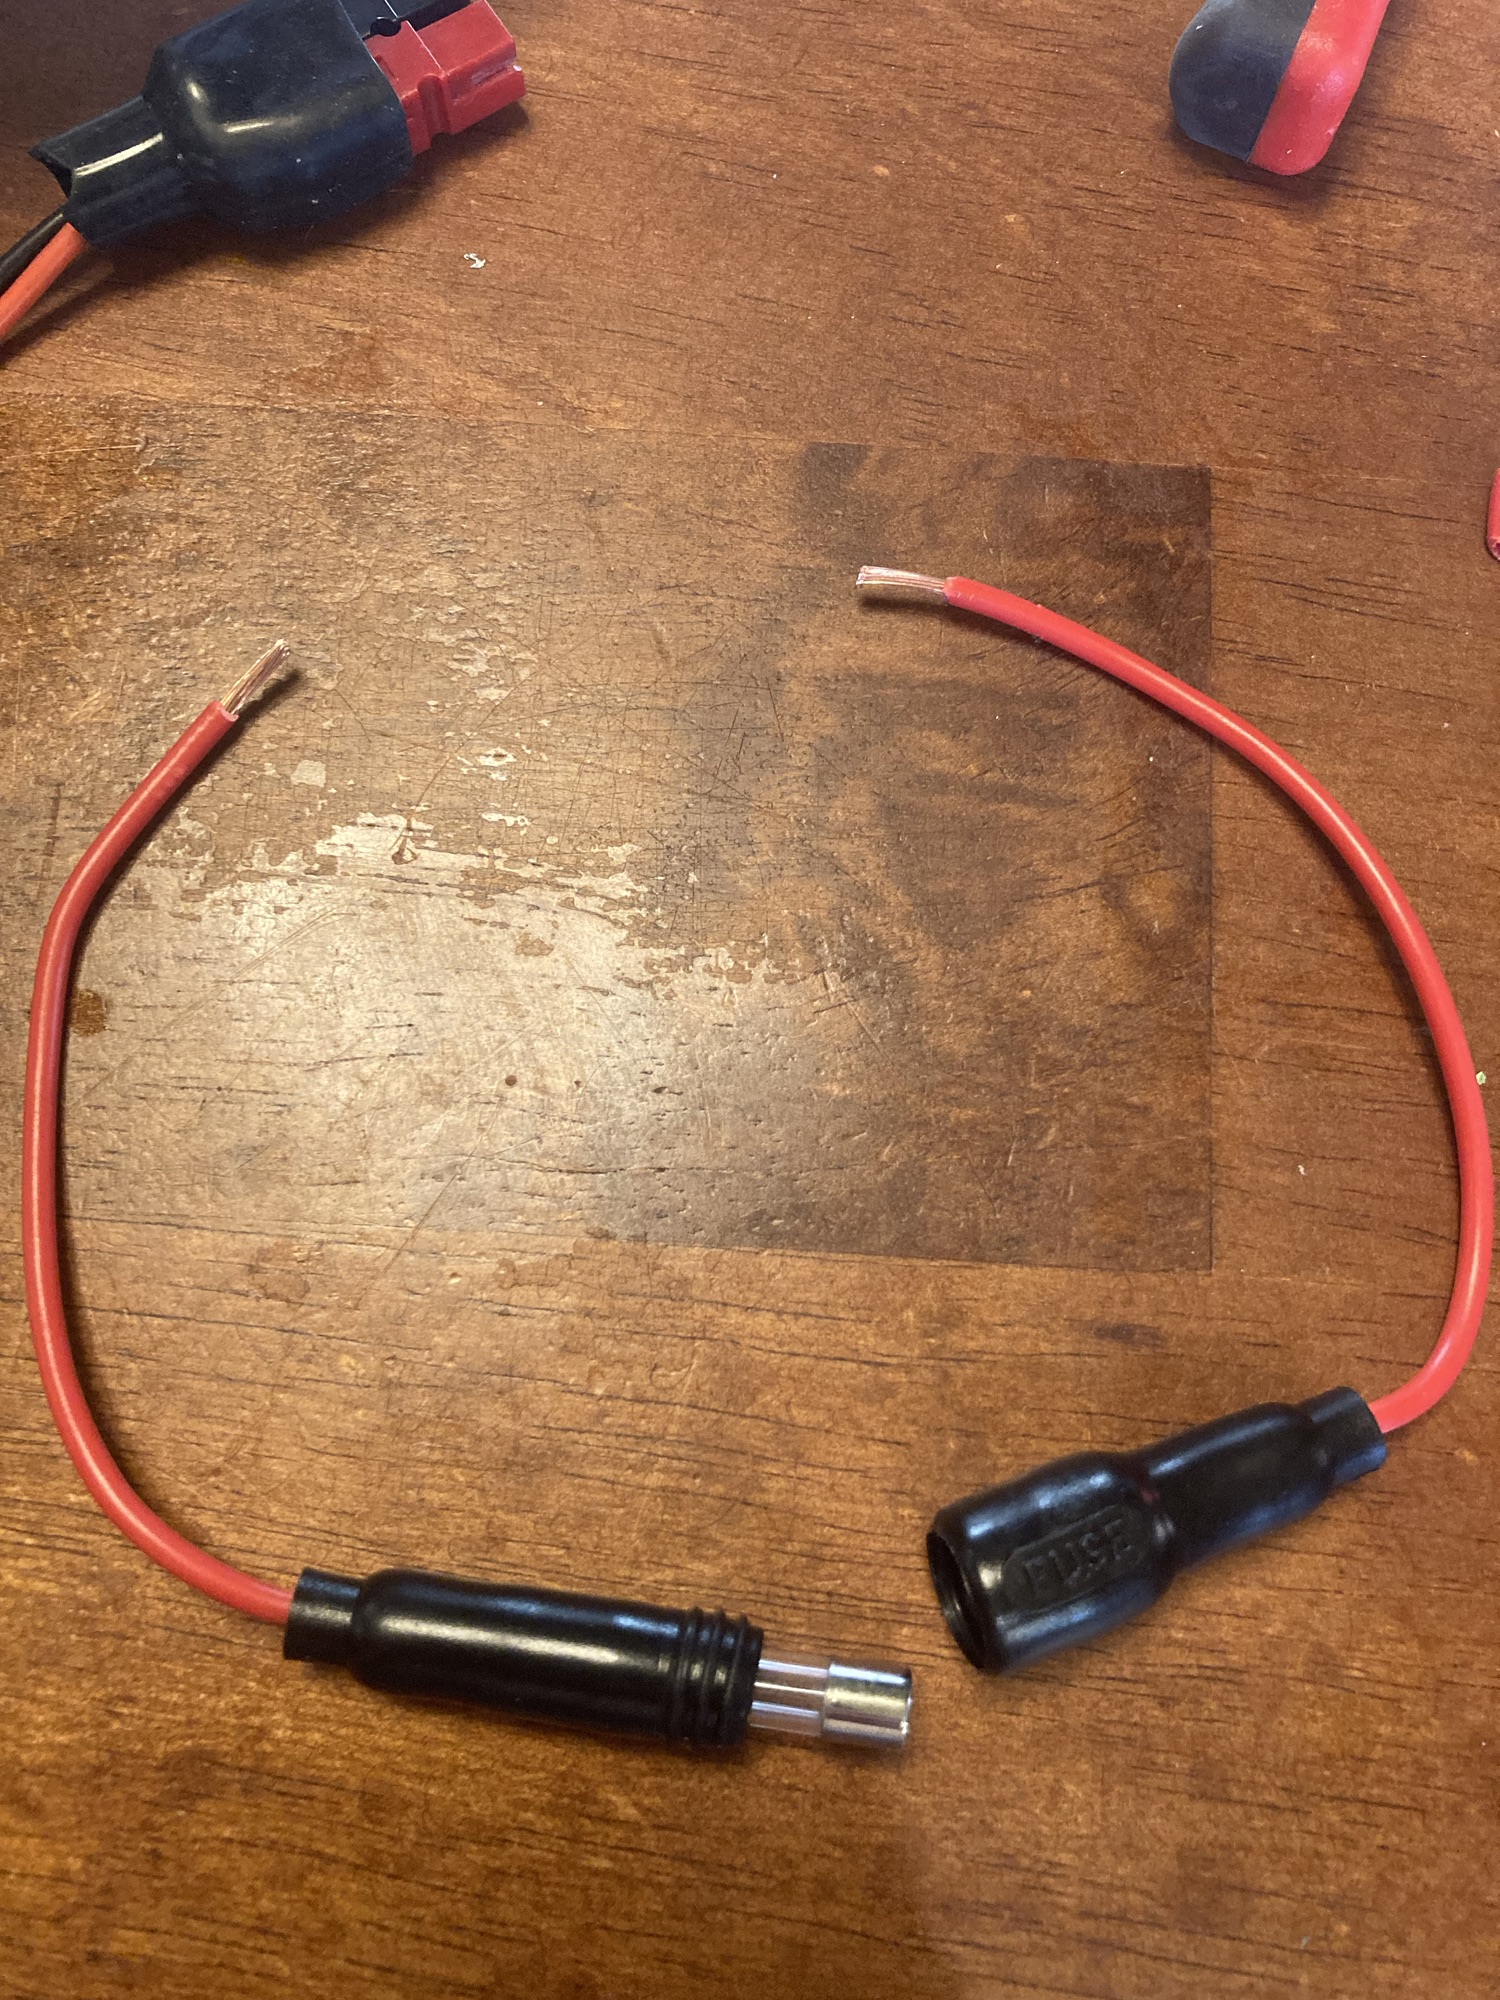
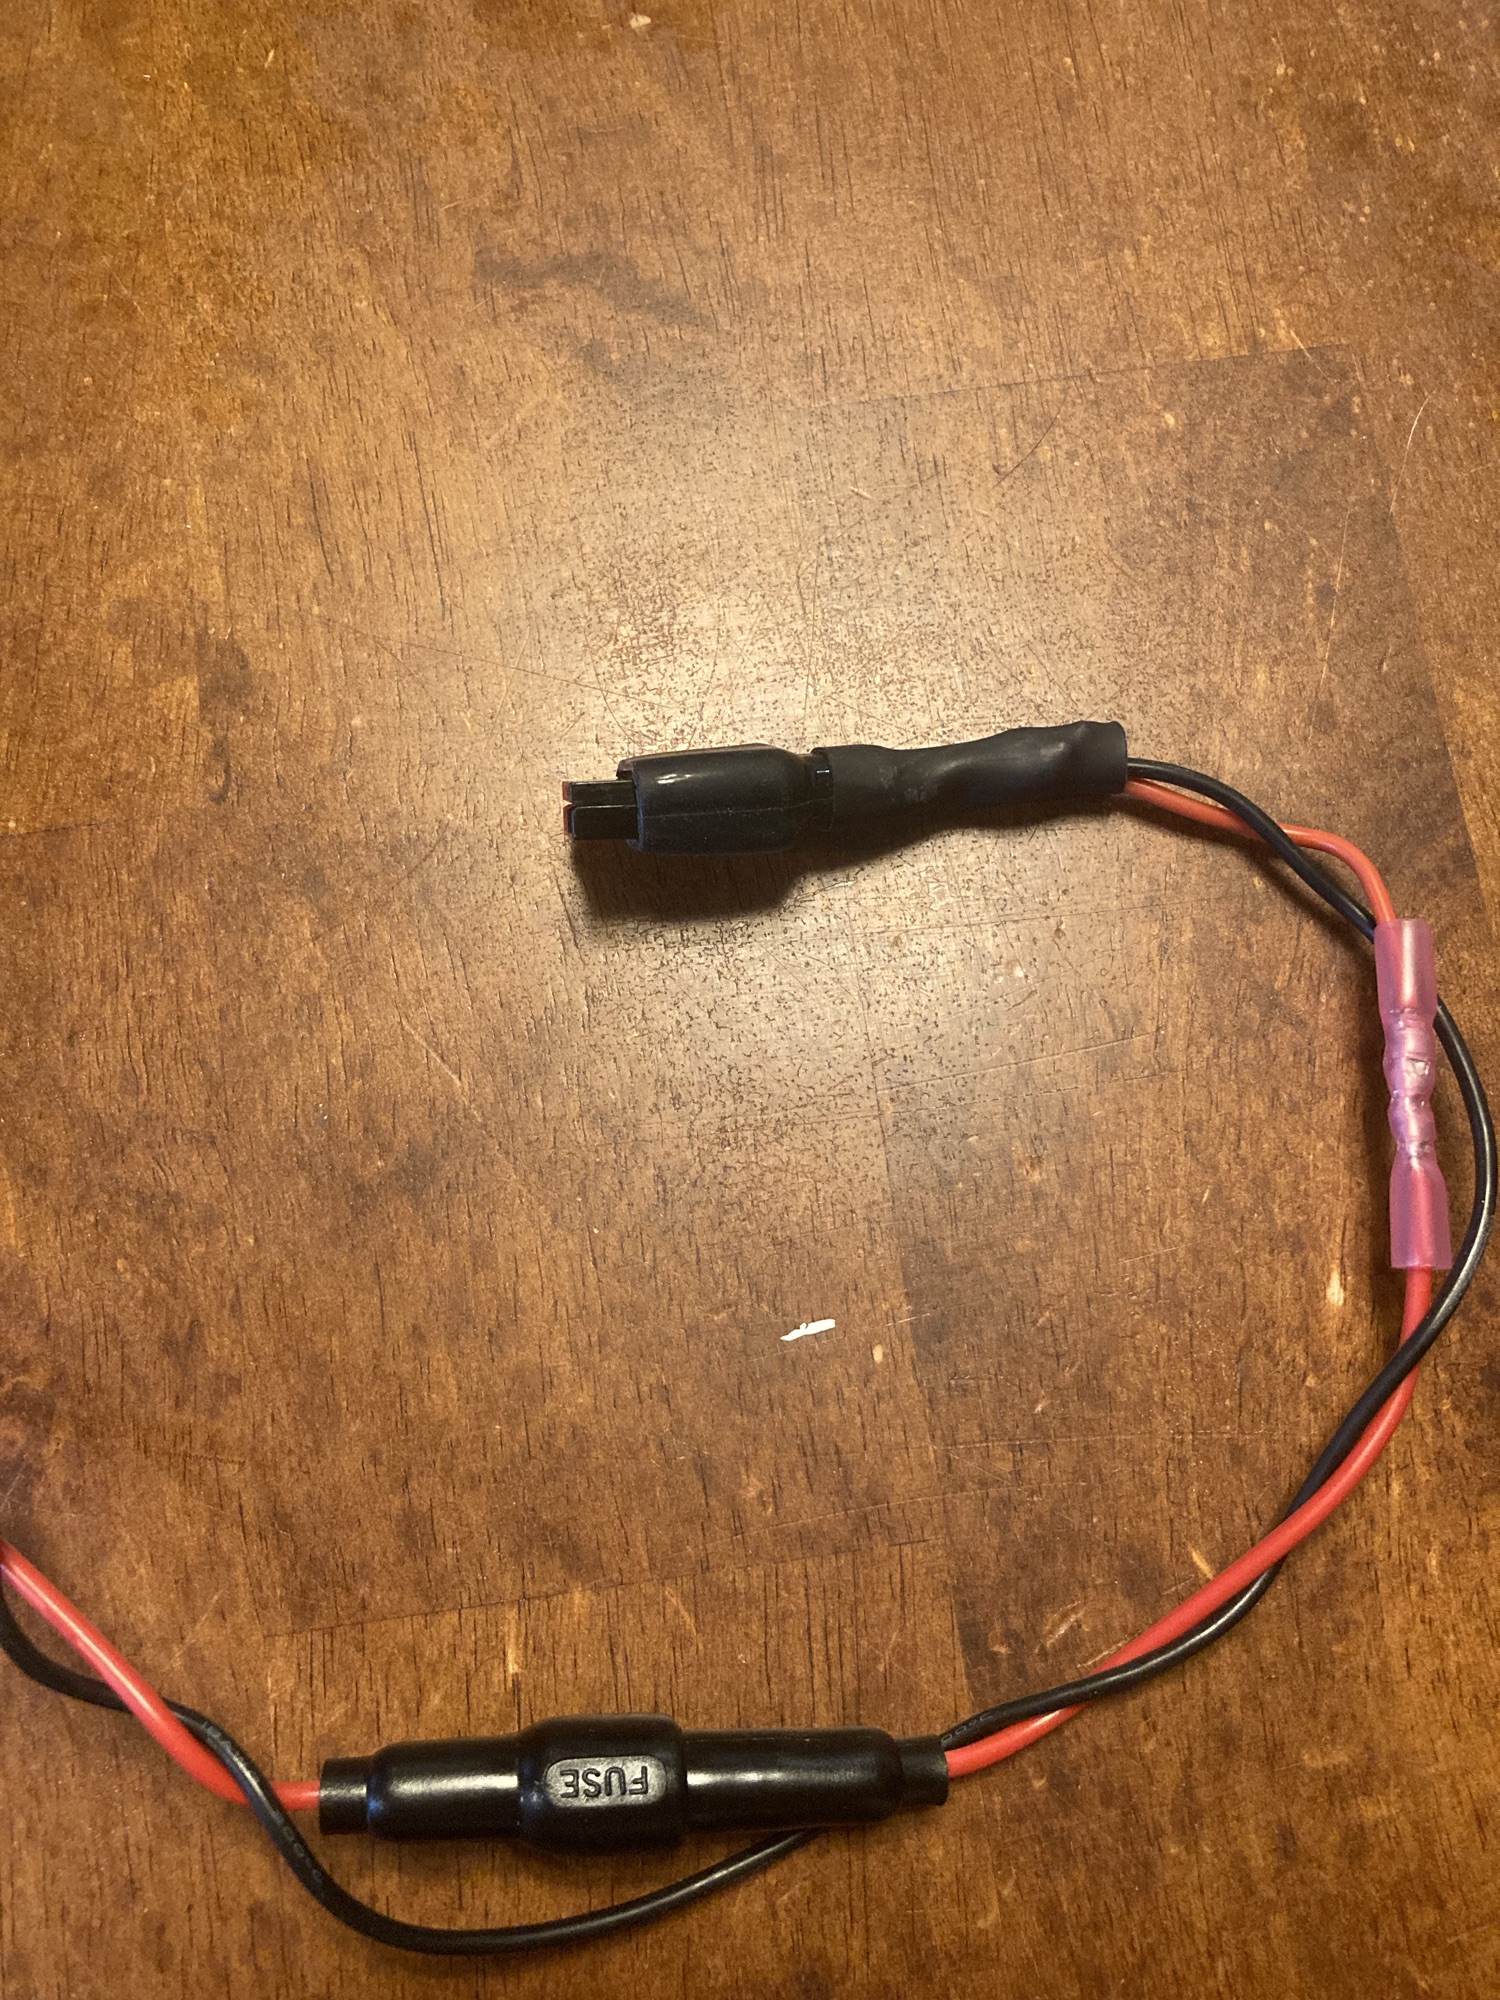
I recommend wiring this directly to the Anderson power plug. I had to retro fit this into my completed wiring which meant making excess cuts and using butt connectors and soldering. It is not as clean and streamlined as I would like it to be.
7. Anderson Power Pole Connectors
Using the ratcheting crimpers and heat shrink attach the Anderson Power Pole Connectors to the 18 gauge electrical wiring. I used heat shrink to reinforce my electrical wires at the connecting points where they are most likely to give out over time. However the heat shrink eventually came loose. I highly recommend reinforcing the connection point here to prevent the wires from detaching.
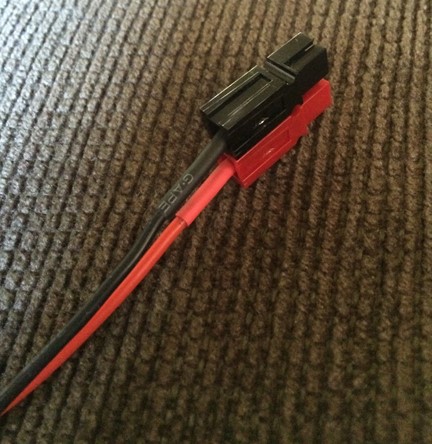
I chose the anderson power pole connectors over the typical 12v cigarette power adapter because of the tendancy of the adapters breaking. I currently have 3 broken 12v cigarette plugs waiting to be made into the anderson power ports.
If you havent worked with Anderson power connectors before here is a brief overlook of how to put them together.
Use the extremely small screw driver to compress the plate inside of the Anderson housing when inserting the power poles.
 jwires
This step would be easier doing before connecting the Anderson connectors.
First place a dust cover over the Anderson port by feeding through your excess electrical wire. Then place the cord sleeve by repeating the same steps. I used electrical tape on both ends of my cord sleeve to secure it in place and prevent future fraying.
8. Connect the pump and faucet electrical wires.
Wiring Guide
Connect the exposed wires and do a test run before finishing off the connections with heat shrink and solder or crimp connectors
- Pump Blue; Faucet Blue A
- Faucet Blue B; Red 18ga; 12v plug positive (A/B wire)
- Pump Brown, Black 18ga; 12v pump negative
Tip:
When connecting the water faucet electrical wires one will say A/B and the other will have no identifying letters. According to the installation manual it doesn’t matter which wire is connected to the 12v positive.
I forgot to take a picture at this point so here is one from the sceptar build I linked above.
9. Attach the Pump to Faucet
After the electrical wires were run I took this time to cut down my tubing that runs from the faucet to the pump and then connect/reconnect it.
10. Silicone the hole the electrical wires run through the lid. Connect to power and run the system.
This project took me quite a bit of time as I also had to build a battery terminal power plug. I had quit a few butt connectors that wouldn’t crimp and I had a few connections come loose while testing. The hardest part was sourcing all of the materials and slowly building it over time as the parts would come in.