Eezi-Awn k9 Roof Rack for 1996 Toyota Land Cruiser

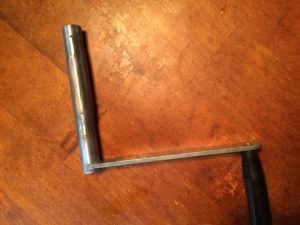
WARNING: When considering adding a roof rack with a hardshell RTT be aware that your average length crank handle may no longer freely turn without hitting the roof rack. Solution is to take your handle to a local welder at any auto body shop and have them add an extension piece for you.
I started out with a simple mission of trying to retrofit Rotopax, Maxtrax, an awning, and other various tools necessary for back country driving and camping to our existing Yakima cross bar gutter mount system. While it is possible to retrofit an existing Yakima or Thule bar system for expedition overland driving/camping I soon became exhausted by all of the materials I would need in order to complete the job in a short 2 week time frame while working and going to school.
Second problem and deciding factor is that the Maggiolina hard clam shell roof top tent mounting instructions indicate;
“Off highway use: These tents are made to withstand a lot of abuse, but we highly recommend, when mounting a tent for using gutter mount rack systems for off-highway use, that you employ THREE or more cross bars. This helps to distribute the load evenly and avoid damage to the vehicle under extreme conditions. Minimum and Maximum front to rear bar spread is 30” Minimum, 54” maximum.”
Our second Yakima bar system was left behind when we moved so we don’t have enough bars for the upcoming back country trip.
Both Roof Rack companies offer free shipping and handling when purchasing their roof rack systems.
Eezi-Awn K9 Roof Rack
Then we saw the Eezi-Awn K9 roof rack in all its glory at the local Equipt show room.
$1,335 not including accessories
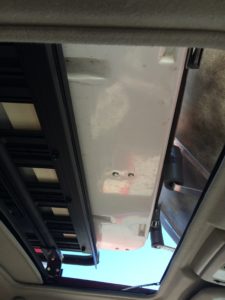
I think that with the 1.8m 71″x 55″ I can still access a clear view of the sunroof and still easily access the Maggiolina clips when they jostle loose via the sunroof.
This has come in handy many times since install.
Pros:
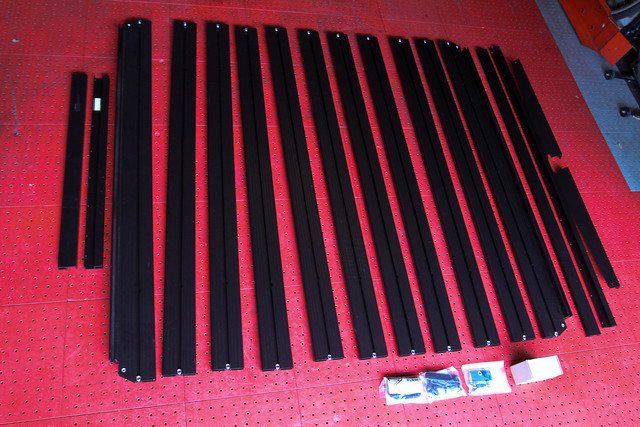
- The entire roof rack system is one piece all of aluminum welded together for a dry weight of 60lbs.
- This system comes complete with (1) platform, (1) pair of rails (2 total), (2) rail mount feet for each of the (5) crossbraces (10 total), and all the hardware components required for installation.
- Thule & Yakima Compatible, So you can still use your existing bike mounts to haul your gear and toys when no RTT is on board.
- local pick up and install
- after reading through various Ih8mud, expedition portal, and overland forums no one had anything negative to say about the system and preferred it over the competing systems.
- 5 sizes to choose from ranging from the smallest length of 55″ to the longest of 87″.
Cons
- Heart breaking news is that It doesn’t seem to be compatible with the leading competitors accessories which seem to be amazing.
- A limited number of rack mounting accessories
Front Runner Outfitters slimline 2
The runner up was the Front Runner Outfitters Slimline 2 roof rack. It is heavily versatile with a large assortment of accessories for mounting Rotopax, awnings, hi-lifts, anything you can think of and had it been local to pick up and install I would have opted for this rack due to the more favorable accessories.
You have two rack size choices
- Full rack 53″w X 85.3″L $1,226.00
- Half rack 53″w X 53.5″L $845.00

Pros
- The movable awning arm $594.00 means you don’t have to buy the large cumbersome bat wing awning and we can still access both sides of our RTT.
- The largest array of rack accessories of any manufacturer I came across


Cons
- more people throughout the forums had negative reviews of the Front Runner rack system that mainly consisted of complicated installation, noisy when driving, and having to re tighten the rack system up after off road driving.
- No local purchase for purchase, pick up, and install
- There are only two size of roof racks you can choose from
- The Half Rack is too short for our RTT and the Full Rack would have completely obstructed the sun roof access and view.
Conclusion
We are set to purchase the Eezi-Awn K9 roof rack system this coming week and I will post pictures of everything installed and set up. I will work on modifying a movable arm for the K9 roof rack in the future.
Eezi-Awn K9 Roof Rack Install 9/20/17
Today was the day that we had the Eezi- Awn k9 Rack system installed on the land cruiser.
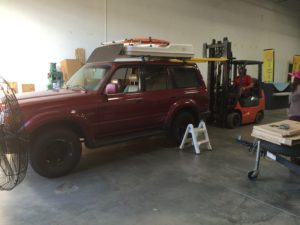
First let me say that Paul and his staff are amazing!
Second the install took some interesting turns and required slight customization for the Maggiolina RTT and their mounting hardware.
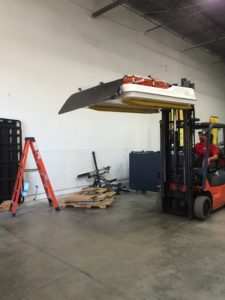
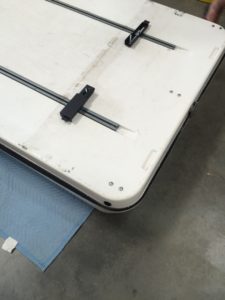
We had an appointment at Equipt to have the rack and tent mounted and I am so thankful that they did the install because it took nearly 3 hours for total install with all the trouble shooting. The Eezi-Awn tent mounting hardware was tricky, the tent was nearly installed when the tent and hardware had to come off and back to the floor and flipped over it went to have the mounts turned 180 degrees. The picture below is how the mounting hardware was finally oriented.
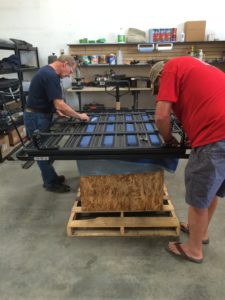
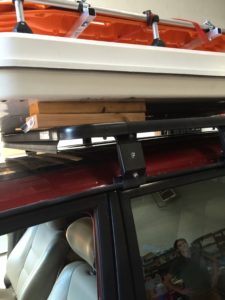 Here blocks of wood were used to prop up the tent so that the mounting hardware could be aligned before setting it down onto the frame.
When we first left the warehouse after the rack was installed we soon heard some strange banging and rattling from the tent. After lunch we headed back over to Equipt to resolve the issue. After a few laps around the parking lot and hitting every possible bump we could find, Paul came up with the solution!!!!!
The problem was that the Maggiolina RTT went from sitting on top of two Yakima cross bars fully supporting its base to now sitting on two narrow straps no longer than 8 inches and giving the tent a 3/4 inch (best guess) height increase from the rack. The lack of base support was causing an imbalance of weight distribution and flexing of the tent. In the end we wedged some pieces of wood between the tent and the rack system that run the entire width of the tent base and this fixed the problem! However now we need to secure the pieces of wood to the rack so we don’t loose them when we go off road.
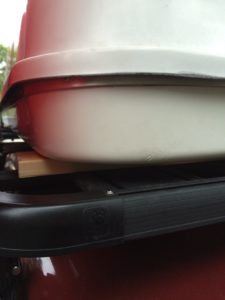
I chose a shorter version of the rack system so that I could still have access to the Maggiolina clips in the front. When we off road the clips frequently come off and bang around so I usually will stick my hand through the sun roof to re attach them. After the rack was installed we considered taking off the wind deflector that comes on the K9 rack so that we can have full use of the sun roof without hitting the deflector. However this was unnecessary because the rack height fully extended allows for full tilt access of the sun roof and future mounting of either a solar panel or table underneath the rack.