Changing Cabinet Hinges
⚠️ WARNING
changing cabinet hinges can have unforeseen complications. A) A cabinet door using a spring tensioned self closing hinge can appear normal under load but once the spring tensioned hinge is removed and a soft close hinge is added, which has zero tension, then the door may now be warped and no longer close flush with the frame. B) older hinges had a more compact less intrusive hardware Making them easier to install into extremely difficult and limited spaces. ⛔️ Newer full overlay hinges are extremely oversized and bulky and are not flush with the frame.
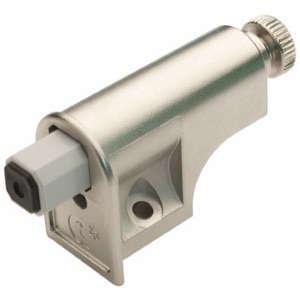
I wanted to upgrade my kitchen cabinet hinges to soft close face mount hinges from the single soft close dampener which keeps breaking (because they aren’t designed to be used with tensioned pressurized self closing hinges) so I thought it was time to make an upgrade.
⚠️ As I mentioned once tensioned self closing hinges are removed the cabinet doors can become warped. So be prepared to add door stops to soften the sound of the uneven warped doors. The best time to install soft close hinges is when installing brand new cabinet doors.
What to do instead..
#1. Inspect cabinet doors for warping and size and weight appropriateness.
If your soft close dampener is breaking then the door is either A) under too much weight from an over sized door or B) it is warped. Soft close dampeners work best with non tensioned hinges aka don’t use dampeners with self closing tensioned hinges, Because a warped door under tension will appear normal and flush with the frame but it will cause the dampener to break prematurely.
#2. 🌟 Consider saving money and installing soft close hinges on XL doors which aren’t rated for use with the dampeners and warped doors that consistently break the dampener. Keep the remaining properly functioning hinges and dampeners in place.
#3. Consider using compact face frame hinges where opening width is the main goal. ⛔️ some face mount hinges are not rated for over 1inch overlay.
I had two cabinet doors with broken dampeners due to one being XL and the other is warped but I did not know it was warped until removing the tensioned self closing hinge and installing the soft close hinges. Removing the tensioned self closing hinges will result in longer life span on soft close dampener being used with self closing hinges on my warped cabinet door.
Lastly and most people may never encounter this problem.. One of my cabinets was built around a staircase. So I had to revert back to the original flush mount Ferrari hinges.
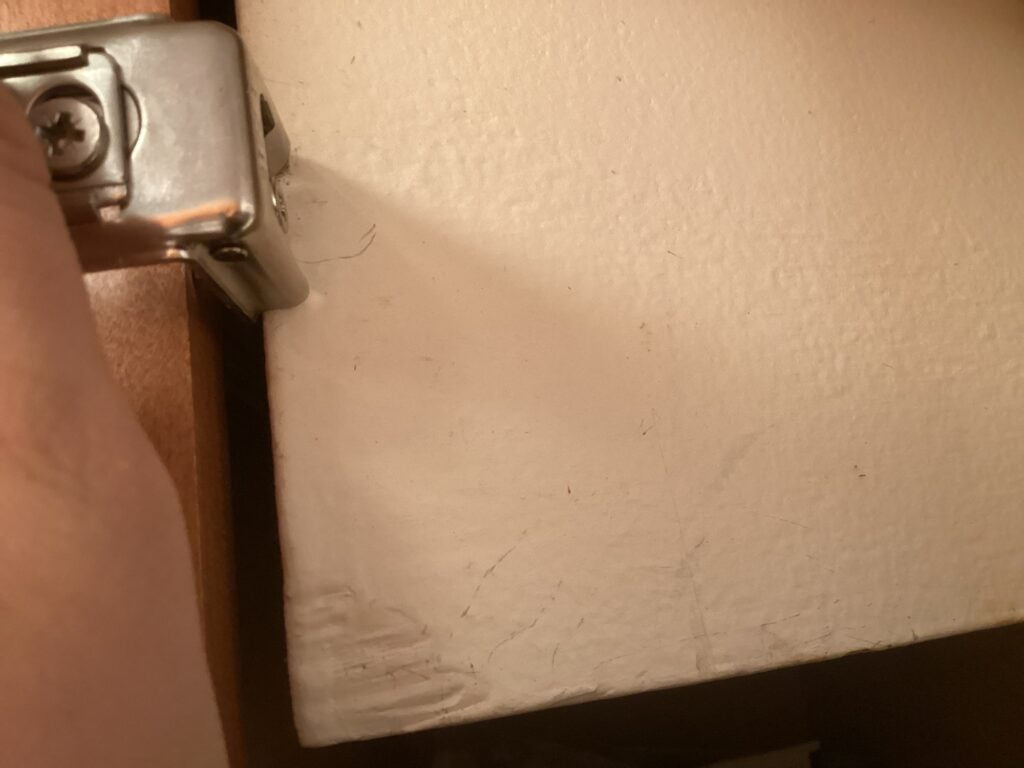
Modern oversized Full overlay hinge does not fit!
Ferrari Hinges
There are many variables to consider when upgrading or changing old cabinet hinges.
So start hereWood workers express and here How to Replace Cabinet Hinges: Tips & Free Hinge Matching Assistance
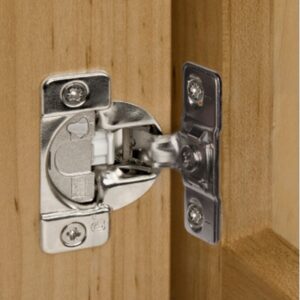
#1. Identify hinge
Ferrari BX710M TZ plate
This cabinet hinge has long since been discontinued and the Ferrari company does not have a North America headquarters.
This means that in the absence of a manufacturing data sec sheet that I had to physically measure the hinge and mounting pattern with calipers.
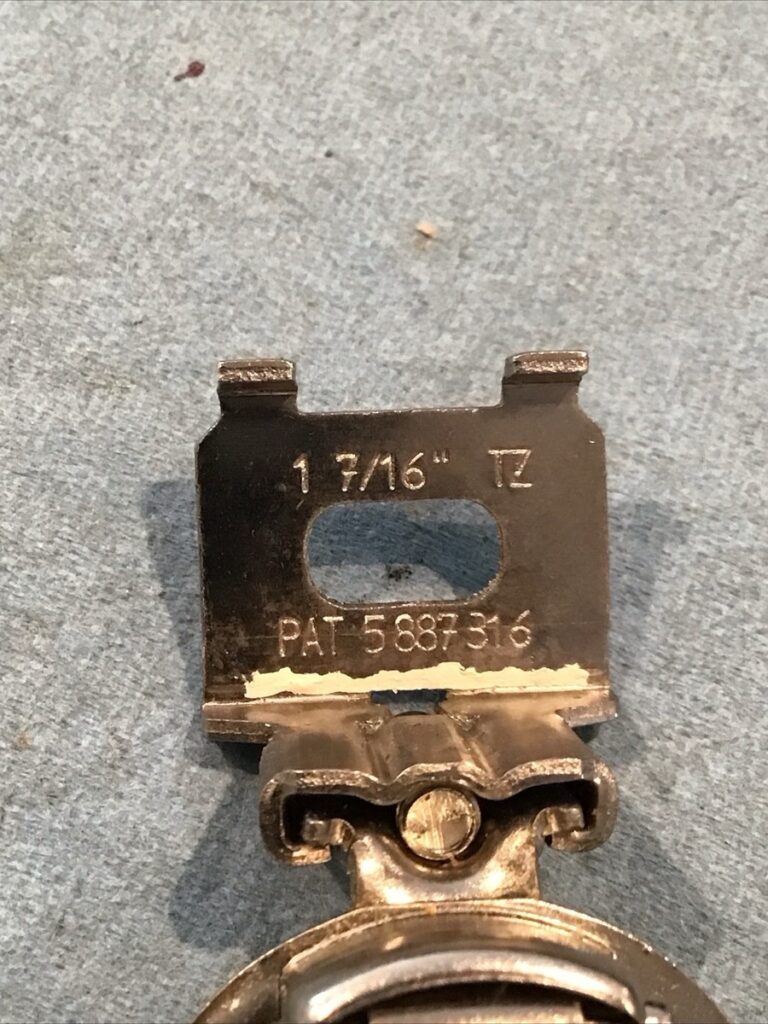
#2. Overlay
This has a 1-7/16in overlay of which I measured prior to finding it stamped on the hinge.
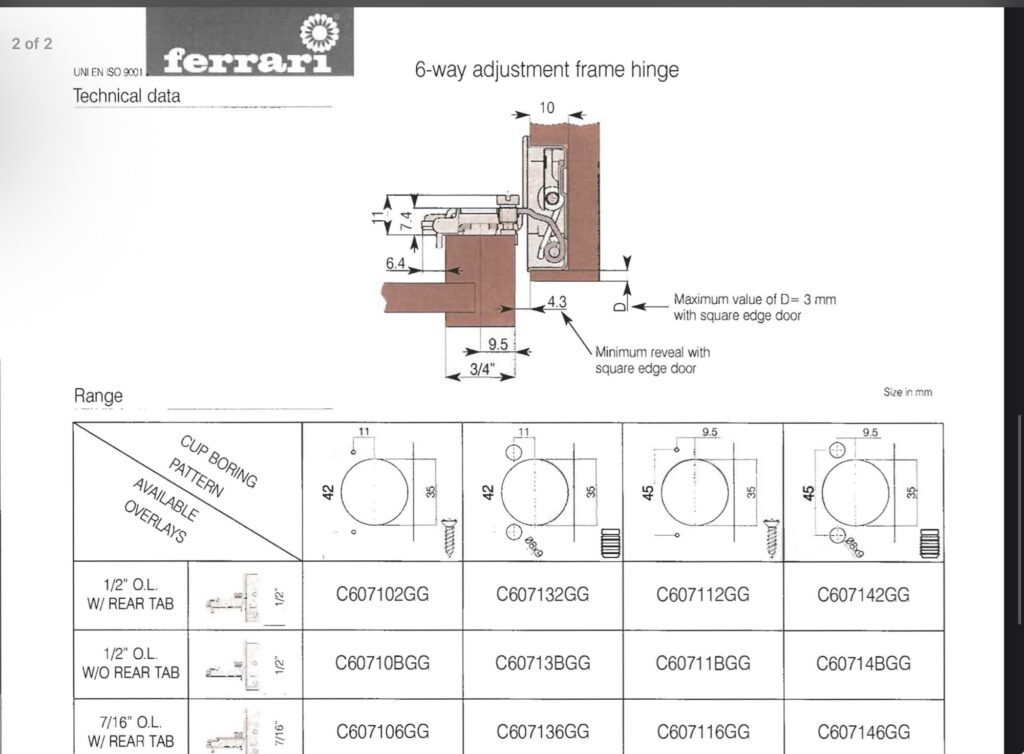
#3. Boring pattern
Using calipers I was able to determine the 8mm dowel boring pattern. Next I Confirmed my measurements with a very difficult to find Ferrari data spec sheet.
My current ferarri hinge has a 42mm boring pattern. The 42mm boring pattern has long since been replaced by the newer industry standard boring pattern of 45mm and therefore is incompatible with most newer hardware.
Identify New Hinge
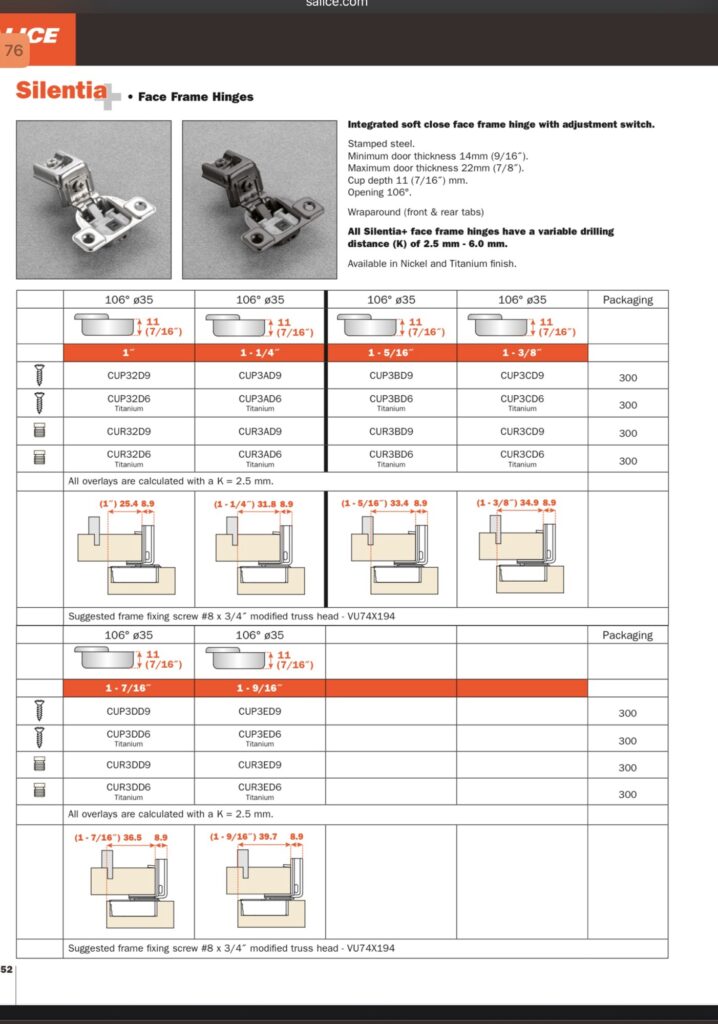
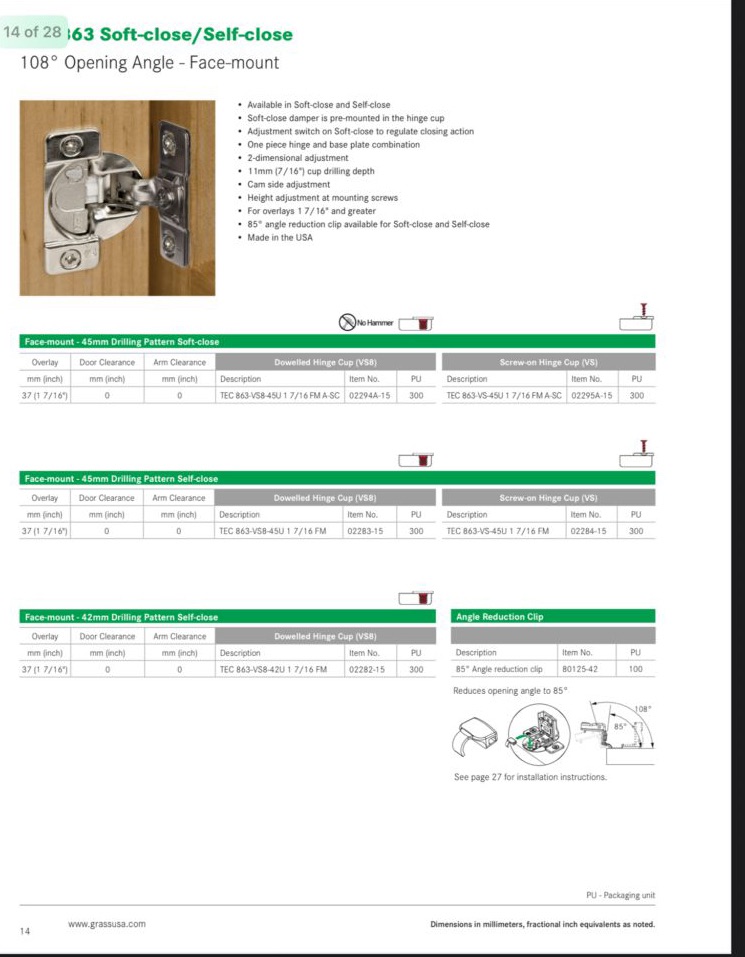
Salic cur3dd9 and the Grass America 863 hinges are the only available soft close hinges that could potentially work.
⚠️ after installing the salice cur3dd9 hinges I can say with confidence that the Ferrari hinges are superior. The Grass American Hinges appear identical in build design as the Ferrari so if you are trying to decide between salice and Grass American to replace the Ferrari hinges then try the Grass America hinges.
The salice cur3dd9
Overlay 1-7/16in with 45mm boring pattern and 9.5mm so this means the hinge boring pattern will not line up and new dowel holes will need to be drilled.

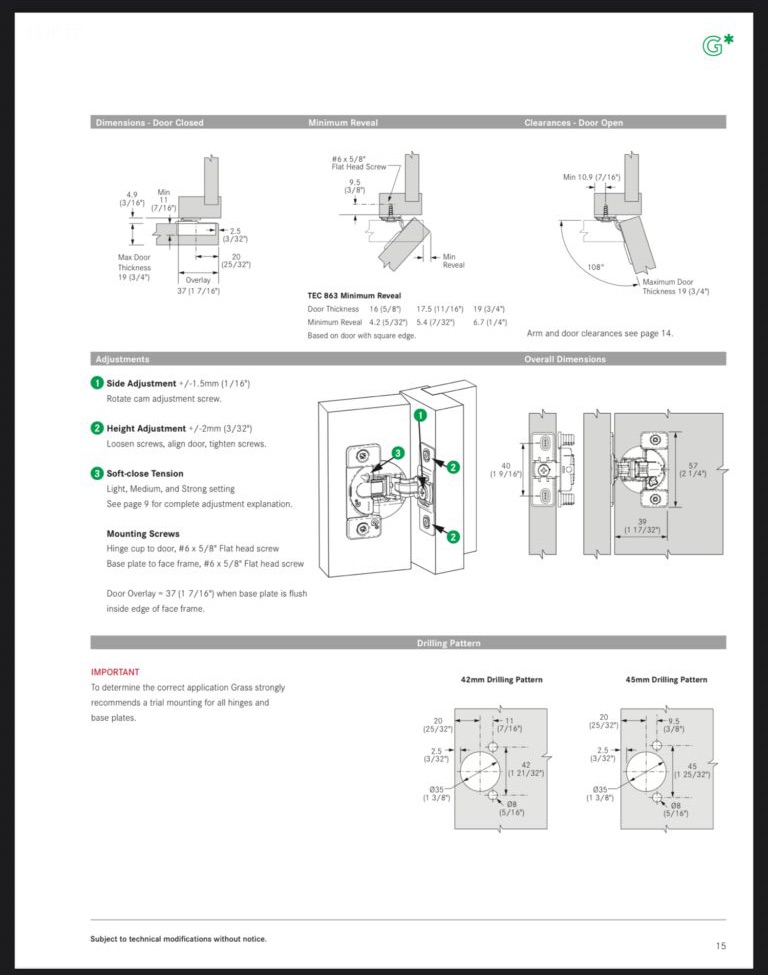
Grass 863
This hinge Doesn’t have a 1-7/16in overlay hinge but it does come in a 1-3/8in overlay with a 42mm boring pattern. So it is close enough that it would work with minor hinge adjustment. However new mounting bore pattern would need to be predrilled into the cabinet frame of which sadly I am not comfortable doing.
What I chose
Salice cur3dd9 is my hinge of choice because it is the identical overlay match and I can reuse my existing frame mounting holes.
It comes in a dowel form so if you want to mount with wood screws then anticipate removing the dowels to achieve a CUP3DD9 hinge.
⚠️ The hinges are extremely weak soft close while being on the firmest setting. my large cabinet doors still bounce closed. I have 2 large cabinet doors hung with two hinges and they do not soft close. I have an XL cabinet door hung with 3 hinges and it is the perfect soft close. Now this could be due to warping or some other issue but I will have to keep my face mounted soft close in place.
Add pictures here
Process
Step#1. Remove hardware from cabinet door
This includes removing any existing dowels. this can be achieved by using a drill with a bit slightly narrower than the dowel, insert drill into dowel for a few bites and then pull it out. Do expect there to be damage with this process.
🌟 finding a screw to drill down into the dowel and then using a hammer to pull out the screw with the dowel was much easier for us than using the drill method.
#2. Using wooden dowels and wood glue fill the holes.
⏭️ you can skip this step and drop off the cabinet doors with a local wood working shop that happens to have a cabinet hinge machine to fill and drill the new mounting holes.
OR the good ole DIY!!!
For this step you want to cut and sand a dowel and wood glue it into the old hole. This is also a great time to use wood Bondo to make any repairs caused by the previous step.
#3. This is where you can either use a drill press and a template/jig to align and drill new holes (for wood screws or dowels).
⏭️ SKIP this next part if not using dowels
#4. With the cabinet ready for new hinge install you can now either use the wood screws to mount directly to the cabinet doors or take the time to install the plastic dowels which will prevent stripping of the wood.
I chose to add the plastic dowels.
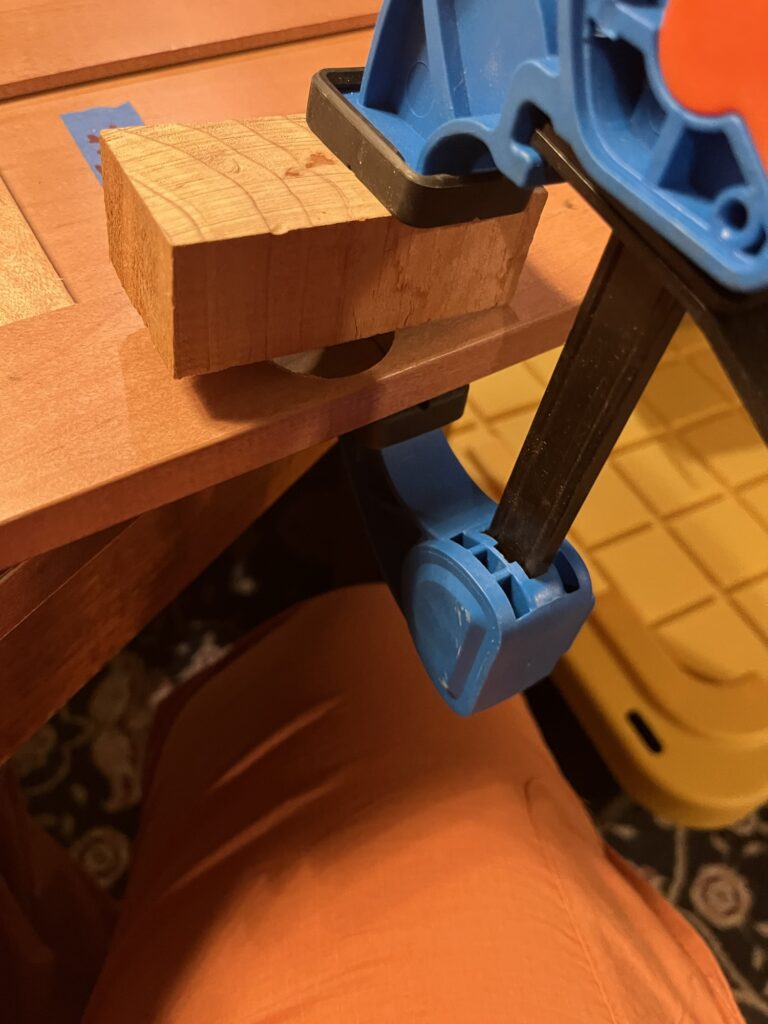
Using a wood block and mallet to set the dowels into the holes before using c clamp.

Use large C clamps to push the dowels down into the holes moving left and right to apply direct pressure to each dowel until it is flush.
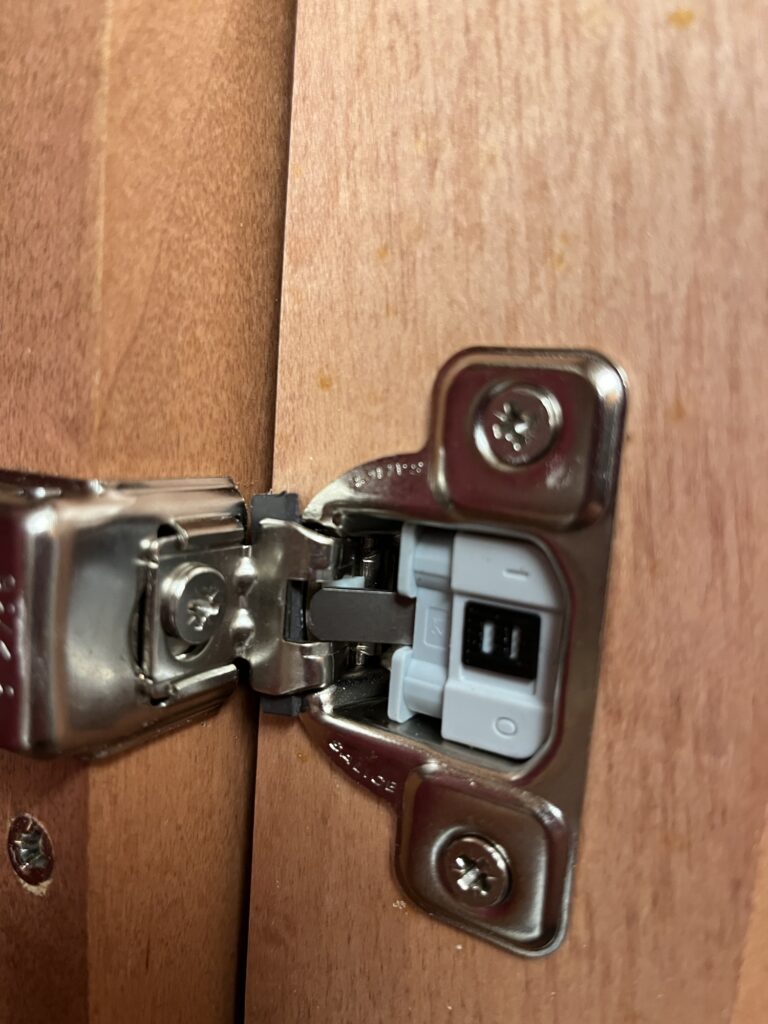
Now add the hinges
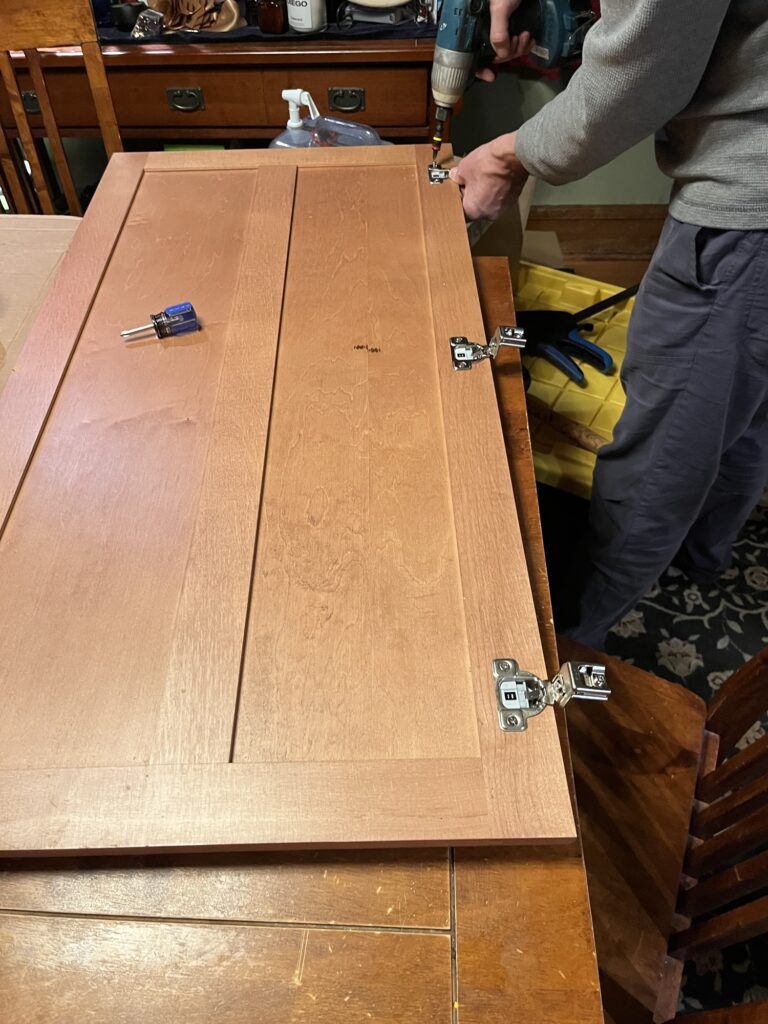
Restriction clips
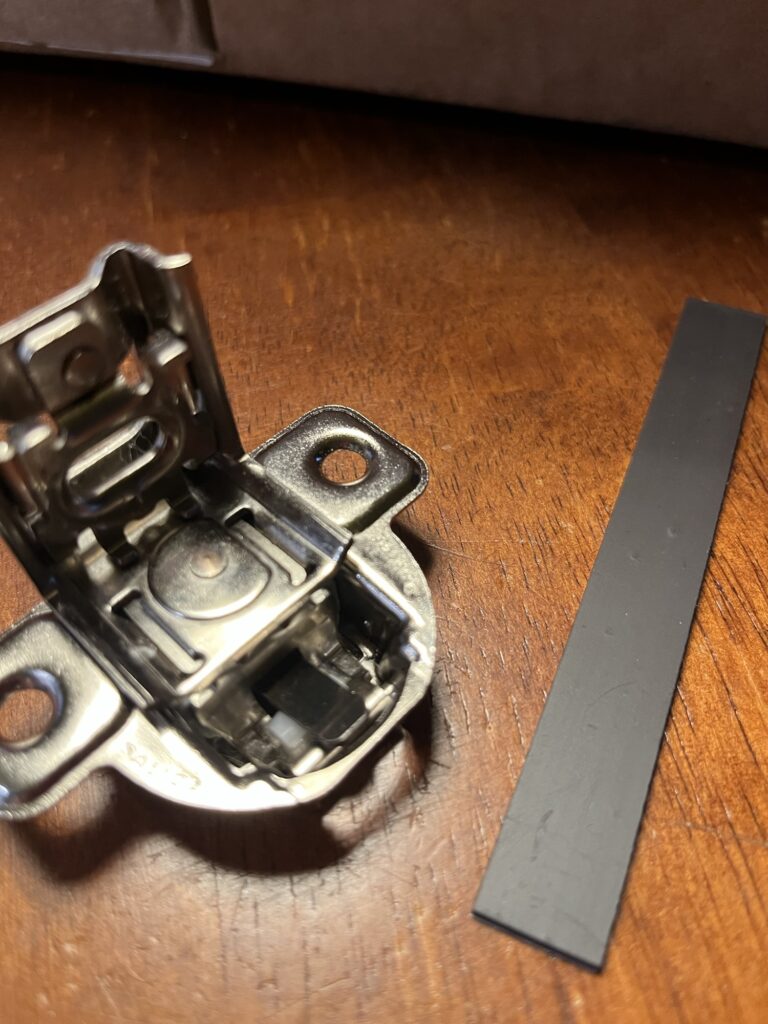
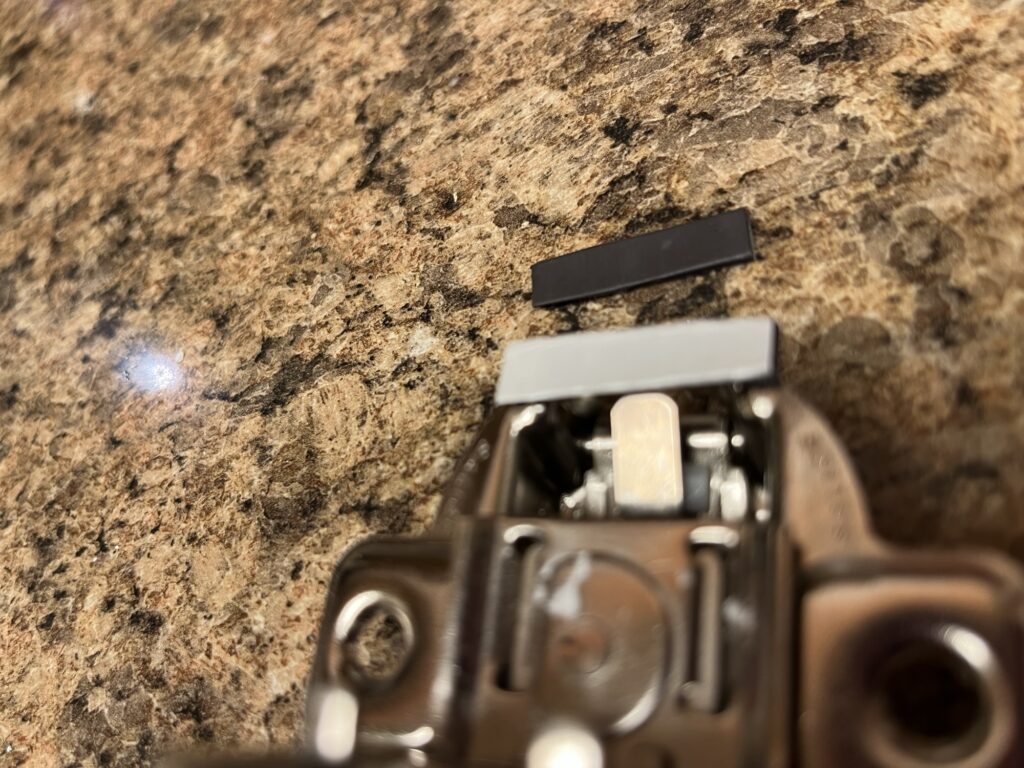
You can try and see if the company who makes your hinges sells pre fabricated restriction clips or you can get creative. For my cabinet doors close to walls or other obstructions I needed a reducer to prevent the doors from slamming open. The restriction clip sold by Salice would have reduced the opening to 86 degrees which would have created blocked my pull out Rev-a-shelf.
So using adhesive backed magnets (or go to hobby lobby and buy rare earth magnets but they may cumble) I was able to cut down to size a shim. If you think of it ahead of time I suggest gluing these in place (e9000) since the adhesive on these is worthless. thankfully I he magnetic holds them in place for now. If they fall out I will take the time to glue them in place.
This will not work on a cabinet door that is incorrectly installed. For example my large cabinet doors were installed only using two hinges when they needed 3 hinges due to size and weight. So now I have to install the hinges to help prevent further warping and damage.
Surprisingly these have remained in 3 out of the 5 doors I installed them into a few months ago.