Adding an Inline Hour Meter & Water Tank LED Light to GX SC4-I Air Compressor
⛔️ It is a violation of National protected US Consumer Rights for any company to threaten or write into their consumer warranties that a warranty will be voided for any aftermarket modification, use of non oem parts, self maintenance, or repairs!⛔️ Do not be scammed go learn more from the FTC and about the Magnuson Moss Warranty Act of 1973.
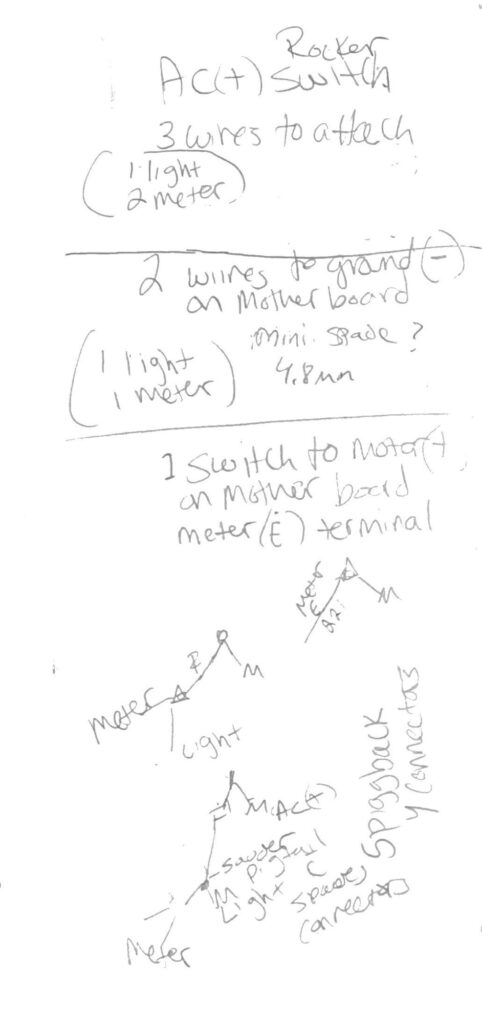
I started with a rough idea of wanting to add an inline meter that would only track the hours when the actual Compressor motor turns on and an LED tank light that would power up with the activation of the AC rocker switch and water pump. I started by opening up the compressor to see what existing electrical I was dealing with and to trace out the electrical connections. Next I drew out a map of what I thought installing my backlit LED inline hour meter and LED water tank light would look like and require. Lastly I began to gather my tools and parts. I did my best to try and slow myself down to remember to take pictures as I was working on this!
⛔️ You should have a basic conceptual understanding of electrical AWG sizes vs current and distance voltage drop, color coding, and ability to determine the difference between electrical (+) and (-) in 12v and AC and or be able to learn it before attempting electrical projects such as this.
Tools and parts I already had
- Electrical strippers and crimps for non insulated and insulated connections (two different crimpers)
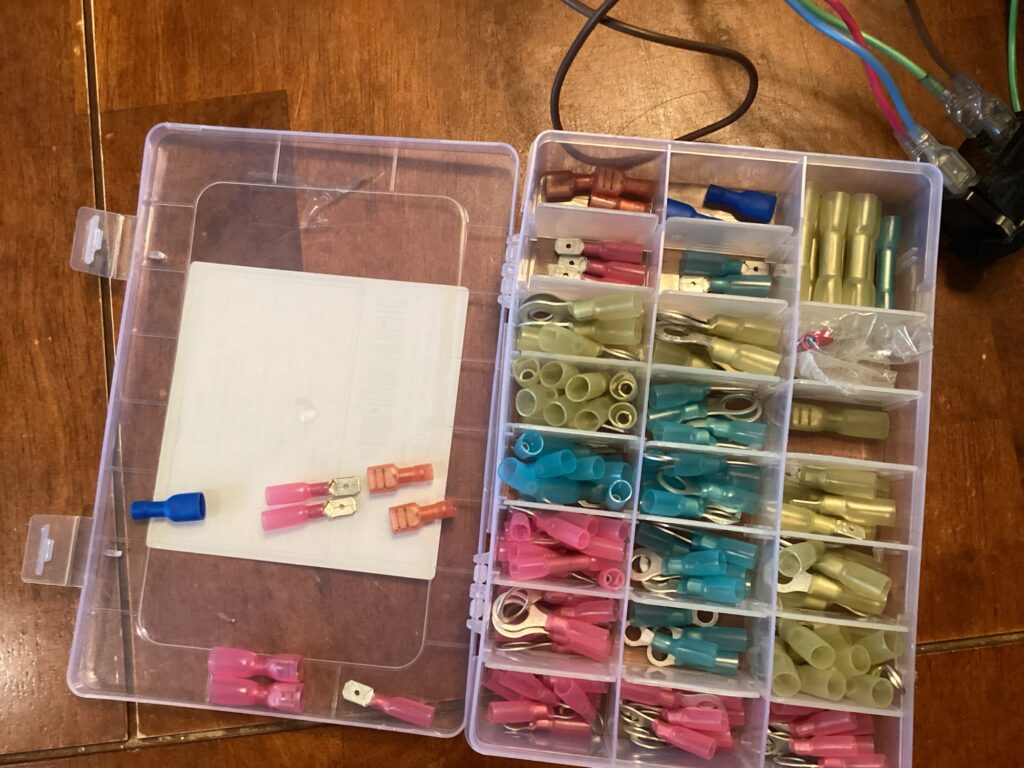
- Box of variety of electrical insulated connectors
- Multimeter
- various short pieces of 16 awg and 22awg stranded electrical wire
Parts Purchased
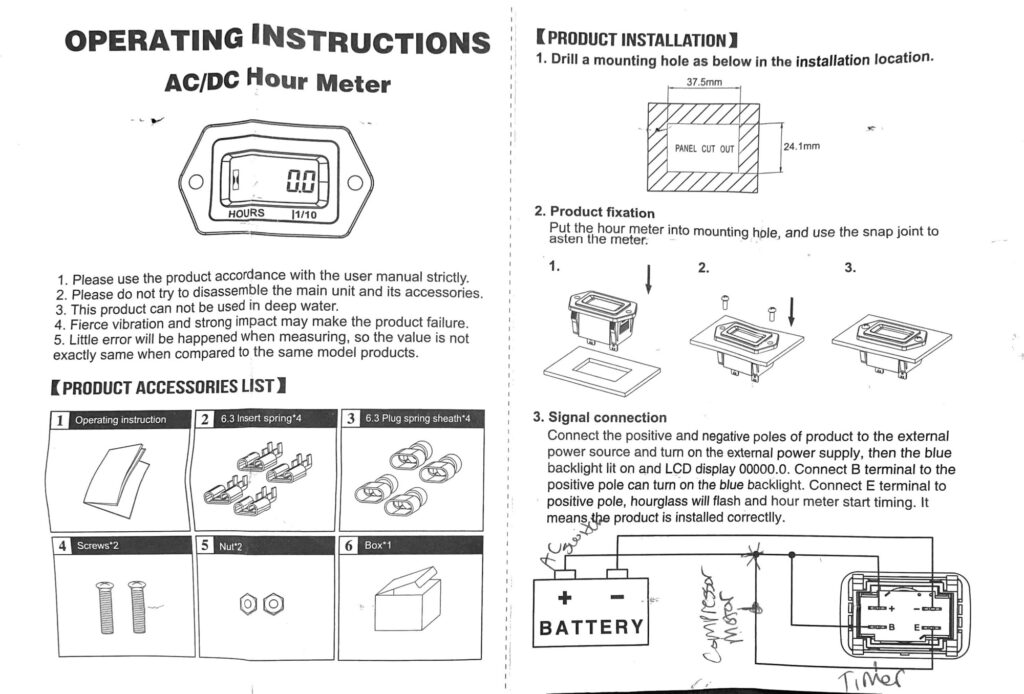
Back light meter $20.00
4” 150 lumen LED light with 2 leads $15.91
6.35mm (1/4”) piggy back spade Connector Adaptor from AC rocker switch to pigtail for led light and meter (B) and(+) $3.99 Advanced Auto
4.8mm (3/16”) Piggyback Connector – for grounding on electrical board to LED light (-). $6.99 with shipping
- ⚠️ This is not a US standard part and is difficult to find and must be purchased online if you can find it at all available for purchase in the US. This part is optional and isn’t necessarily needed but it does help keep things tidy and organized for,a,clean install. I found this piece and purchased it from a US based bike shop.
- ⚠️ This fitting adapter will fit as large as 16-18 gauge wire.
24” #16 gauge 4 stranded wires (brown, green, blue, red) $2.75. A bit of overkill I could have done a better job with just a foot of wire.
- Local ace hardware and RV supply store sell 16 gauge electrical wire by the foot.
Red #22-16 gauge male spade disconnect $3.99 (ace hardware 6 pack)
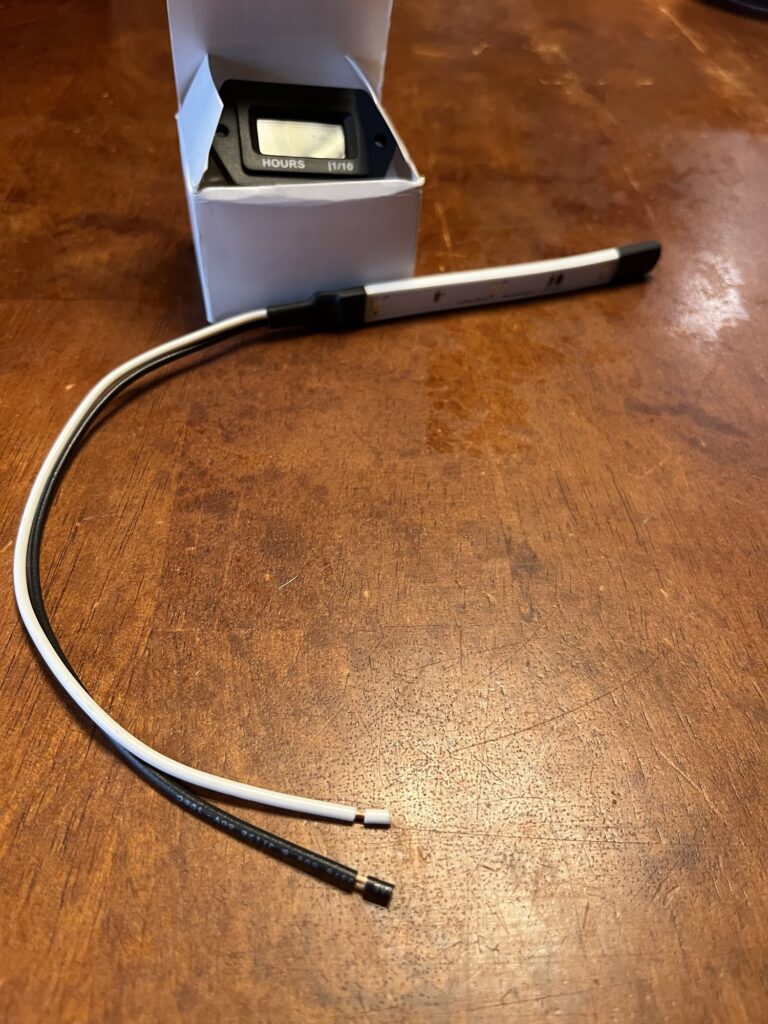
White (+) and Black (-) This light does not come with any instructions and the leads are unmarked
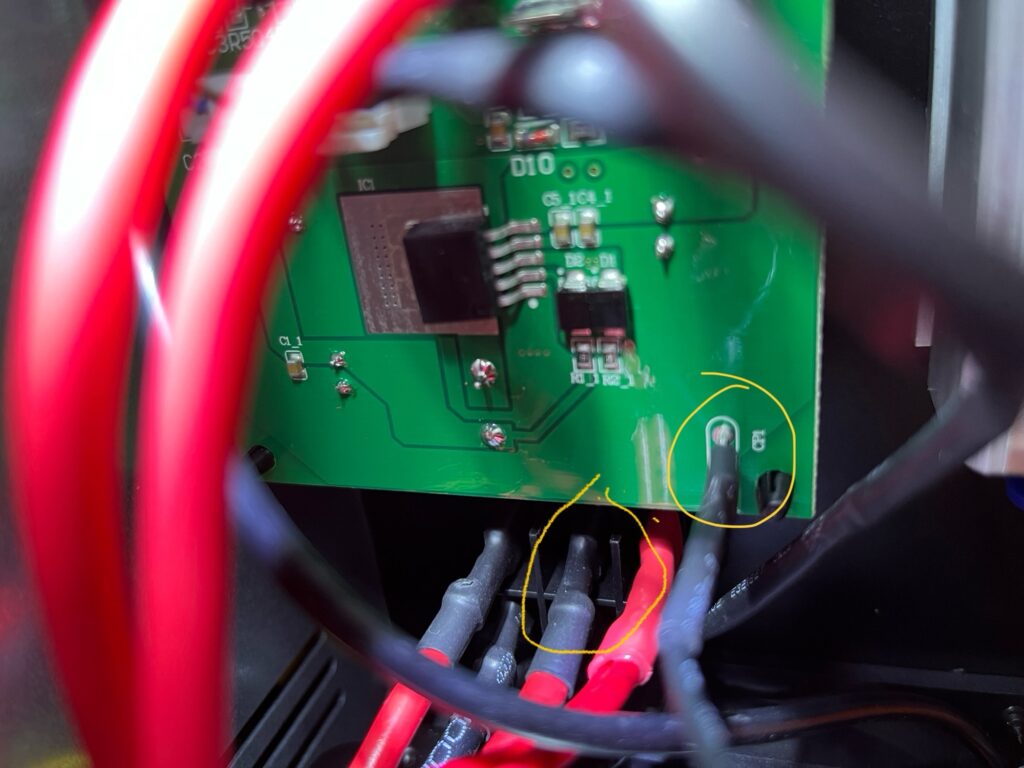
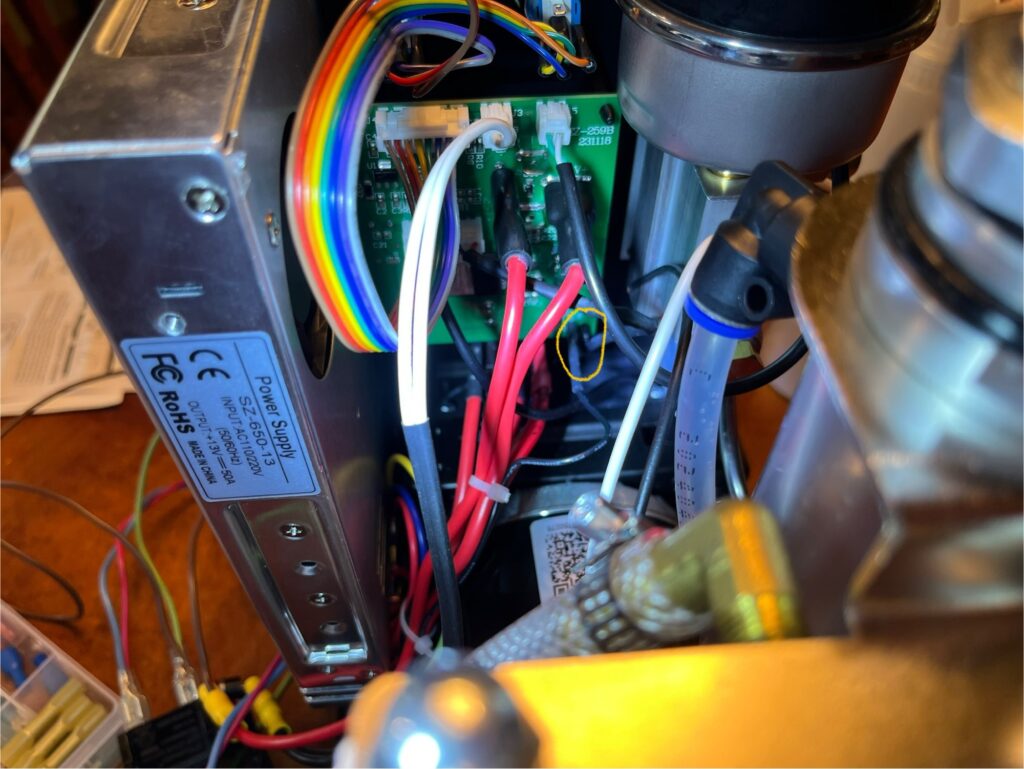
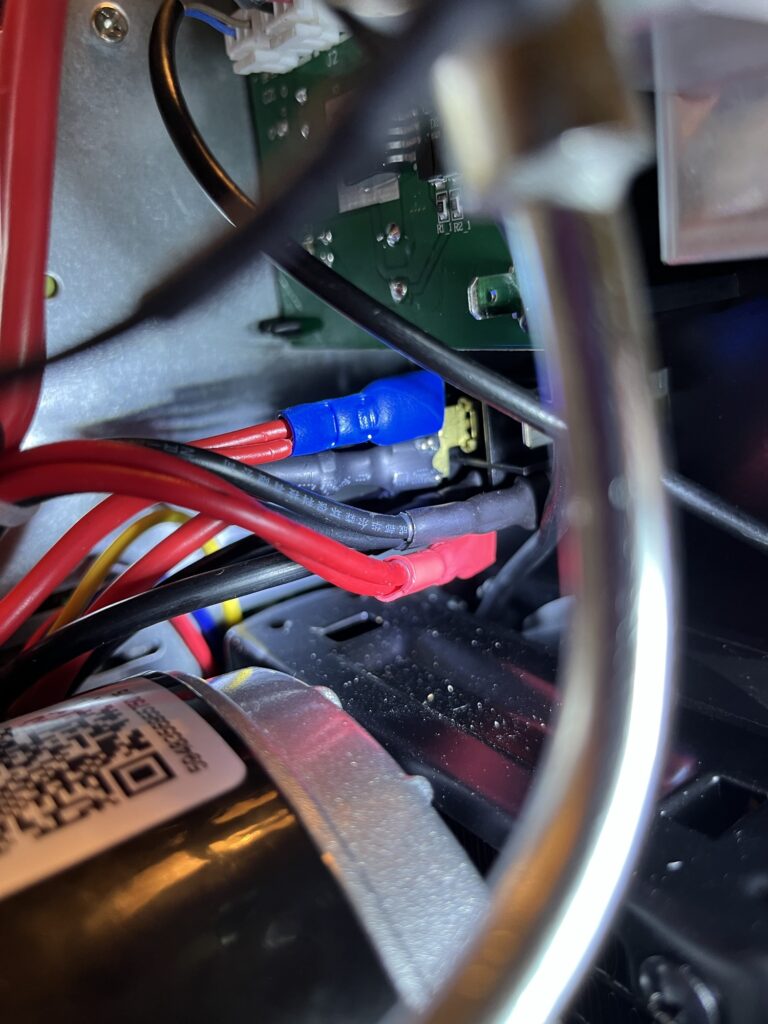
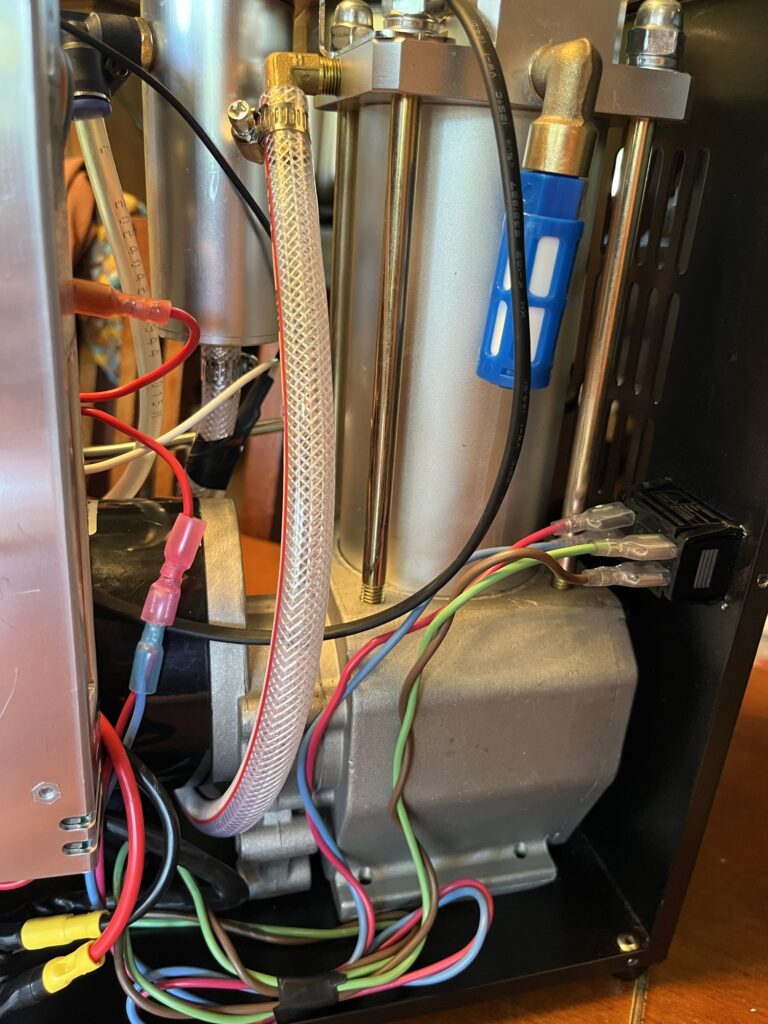
The Circled connections are the two that need to be spliced into. The black is the 4.8mm (3/16”) spade ground and the red wire is the 1/4” spade connector running AC from the rocker switch to the control board. Follow the red power line to ensure it is connecting to the electrical board. This is a tight fitting space that will not fit a standard double headed pigtail adapter! I know this to be true because I tried and failed!
LED (-) to electrical board ground
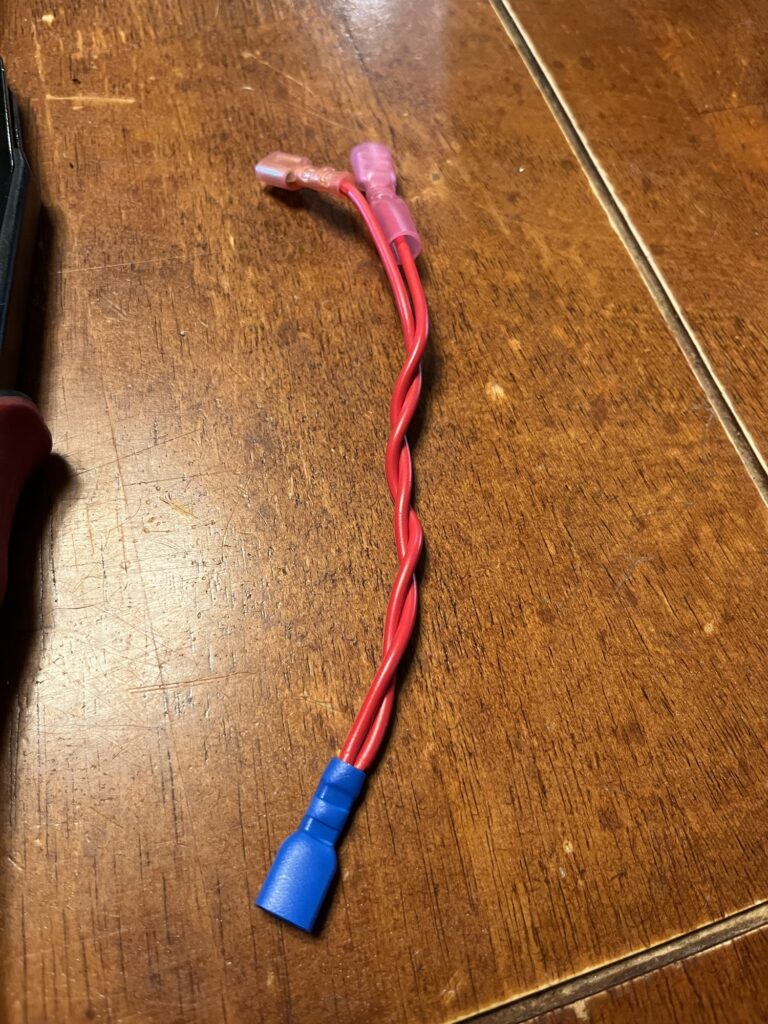
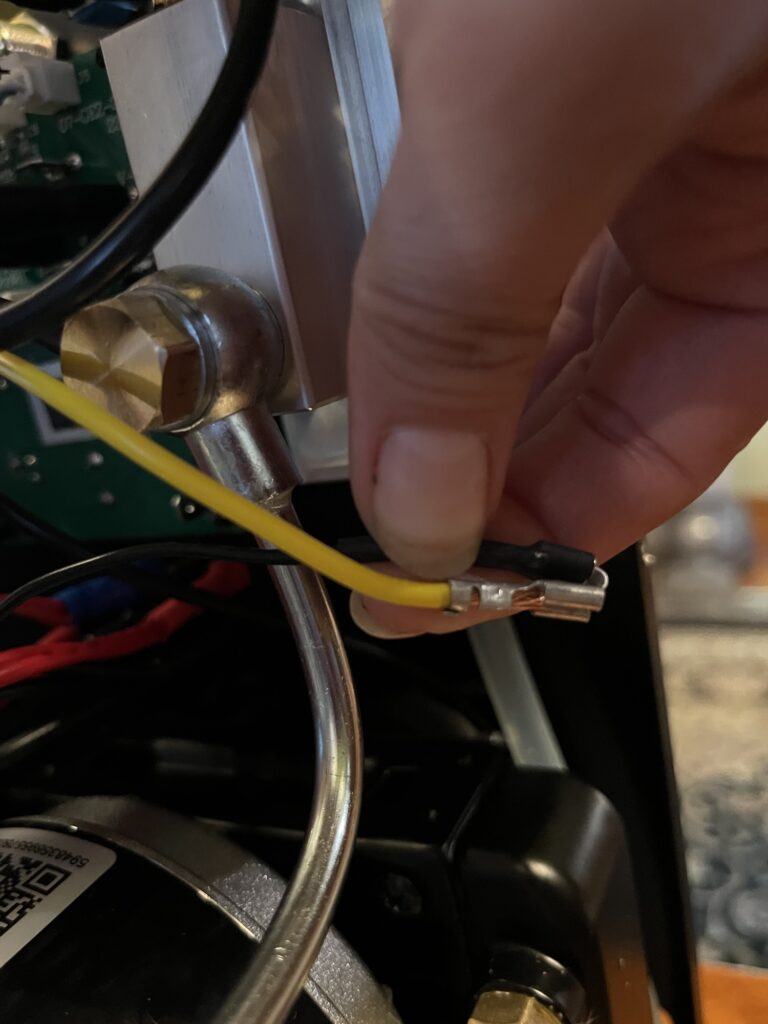
Here is the pigtail I made using 16AWG stranded wire.
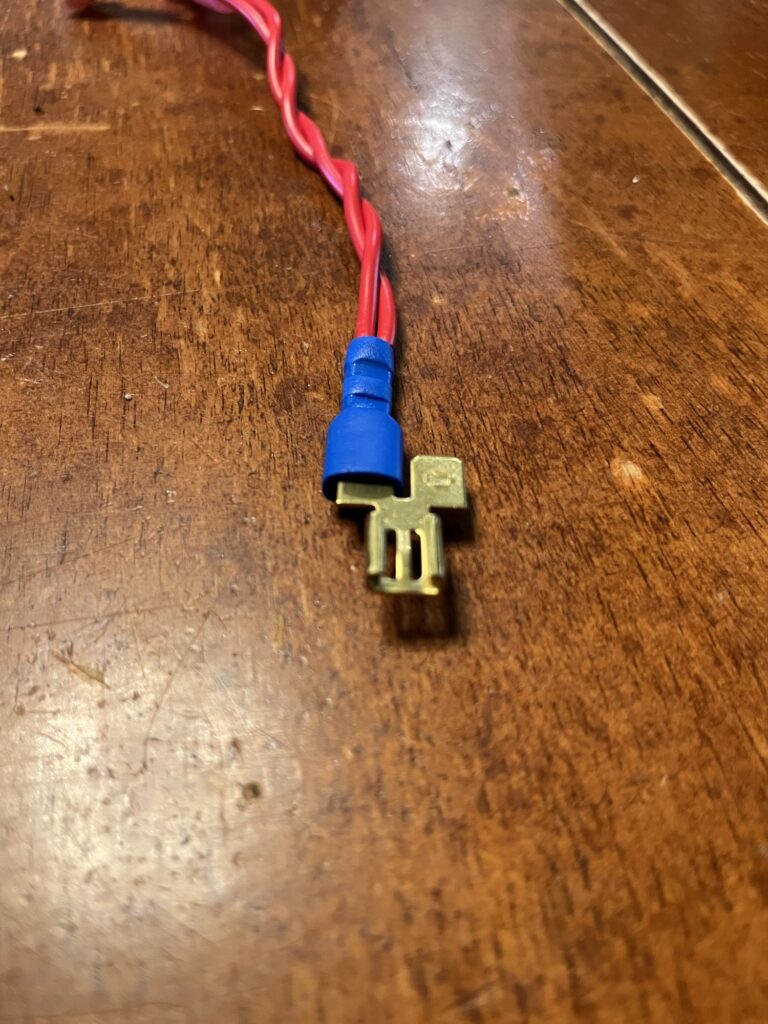
Here is the Dorman double ended 1/4″ splitting adapter needed
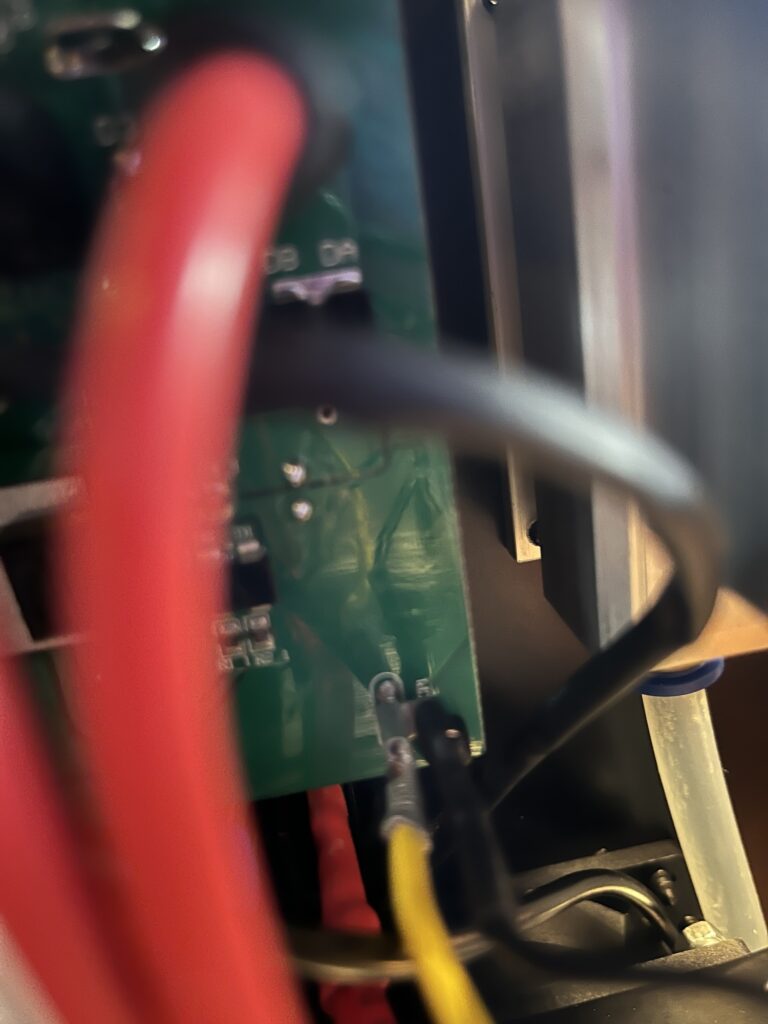
Installed with my pigtail and the original connection. There is a connection I removed in order to install this adapter and take this picture. It was reinstalled!
You can save yourself some headache by splicing into a larger grounding location that has a US 1/4” spade connector or bullet connector. I suggest using a multimeter to confirm grounding continuity between the desired grounding location and any terminal or area splicing into.
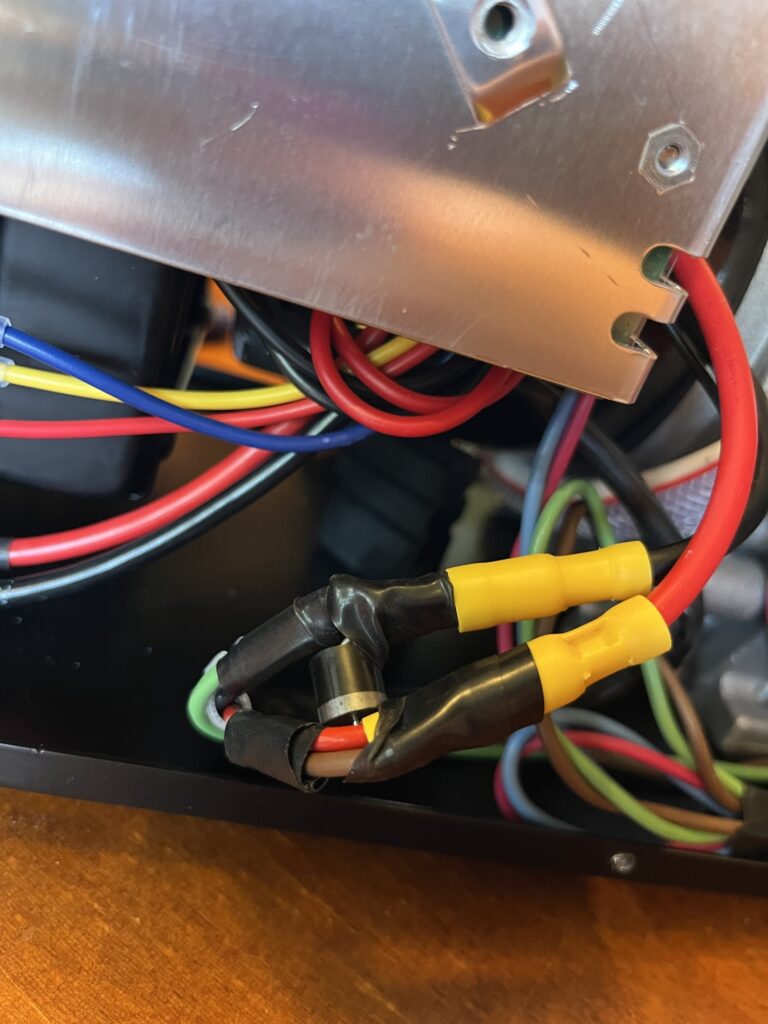
Here I decided to splice into the 12 AWG Bullet splice connectors via the corresponding wiring from the meter to the (-) and (+). Connecting the (E) terminal here to this splice point allows for the meter counter to activate when power is turned on for the compressor motor only.
Thankfully I had some brand new Tungsten Carbide Dremel Burr removing tips waiting to be used when this mounting cut for the meter was made!
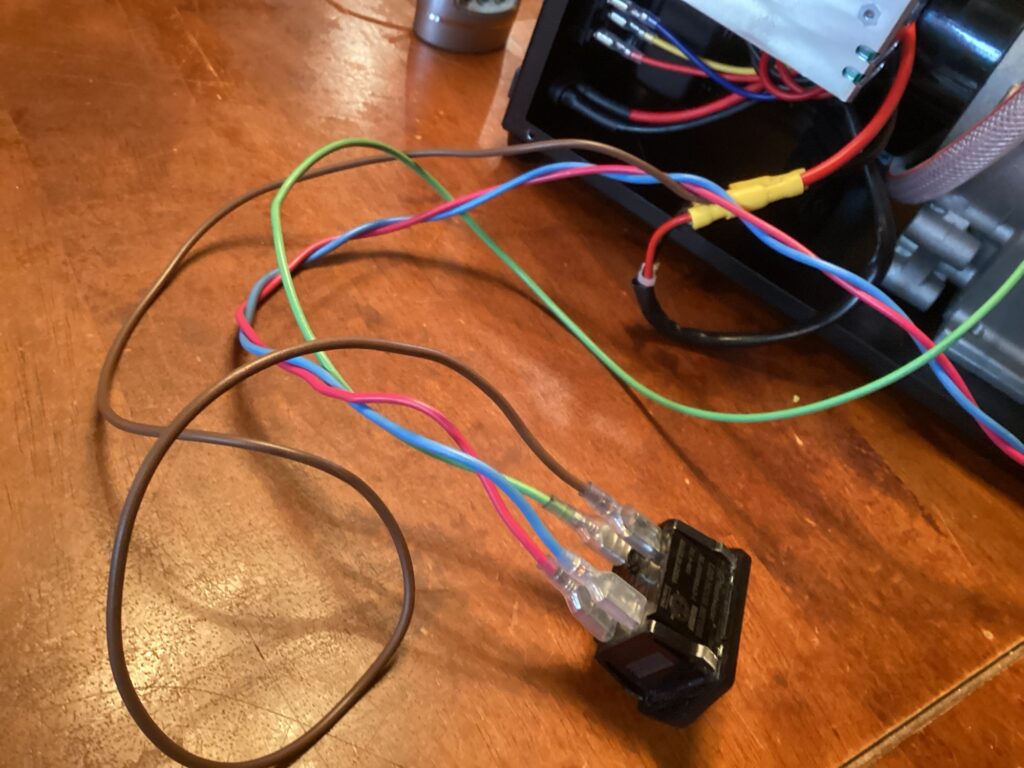
Terminals
- B: Blue
- +: Red
- E: Brown
- -: Green
It is best practice to braid wrap coated electrical wires together when installed such as I have done here.
Here you can see the LED light power on with my AC! I have also removed the ridiculous bulls eye aluminum insert from the tank cap. Just use a pair of pliers to pull it out!
This is my first successful test run! Meter and light both power on when AC is switched on but the hour meter is not yet activated.
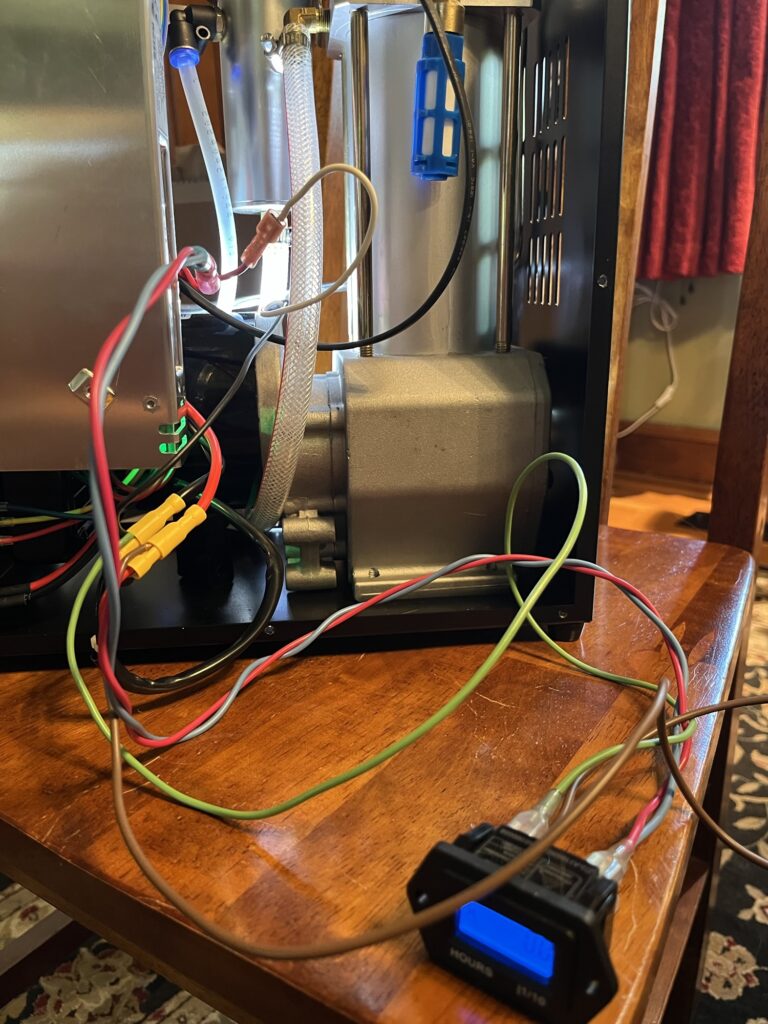
The meter counter works exactly as intended!